Cramming a gaming GPU into your MacBook Pro
…without actually doing that
How we got here
After Apple released its (soon-to-be) previous generation Mac Pro, it probably didn't take long for them to realize they had a trash can fire on their hands, especially with regards to GPU performance. When Apple announced eGPU support for macOS in 2017's High Sierra release, it was hard not to see the announcement as anything more than an admission that Apple's top-of-the-line desktops and notebooks shipped with subpar GPUs due to their severe thermal constraints. Of course, because Apple has never considered AAA gaming to be an important function of its products, the Mac has always lagged behind Windows in GPU availability and support. But by 2017 (and until the new Mac Pro tower releases this fall), the situation has been especially grim: even for workstation tasks like video encoding and 3D modeling, the internal GPUs Apple has been selling are so bad that they're driving a nontrivial number of creative professionals—a market Apple actually does care about—off its platform.
The world may be excited to close the door on the ill-conceived trash can Mac Pro, but if it hadn't been for its glaring design flaws, Apple and Intel probably wouldn't have prioritized the engineering needed to make running an eGPU over Thunderbolt 3 a commercial reality.
So, it's thanks to the trash can Mac Pro that in 2019, it can truthfully be said: instead of putting a beefy graphics card inside your computer, you are now able to take a top-of-the-line gaming GPU, seat it inside an external box, plug that box into your computer, and—using a single high-bandwidth cable—push the necessary instructions to render 4K games at 60 frames per second on the card before (over the very same cable!) pushing those frames back to your notebook's built-in monitor without introducing any perceptible latency. I've seen daily evidence of this for the last month and I gotta say: it's pretty freakin' cool.
The idea that you'd be able to connect a GPU over a 2-meter cable and get desktop-class gaming performance out of the current crop of MacBooks Pro seems far-fetched. Even to me, as I literally play games with one. When reasonable people encounter Apple's marketing about eGPUs—which is only focused on creative professional workflows like modeling VR experiences as opposed to experiencing them—it would be unreasonable to make the logical leap to say, "ah, yes, surely if I boot that computer into Windows, the eGPU enclosure would have the necessary drivers and the Thunderbolt 3 cable would have the necessary bandwidth to render games in real-time with an acceptable frame rate and input latency."
And yet, AAA PC gaming is actually within reach of a recent MacBook Pro paired with an eGPU. It's just that nobody other than Razer is telling the market that.
How to get started
I pieced this all together from dozens of forum posts, guides, and build data from the small-but-dedicated community at eGPU.io. Because the very-newest Macs, eGPU enclosures, and operating system releases have made things much easier as of late, much of the content in the most popular guides is no longer relevant. Therefore, I will try to document here a stripped-down walkthrough that starts fresh with the latest operating systems and hardware components.
Hardware:
- 13-inch MacBook Pro (mid-2019)
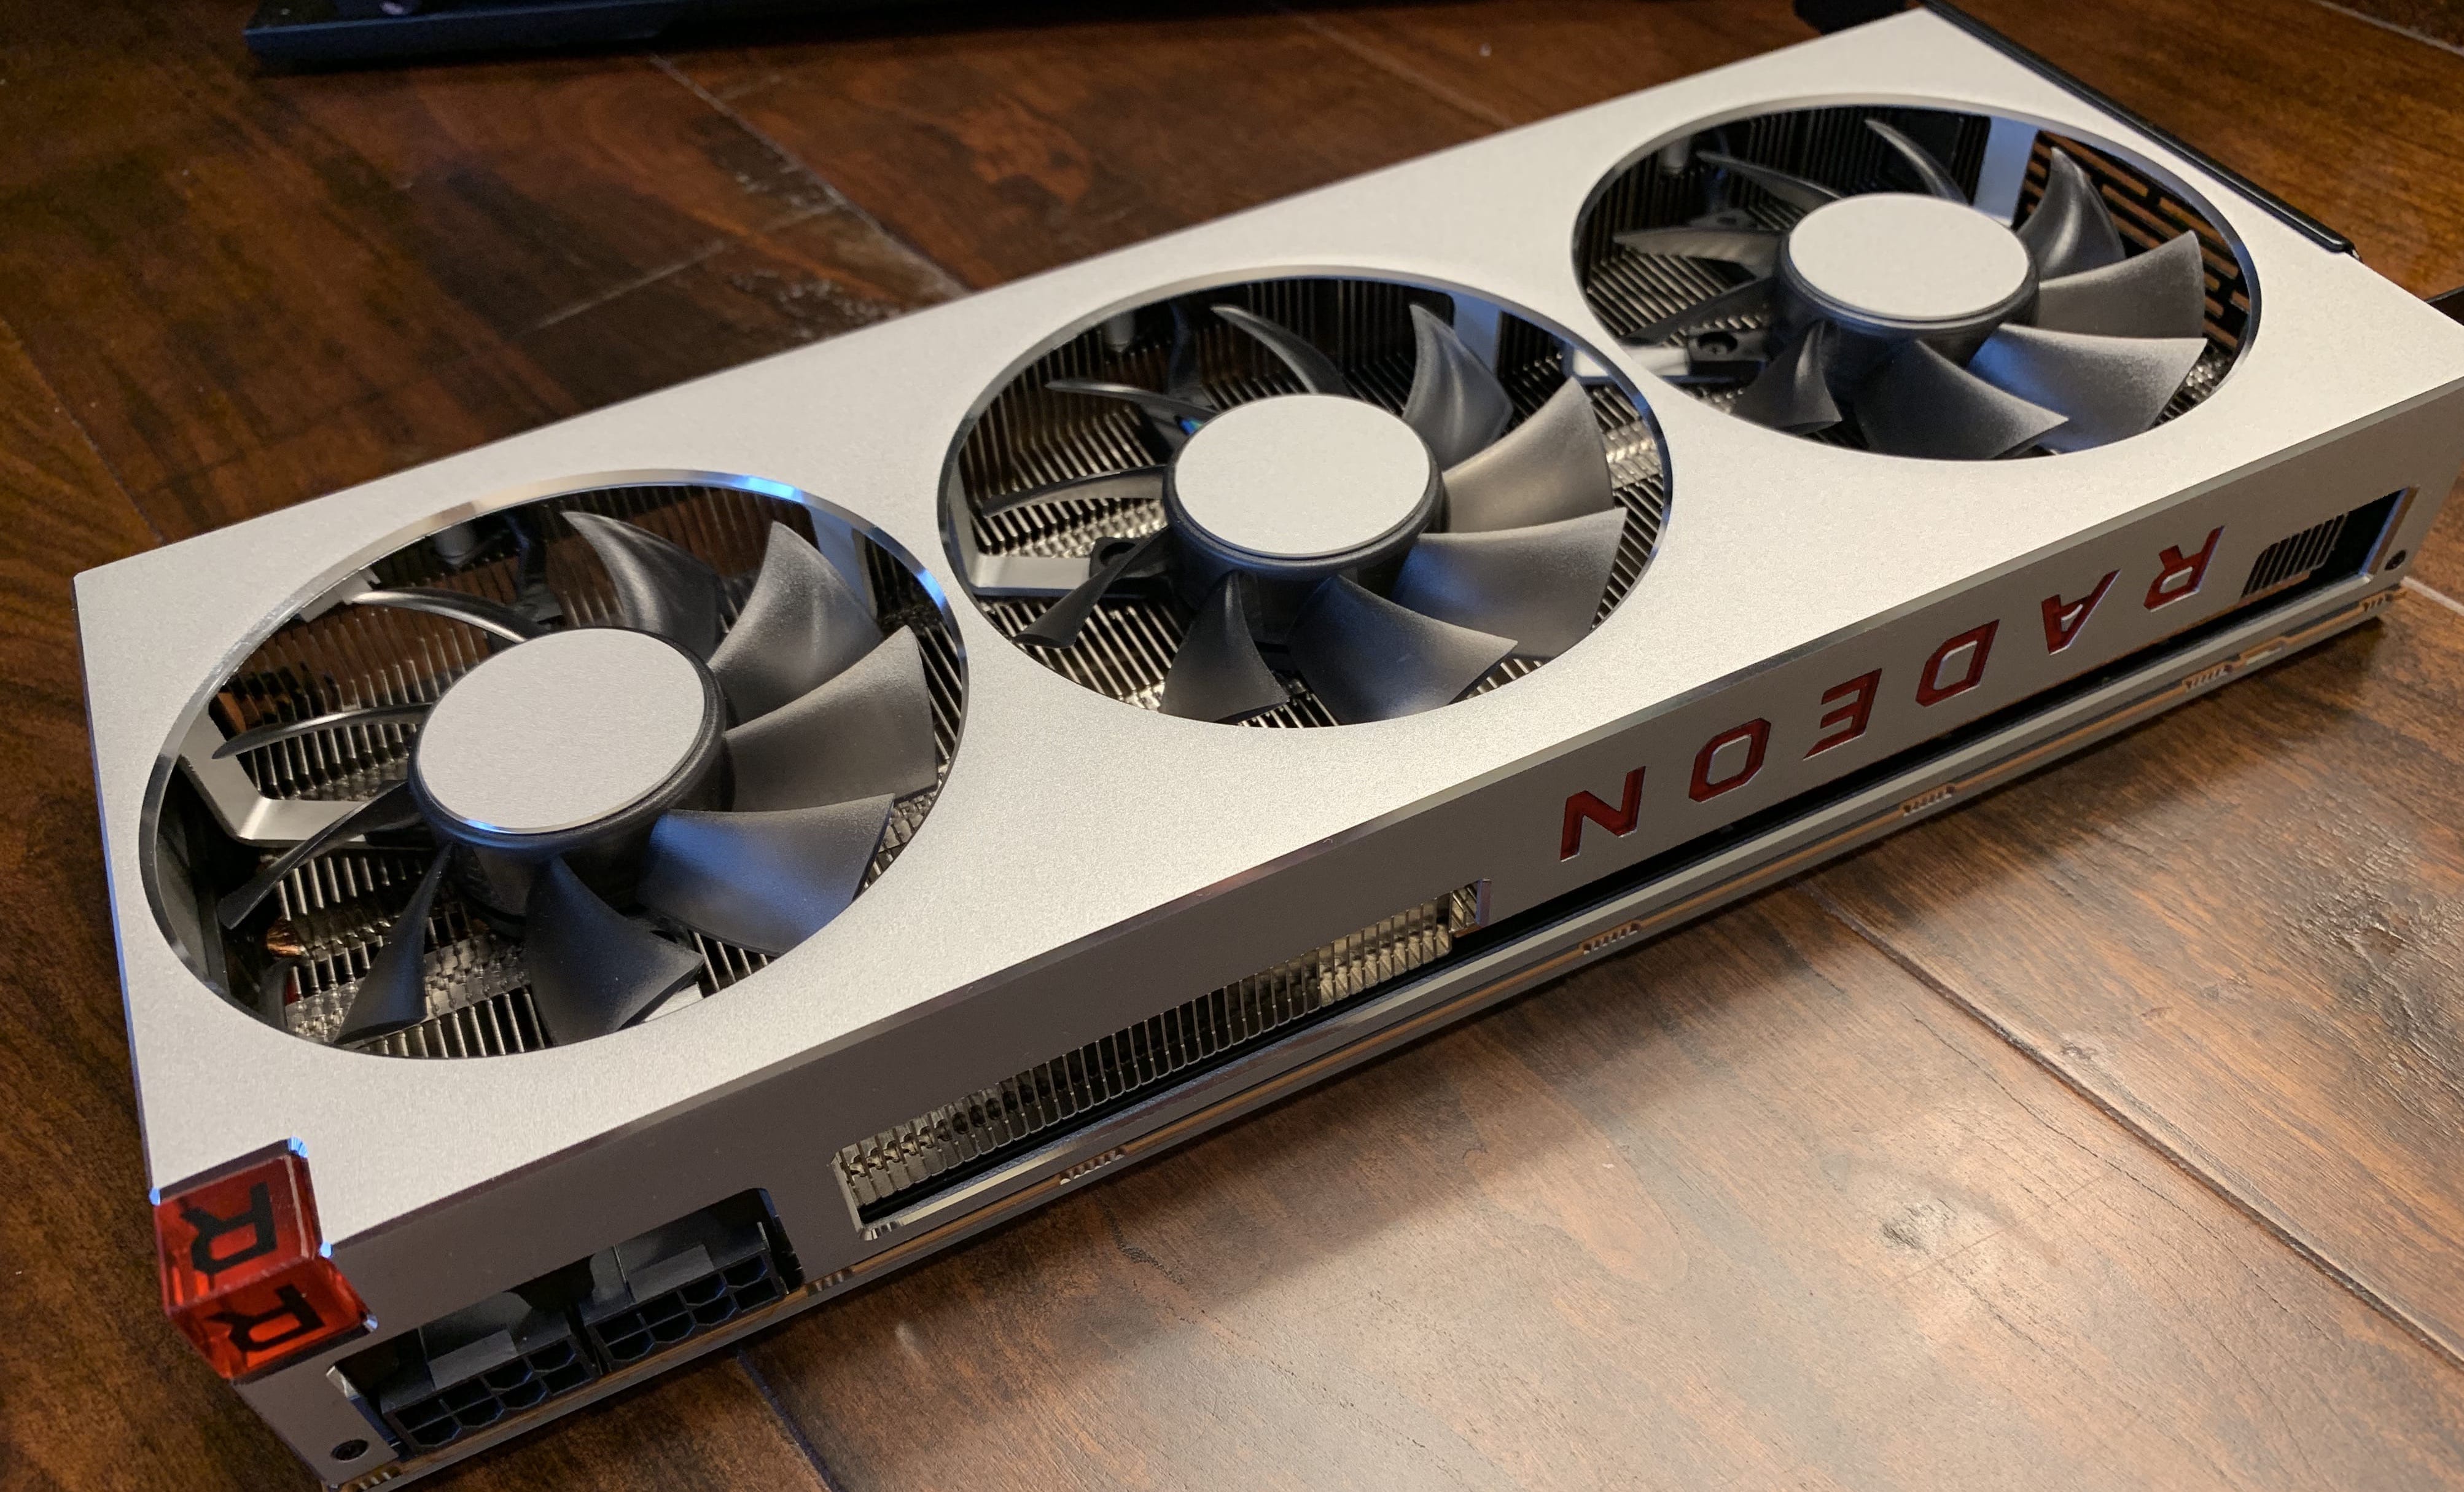
- AMD Radeon VII card
- Razer Core V2 (which Razer has already discontinued in favor of the larger, cheaper Razer Core X)
- Any certified 2 meter Thunderbolt 3 cable
- Any TV or external monitor you want to output games to (Optional)
Software:
- macOS 10.14.5 (18F132)
- Windows 10 version 1903 (18362.175)
Initial questions you might have
What about my 15" MacBook Pro? The 15" MacBook Pro may be beefier, but it's actually more of a pain to set up for this purpose, because convincing Windows to yield to the eGPU instead of the discrete AMD GPU that the 15" model ships with takes a bit of work. Most of this guide will suit you fine, but this thread might provide some guidance beyond what I offer here.
Why an AMD card over Nvidia? If you plan on ever plugging the eGPU into macOS (as opposed to Windows), you're going to have a much easier time of it with an AMD card. macOS ships with drivers for most AMD cards, but Nvidia support is a tremendous pain that's only getting worse with time, as zero Mac drivers are available for their new RTX line.
Why a Razer Core V2? I chose this model because it's lightweight (at a "mere" 11 pounds), properly isolates bandwidth (5gbps) for its 4 USB ports, and is relatively small (7.5 liter). It can't help much with heat or noise, though. In truth, there are actually quite a few decent options out there, and most will incorporate the same Thunderbolt 3 controller doing the heavy lifting.
Why an external monitor? While both macOS and Windows can "loopback" frames rendered by the eGPU over the cable and onto the computer's built-in monitor, operating system support for this is very recent and it introduces a nonzero bandwidth cost which can result in lower framerates as well as frames being dropped. Adding to that, the relatively high DPI of Apple's displays makes running games at native resolutions more demanding than monitors designed for PC gaming.
What about my pre-2019 MacBook Pro? If your Mac has Thunderbolt 3 ports (late-2016 or later), you'll be able to figure out a way to make it work, but with an increased amount of Windows futzing for each year you go back. I initially set all this up with a mid-2017 MacBook Pro, but wound up spending six or seven hours applying various salves and incantations to try to work around "Windows Error 12", which is the nonsense Device Manager will spew when Windows can't figure out how to get sufficient bandwidth and memory addressed to the eGPU.
Ok, with that out of the way. Let's see what it looks like to set this all up.
Step-by-step instructions
At the risk of being too verbose, I've decided to document literally every little step of the process I took in setting things up, because even minor gaps I found in other people's builds online would often mask tremendous complexities that took me hours to figure out on my own.
Assembling the eGPU
Start by unboxing your GPU and eGPU enclosure.
So, here's a Radeon VII card:
And here's a Razer Core V2 eGPU enclosure:
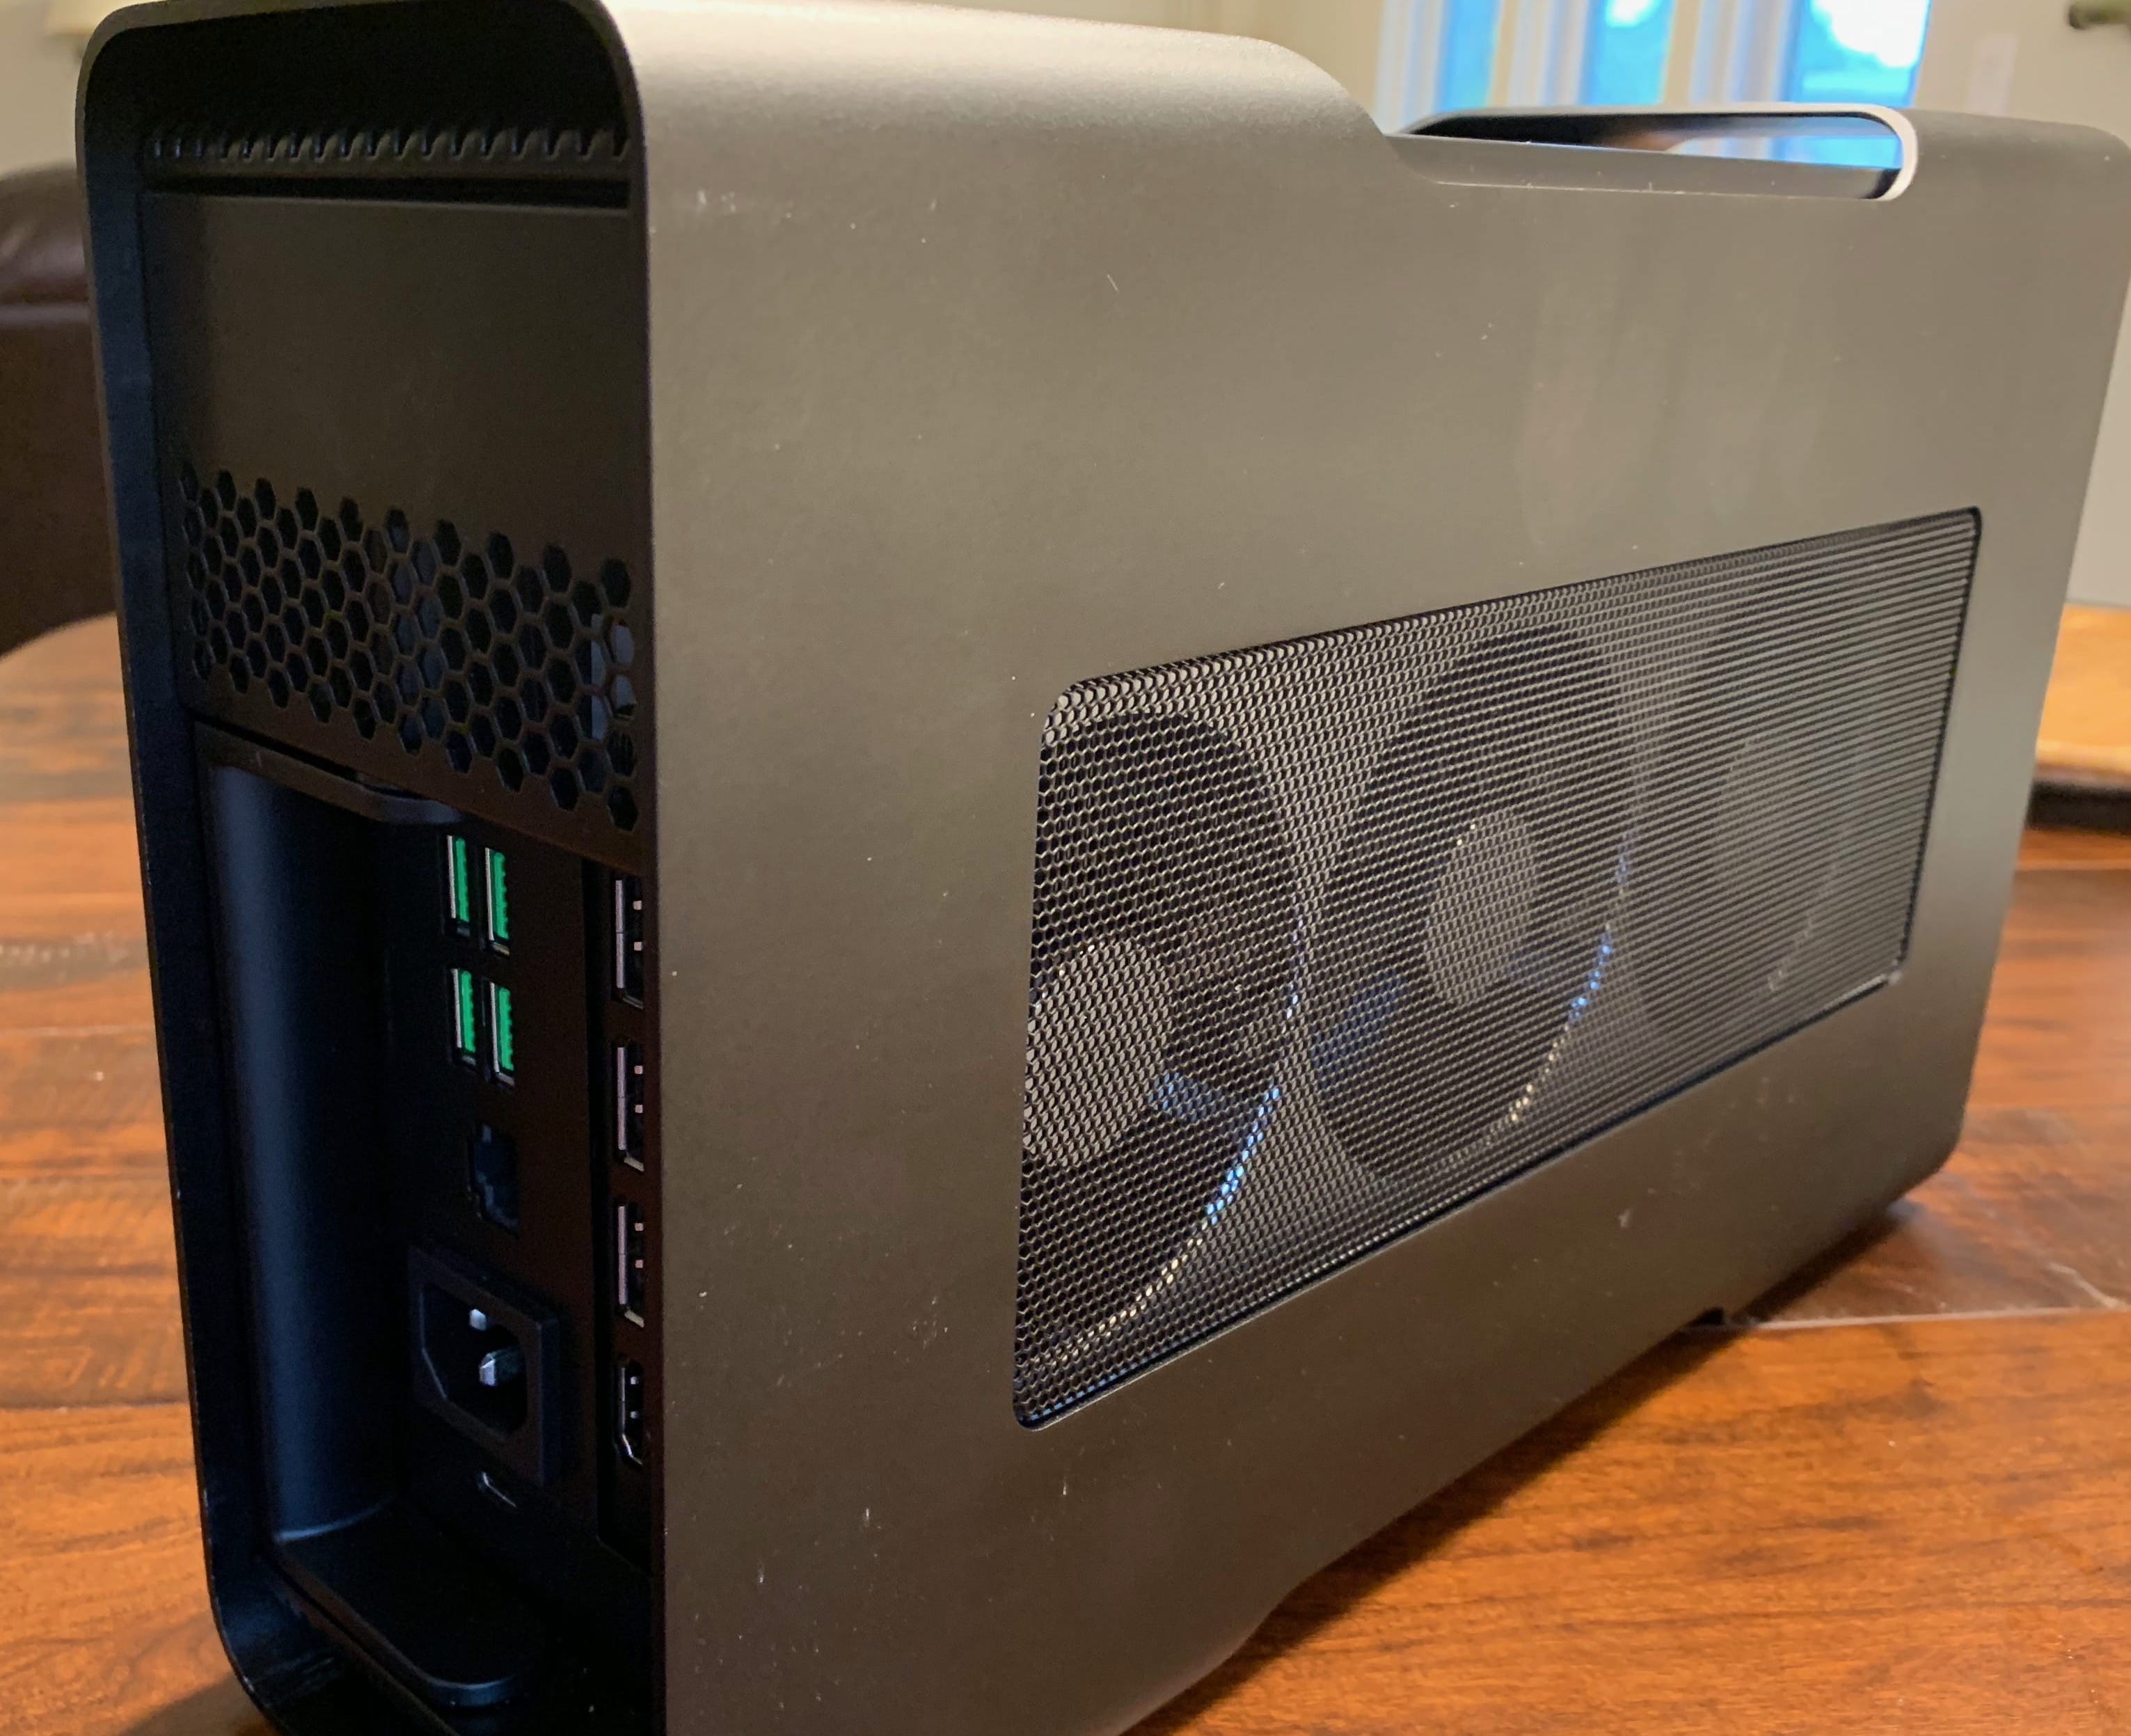
Razer's eGPU models have a simple handle locking mechanism that makes it easy to get at the PCI slot and release or mount a card. Mounting a card is pretty simple: just remove the I/O plate facade, push the card's pins into the slot, and connect the enclosure's two ATX power connectors into the top of the card. It'll look like this before you slide it back into place:

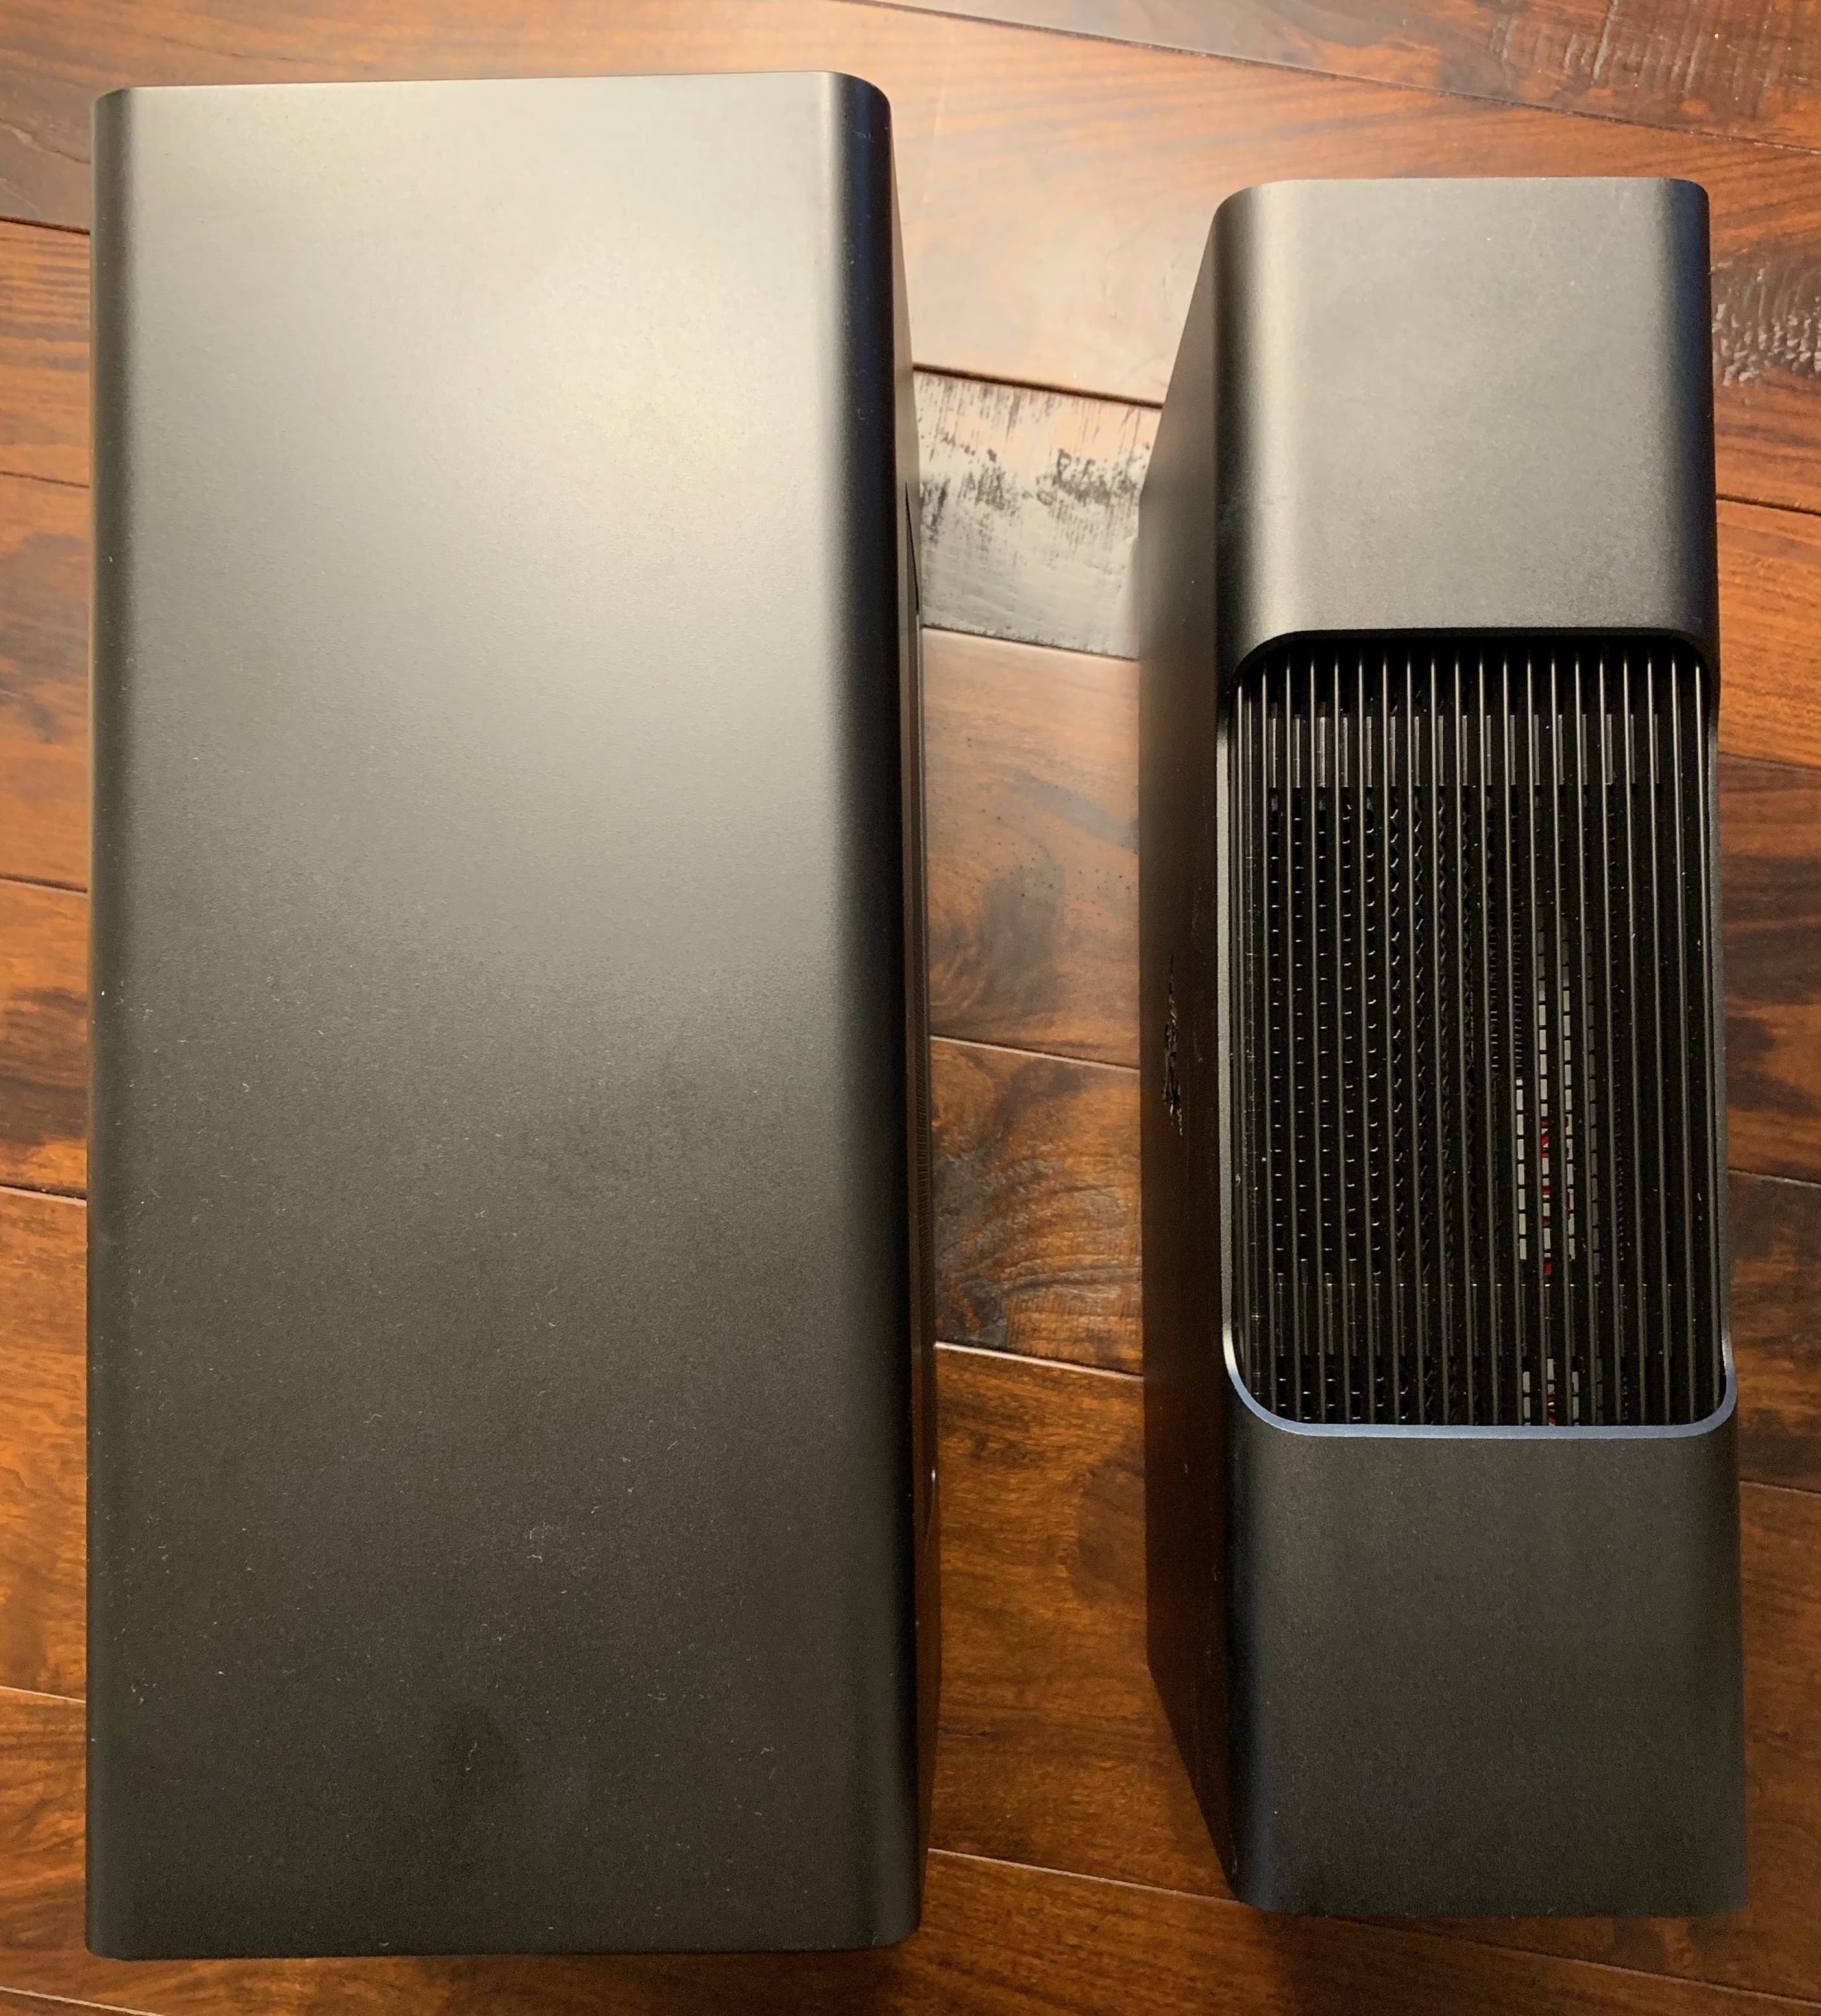
If you opt for the cheaper, quieter, larger Razer Core X, here's an idea of the size difference:
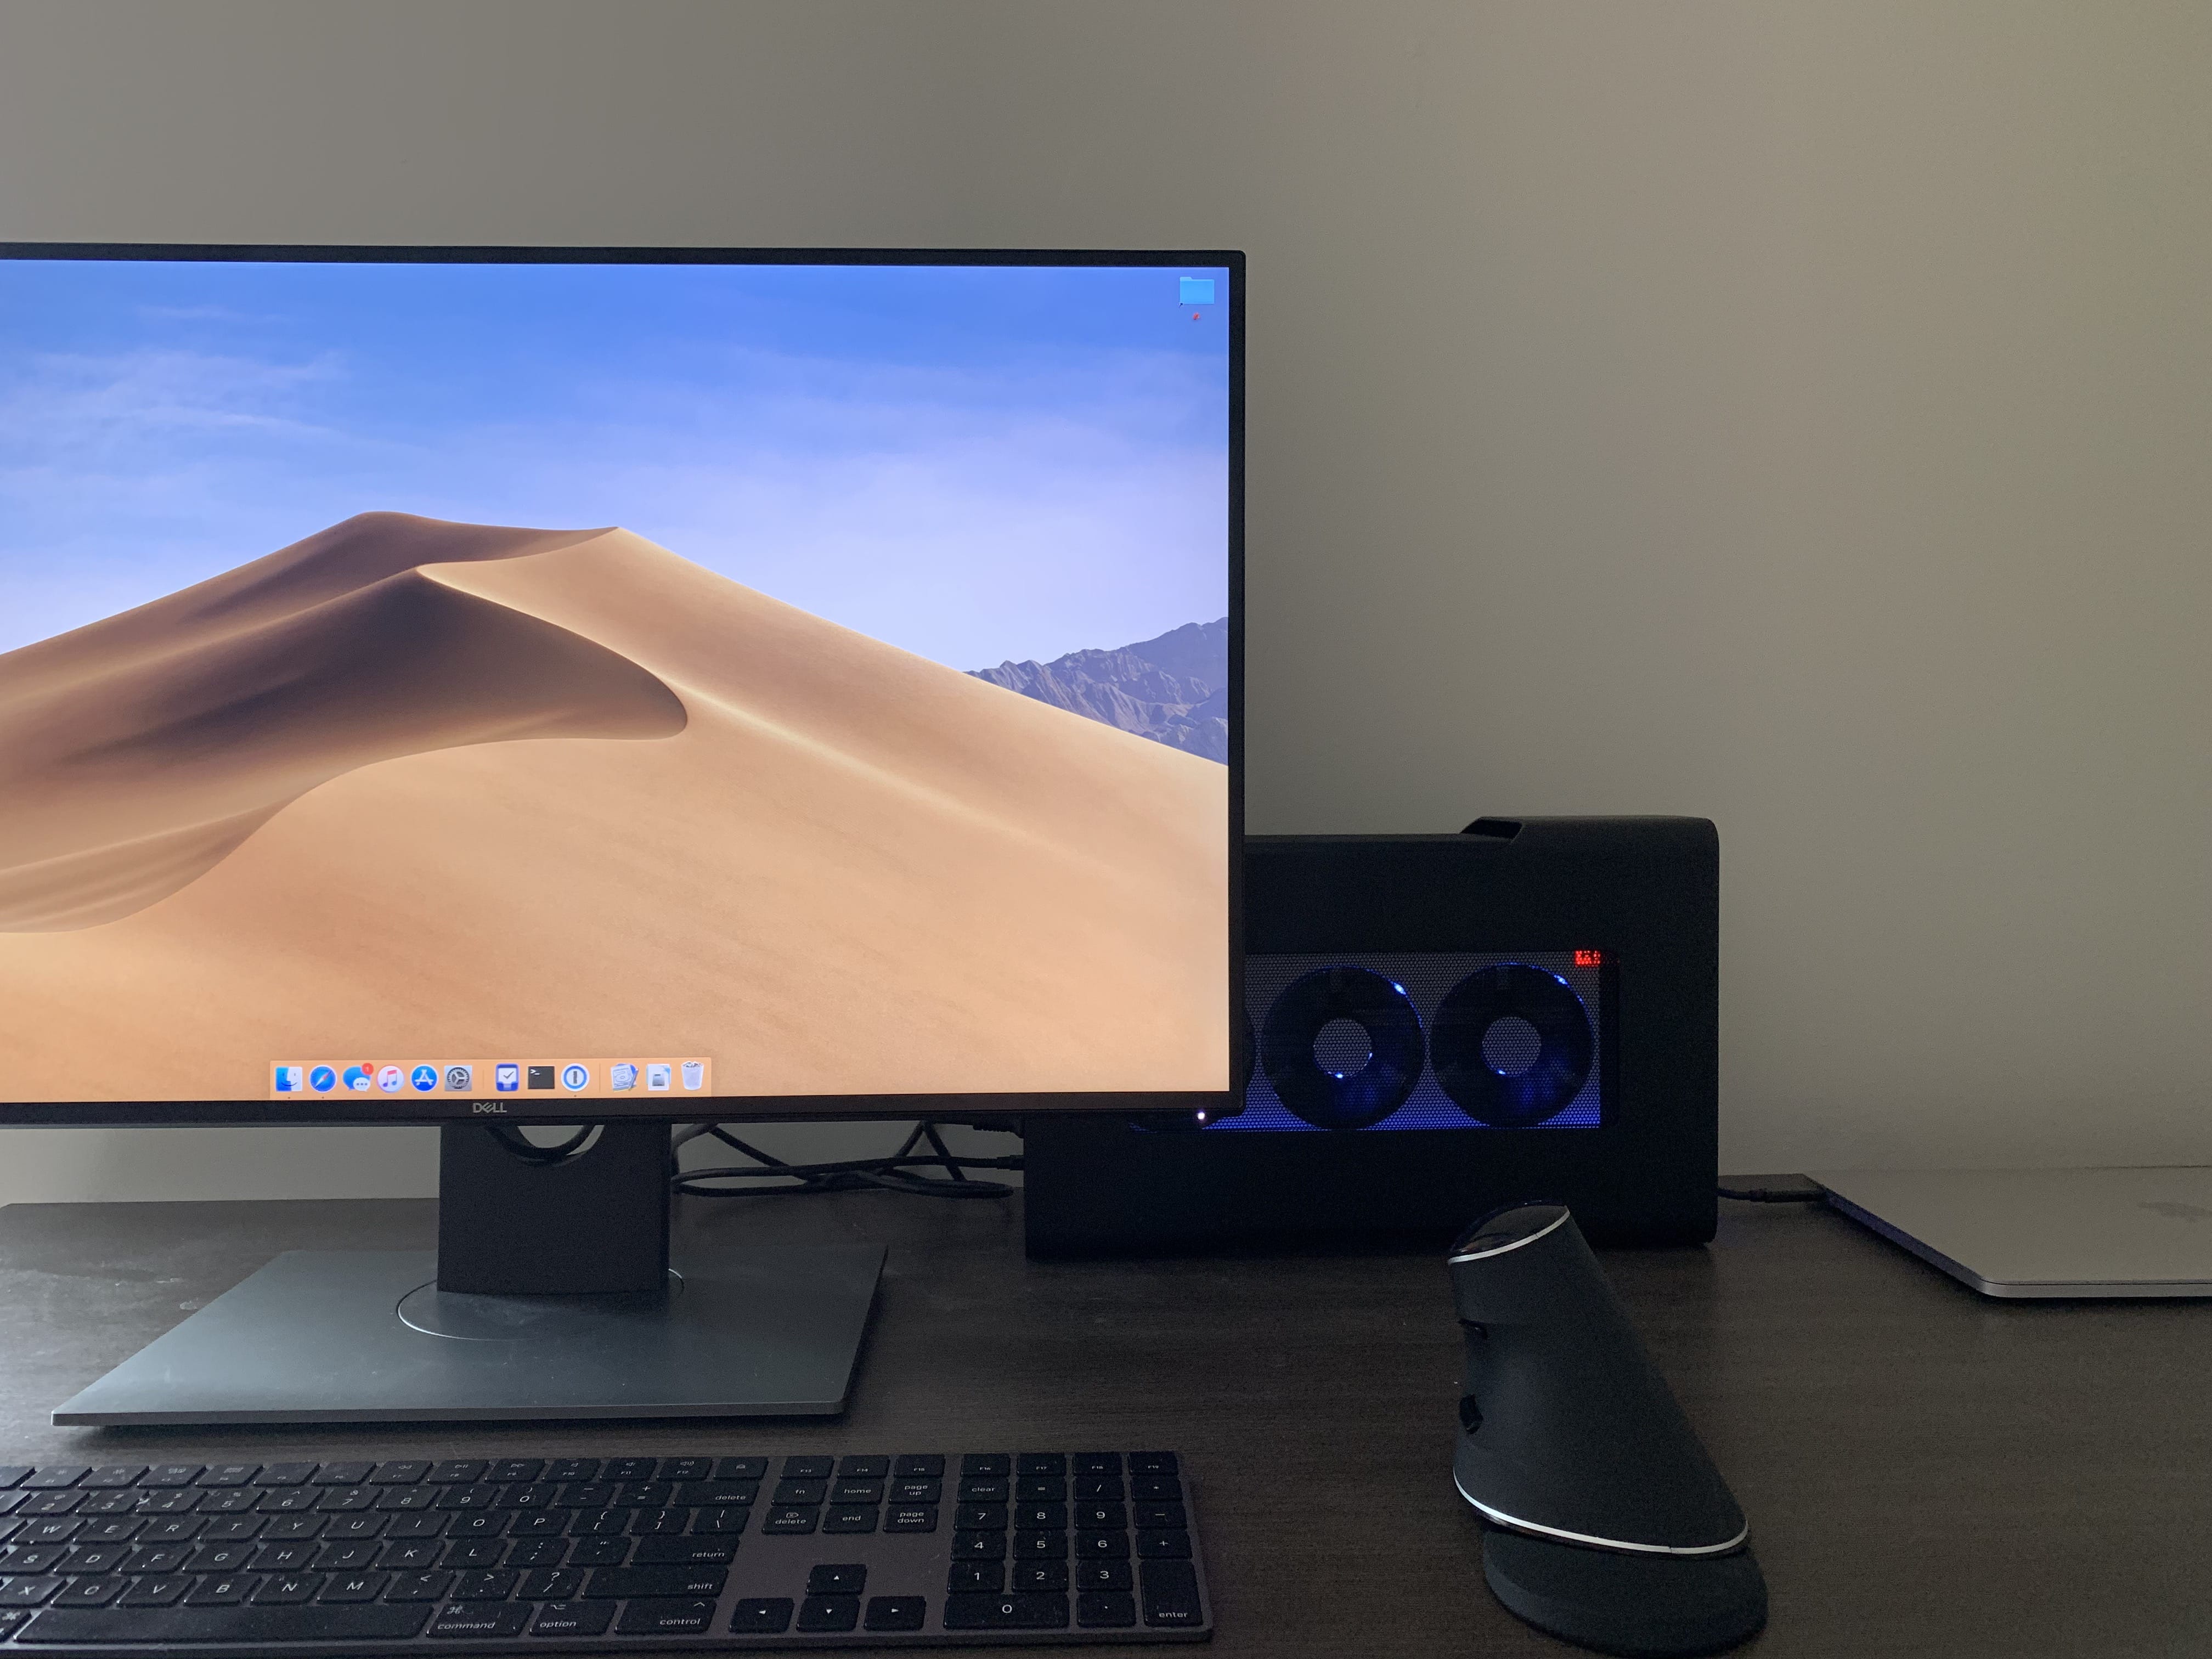
And finally, here's what it all looks like when thrown onto a desk with a monitor and a keyboard:
The eGPU ships with a hilariously short 1-foot cable, so you'll want to reach for an active 2 meter cable as soon as possible.
Setting up macOS
This one's easy: update macOS to the current release version, which (as of this writing) is 10.14.5. If you're on that version or newer, just plug the eGPU enclosure into a power outlet, then connect it to the computer via a Thunderbolt 3 cable, and you should immediately see it recognized in the "About This Mac" view:
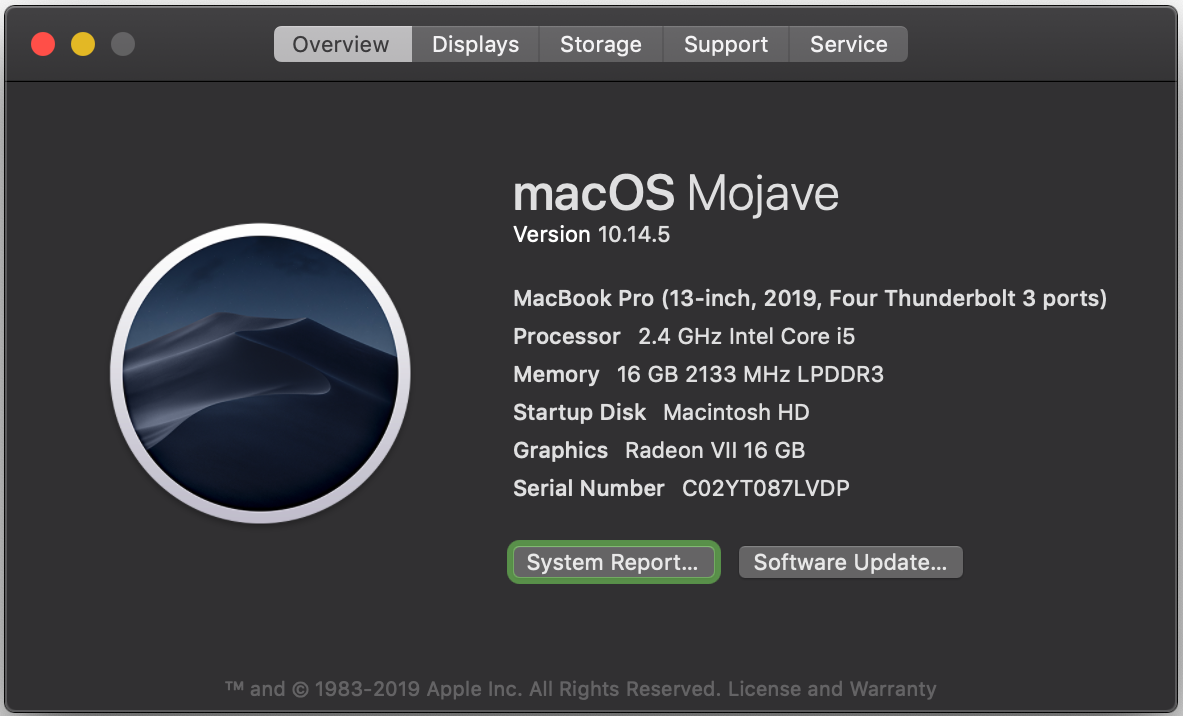
And that's it. On macOS, this is all truly plug-and-play. If you have any games that run on macOS, they should be able to immediately take advantage of the eGPU.
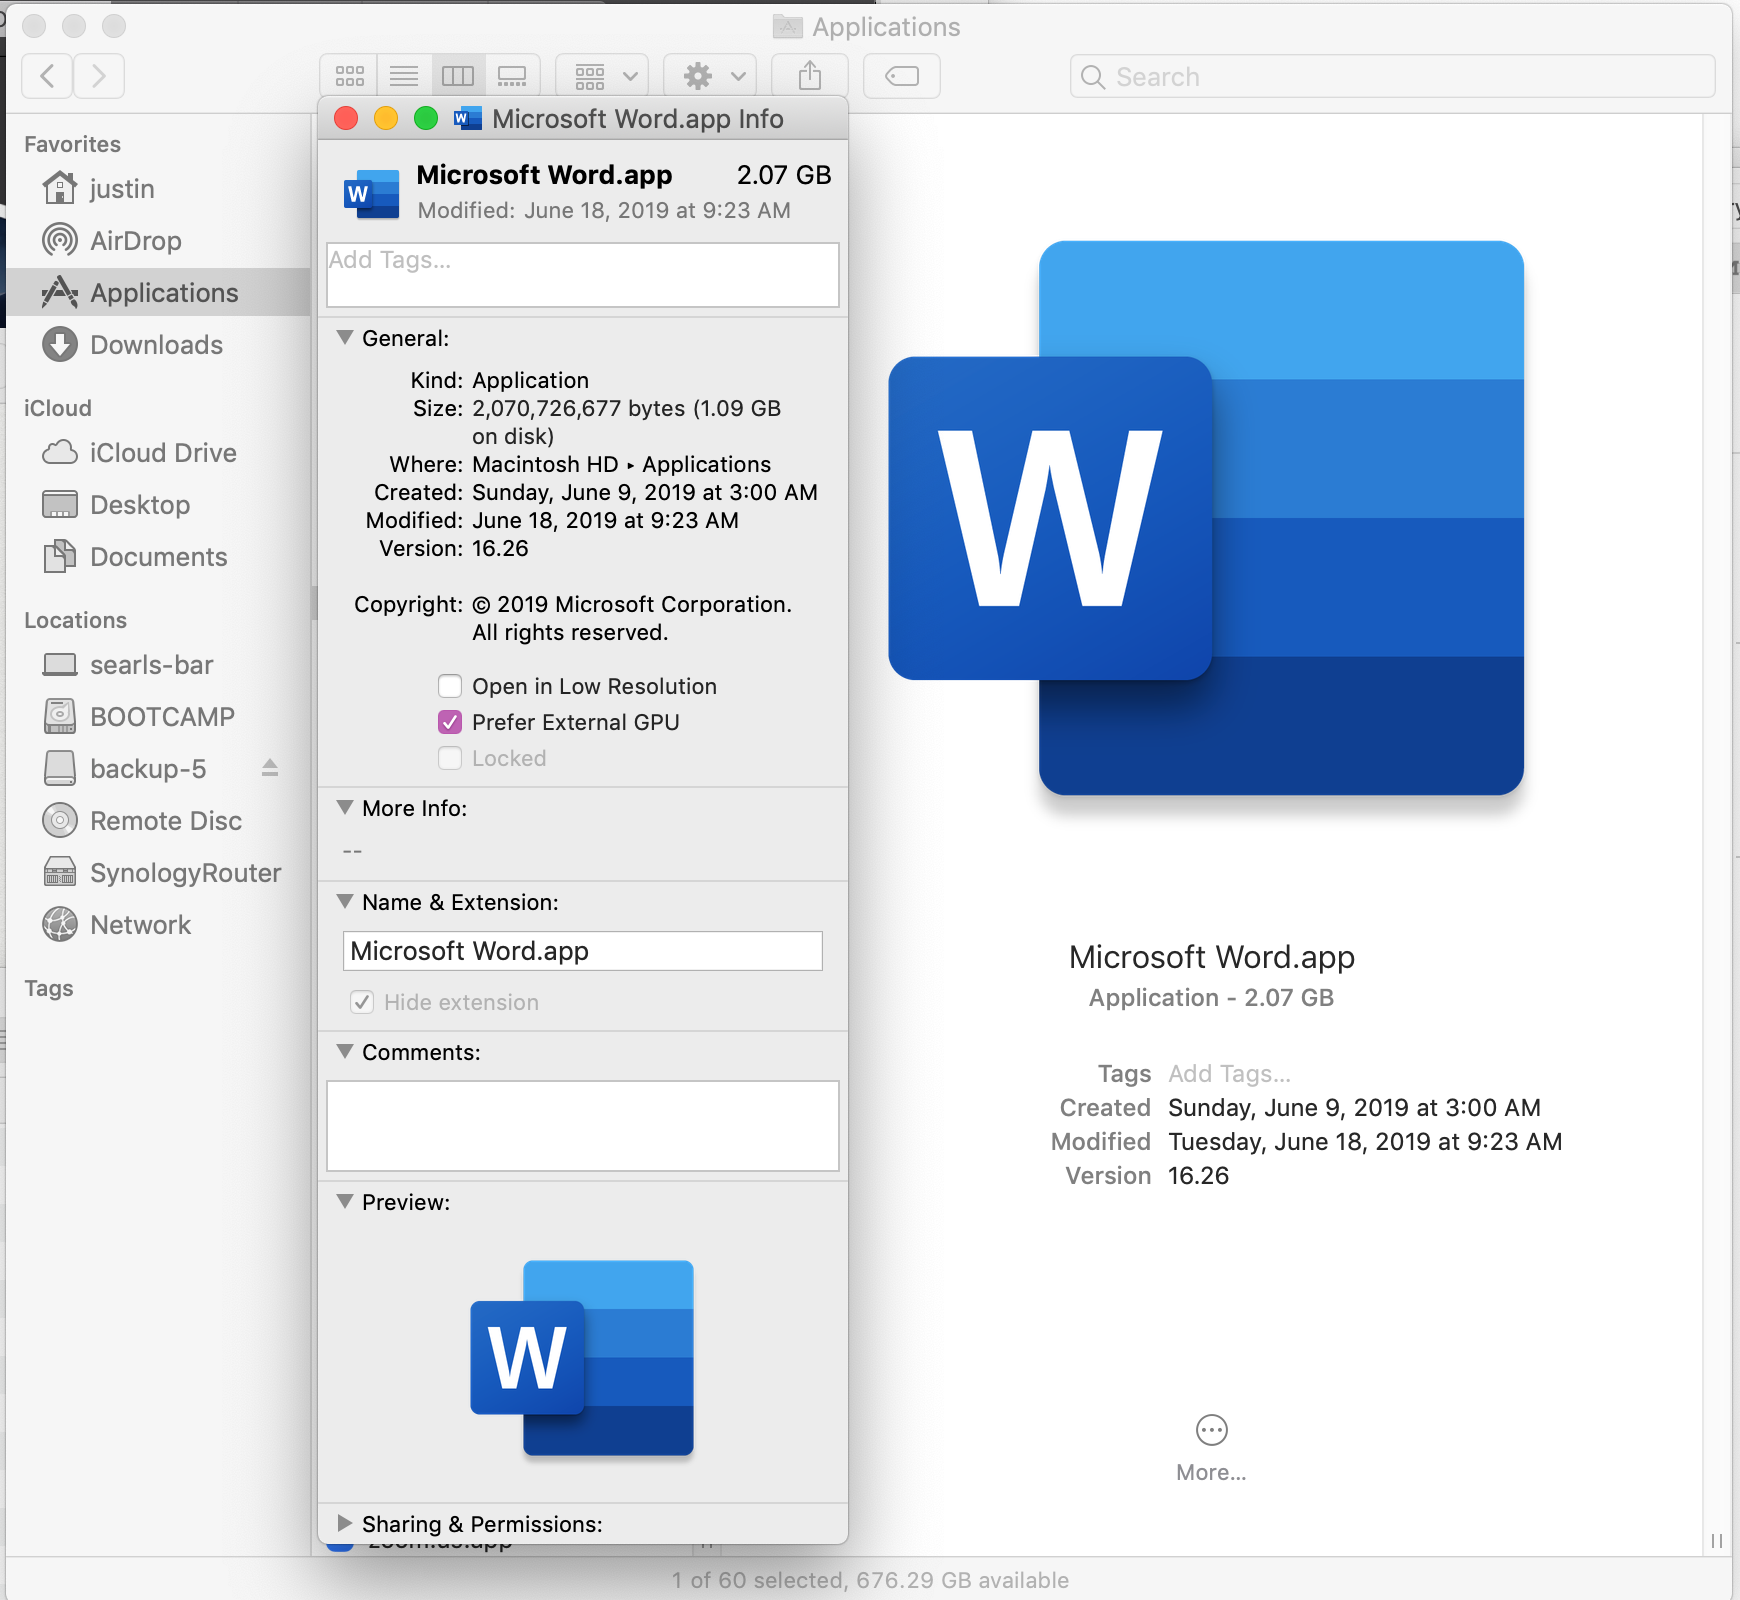
If you have certain apps that need an extra push to use that GPU, you can tell macOS to present only that GPU to them by checking "Prefer external GPU" in the application's "Get Info" dialog in Finder:
And, while you can "hot plug" an eGPU into your machine at any time while running the computer, I think it'd be more fair to say you can merely "warm unplug" it. You're first supposed to tell macOS to force restart any apps that are currently depending on the eGPU via this menu bar option:

If you fail to do this and yank the cable without first unmounting the eGPU, macOS will yell at you (before proceeding to force-restart most of the apps you were just running):

And that's pretty much all there is to using an eGPU with macOS. The entire experience is so invisible and seamless that Apple's engineers deserve to be commended.
Installing Windows via Boot Camp
Before you do anything else, disconnect your eGPU. When it's safe to plug it in under Windows, I'll let you know!
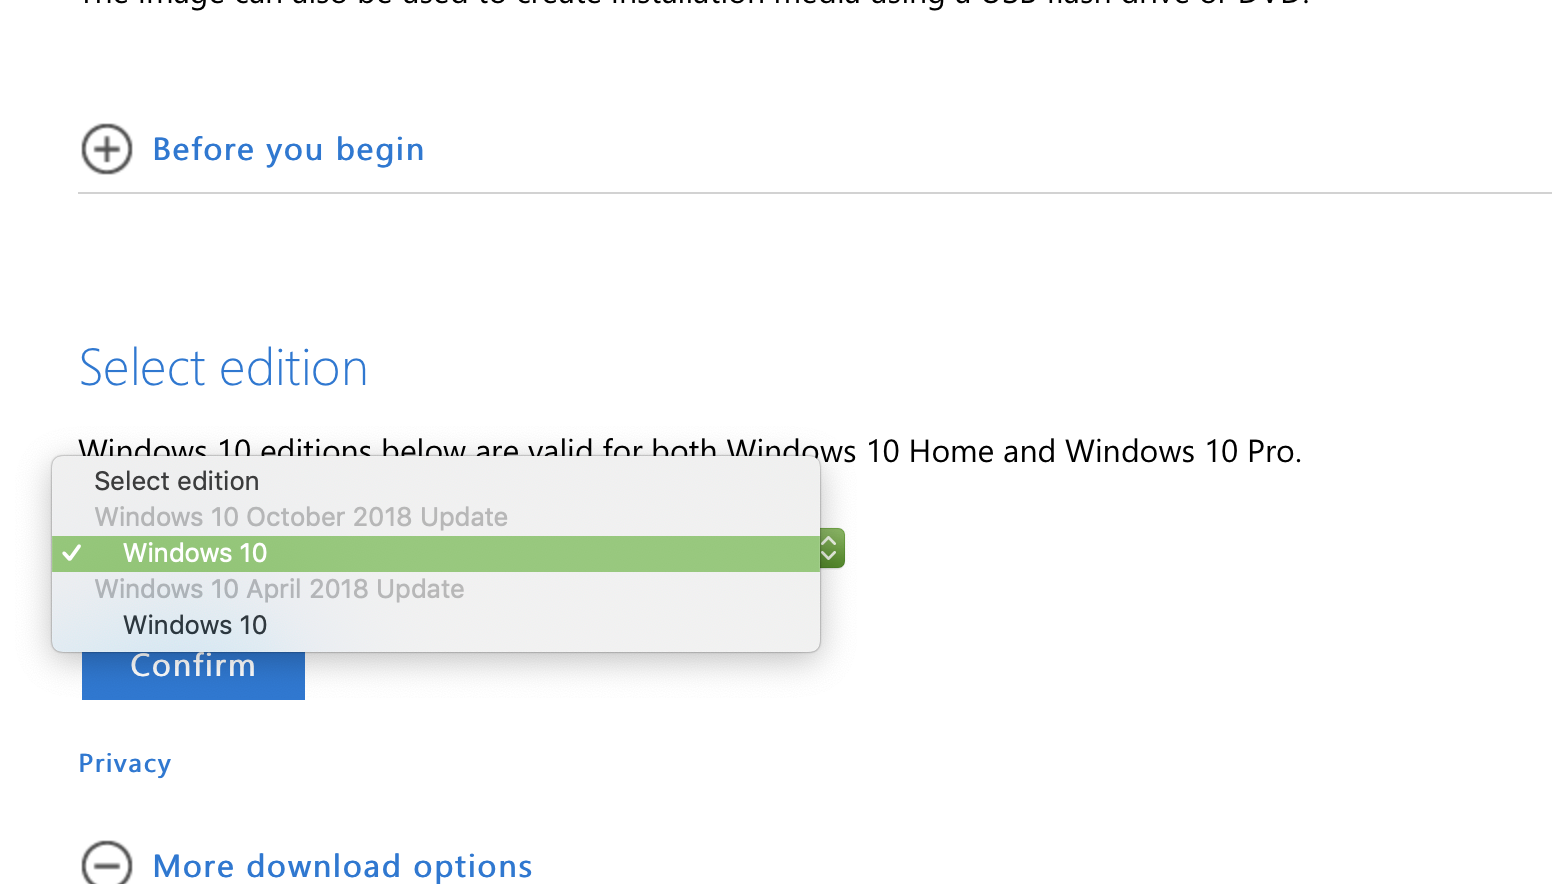
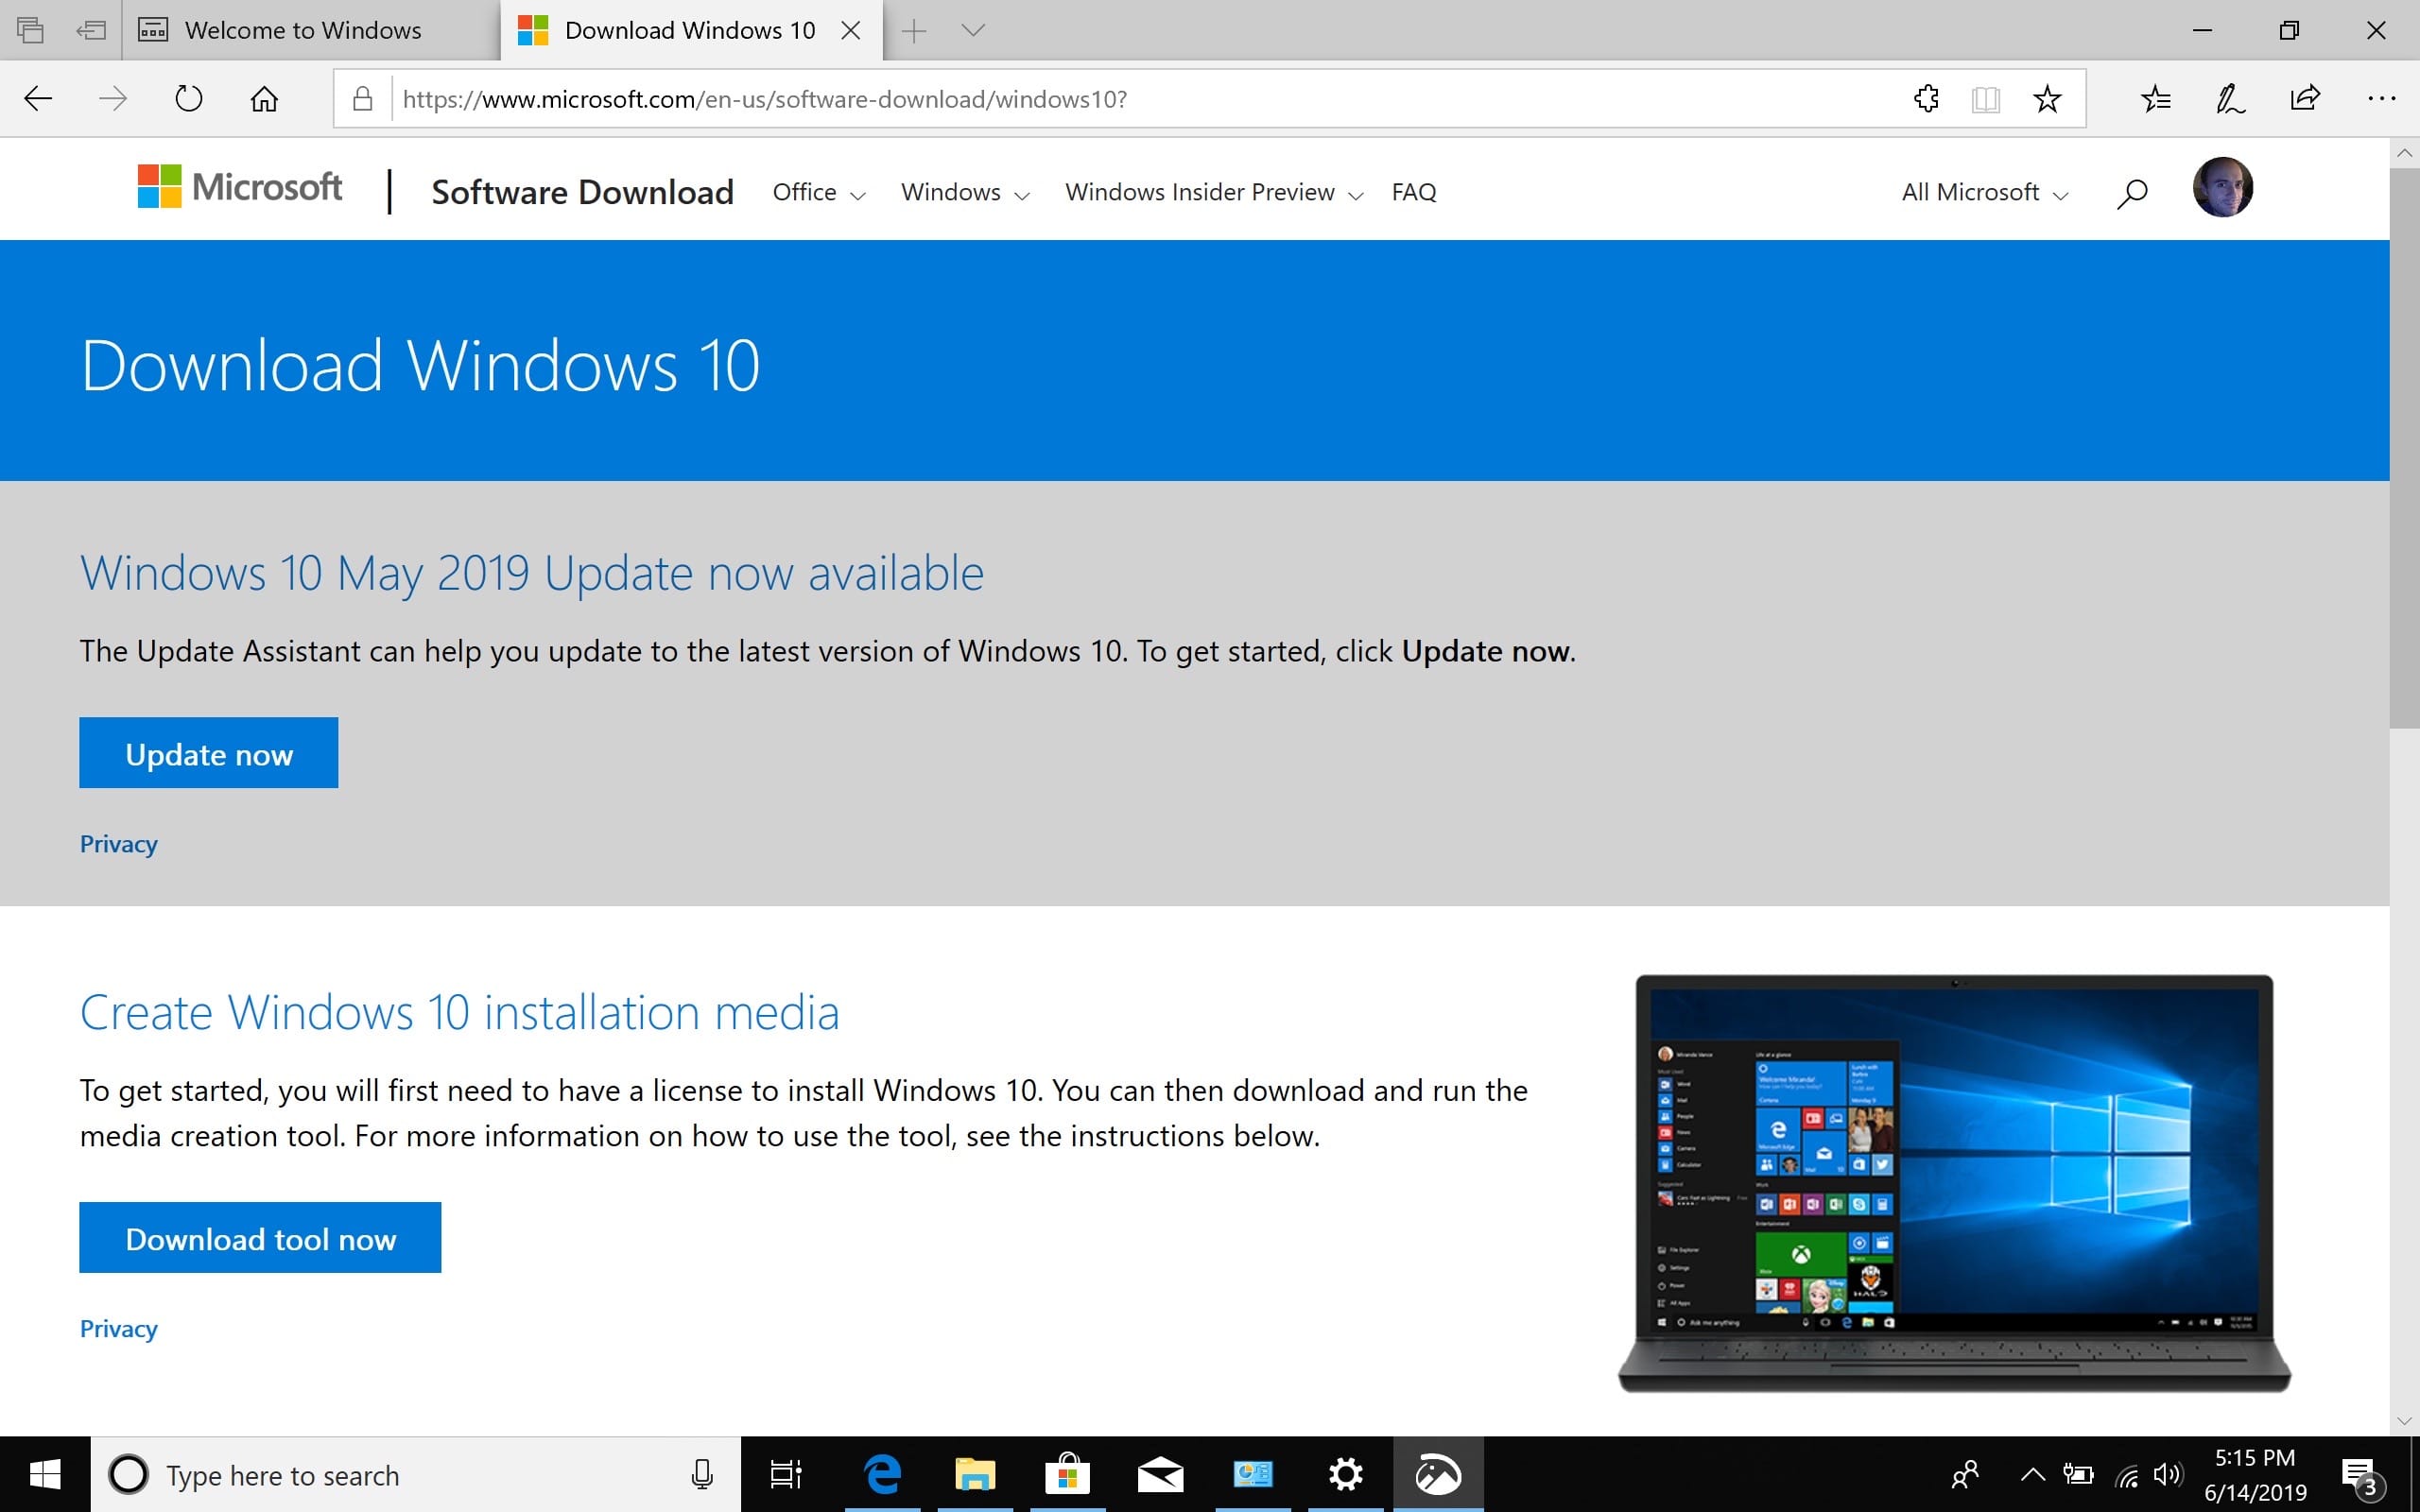
This process hasn't changed much in the last 12 years. Start by downloading Windows 10.
As of mid-June 2019, the most recent downloadable version of the Windows 10 installer was the October 2018 release:
Once downloaded, launch Boot Camp Assistant, which will download some support software, ask for the Windows disk image (which, if the download is complete, it may detect automatically), and prompt you to choose your partition size:
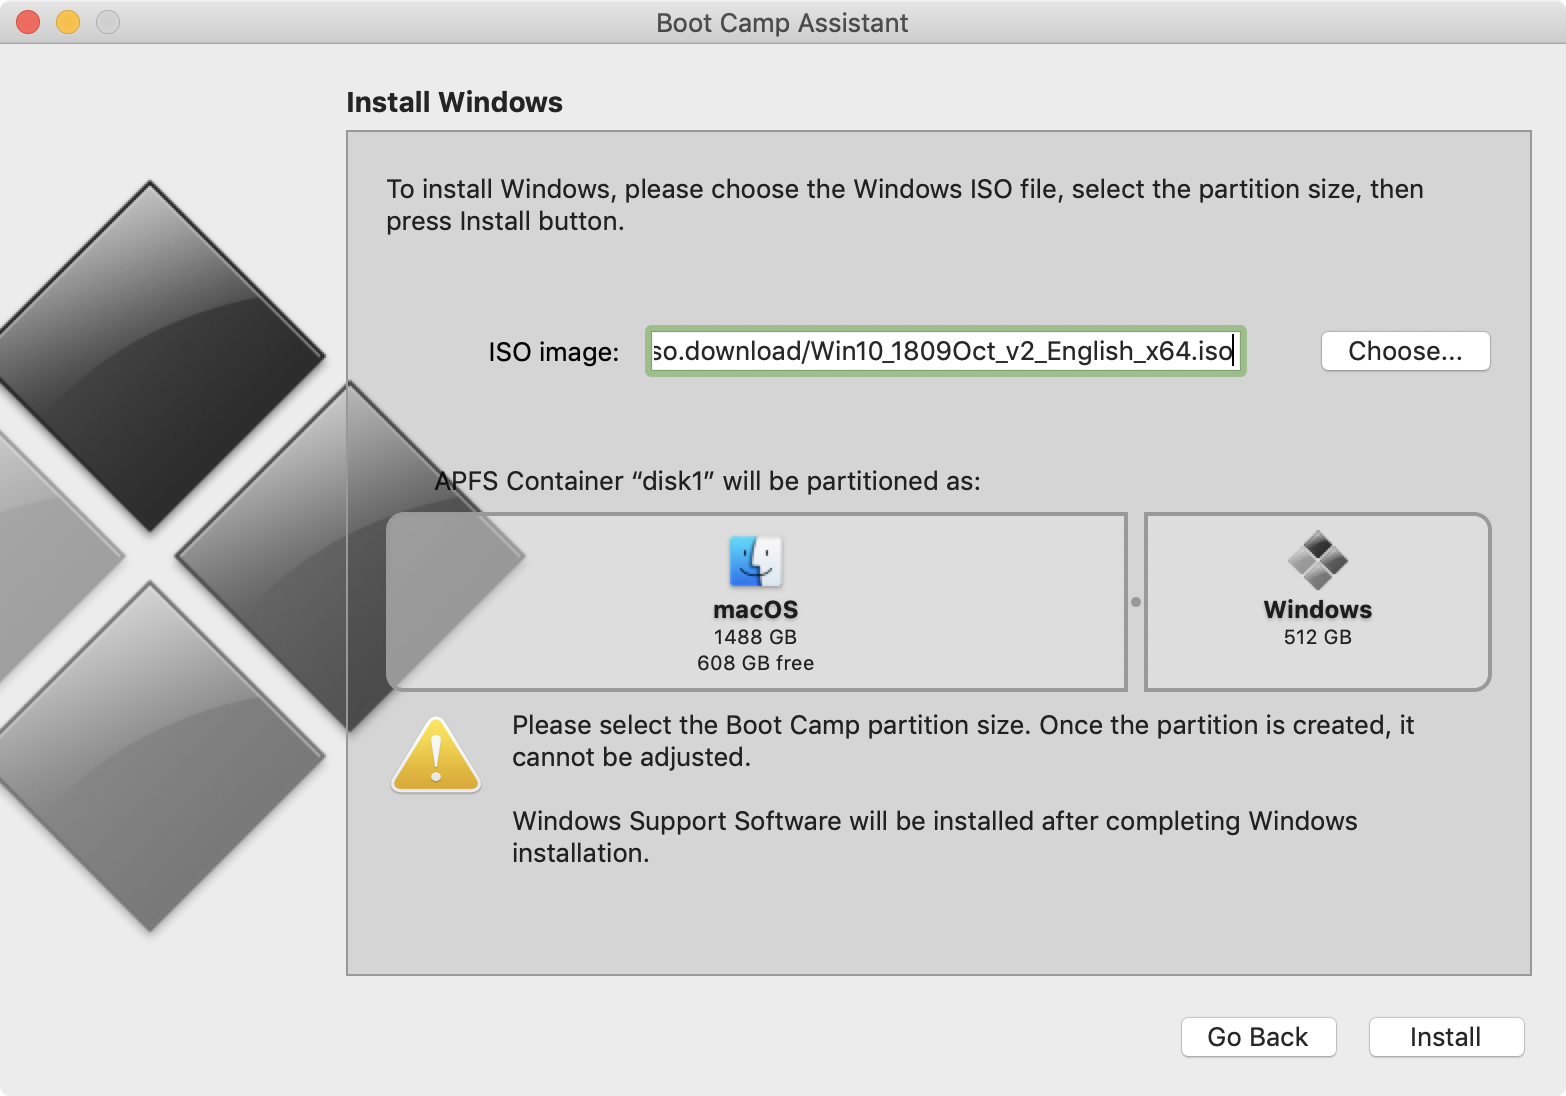
Boot Camp Assistant is still finicky and on AFPS volumes will regularly report failure when attempting to partition the disk.
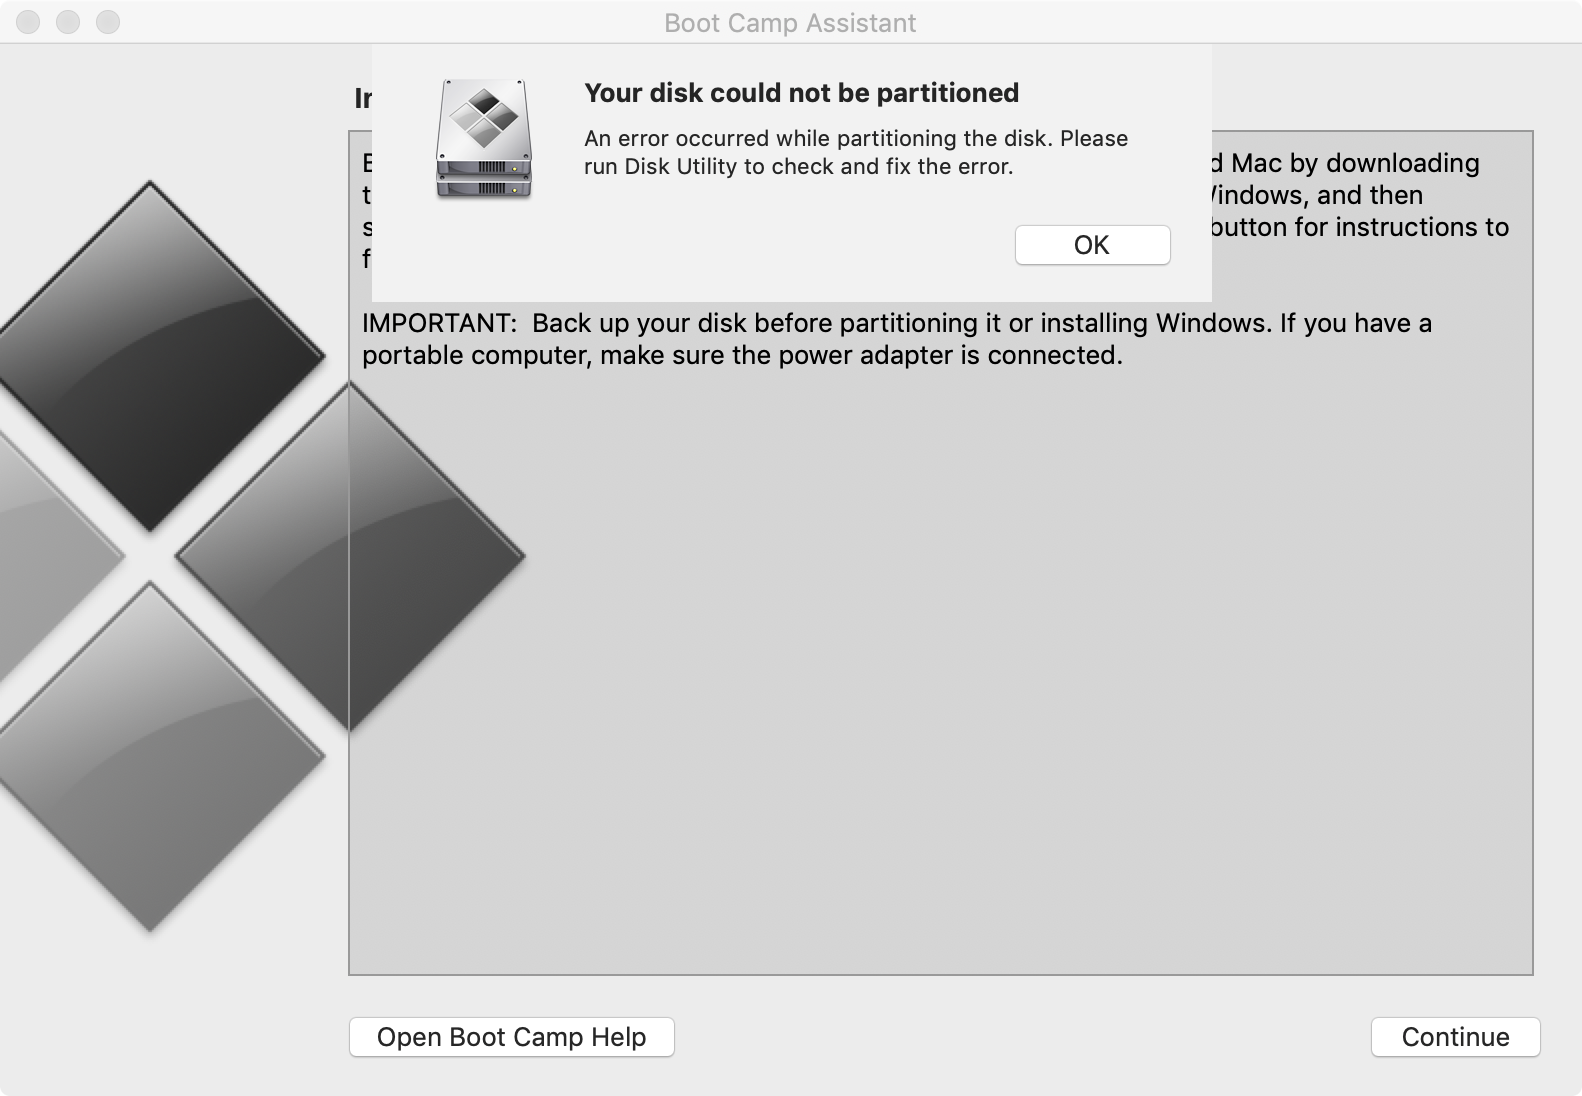
When this happens, just quit the app, reboot, and try again. It has never not taken me at least two tries. Once it's working, you should be booted into the Windows installer:
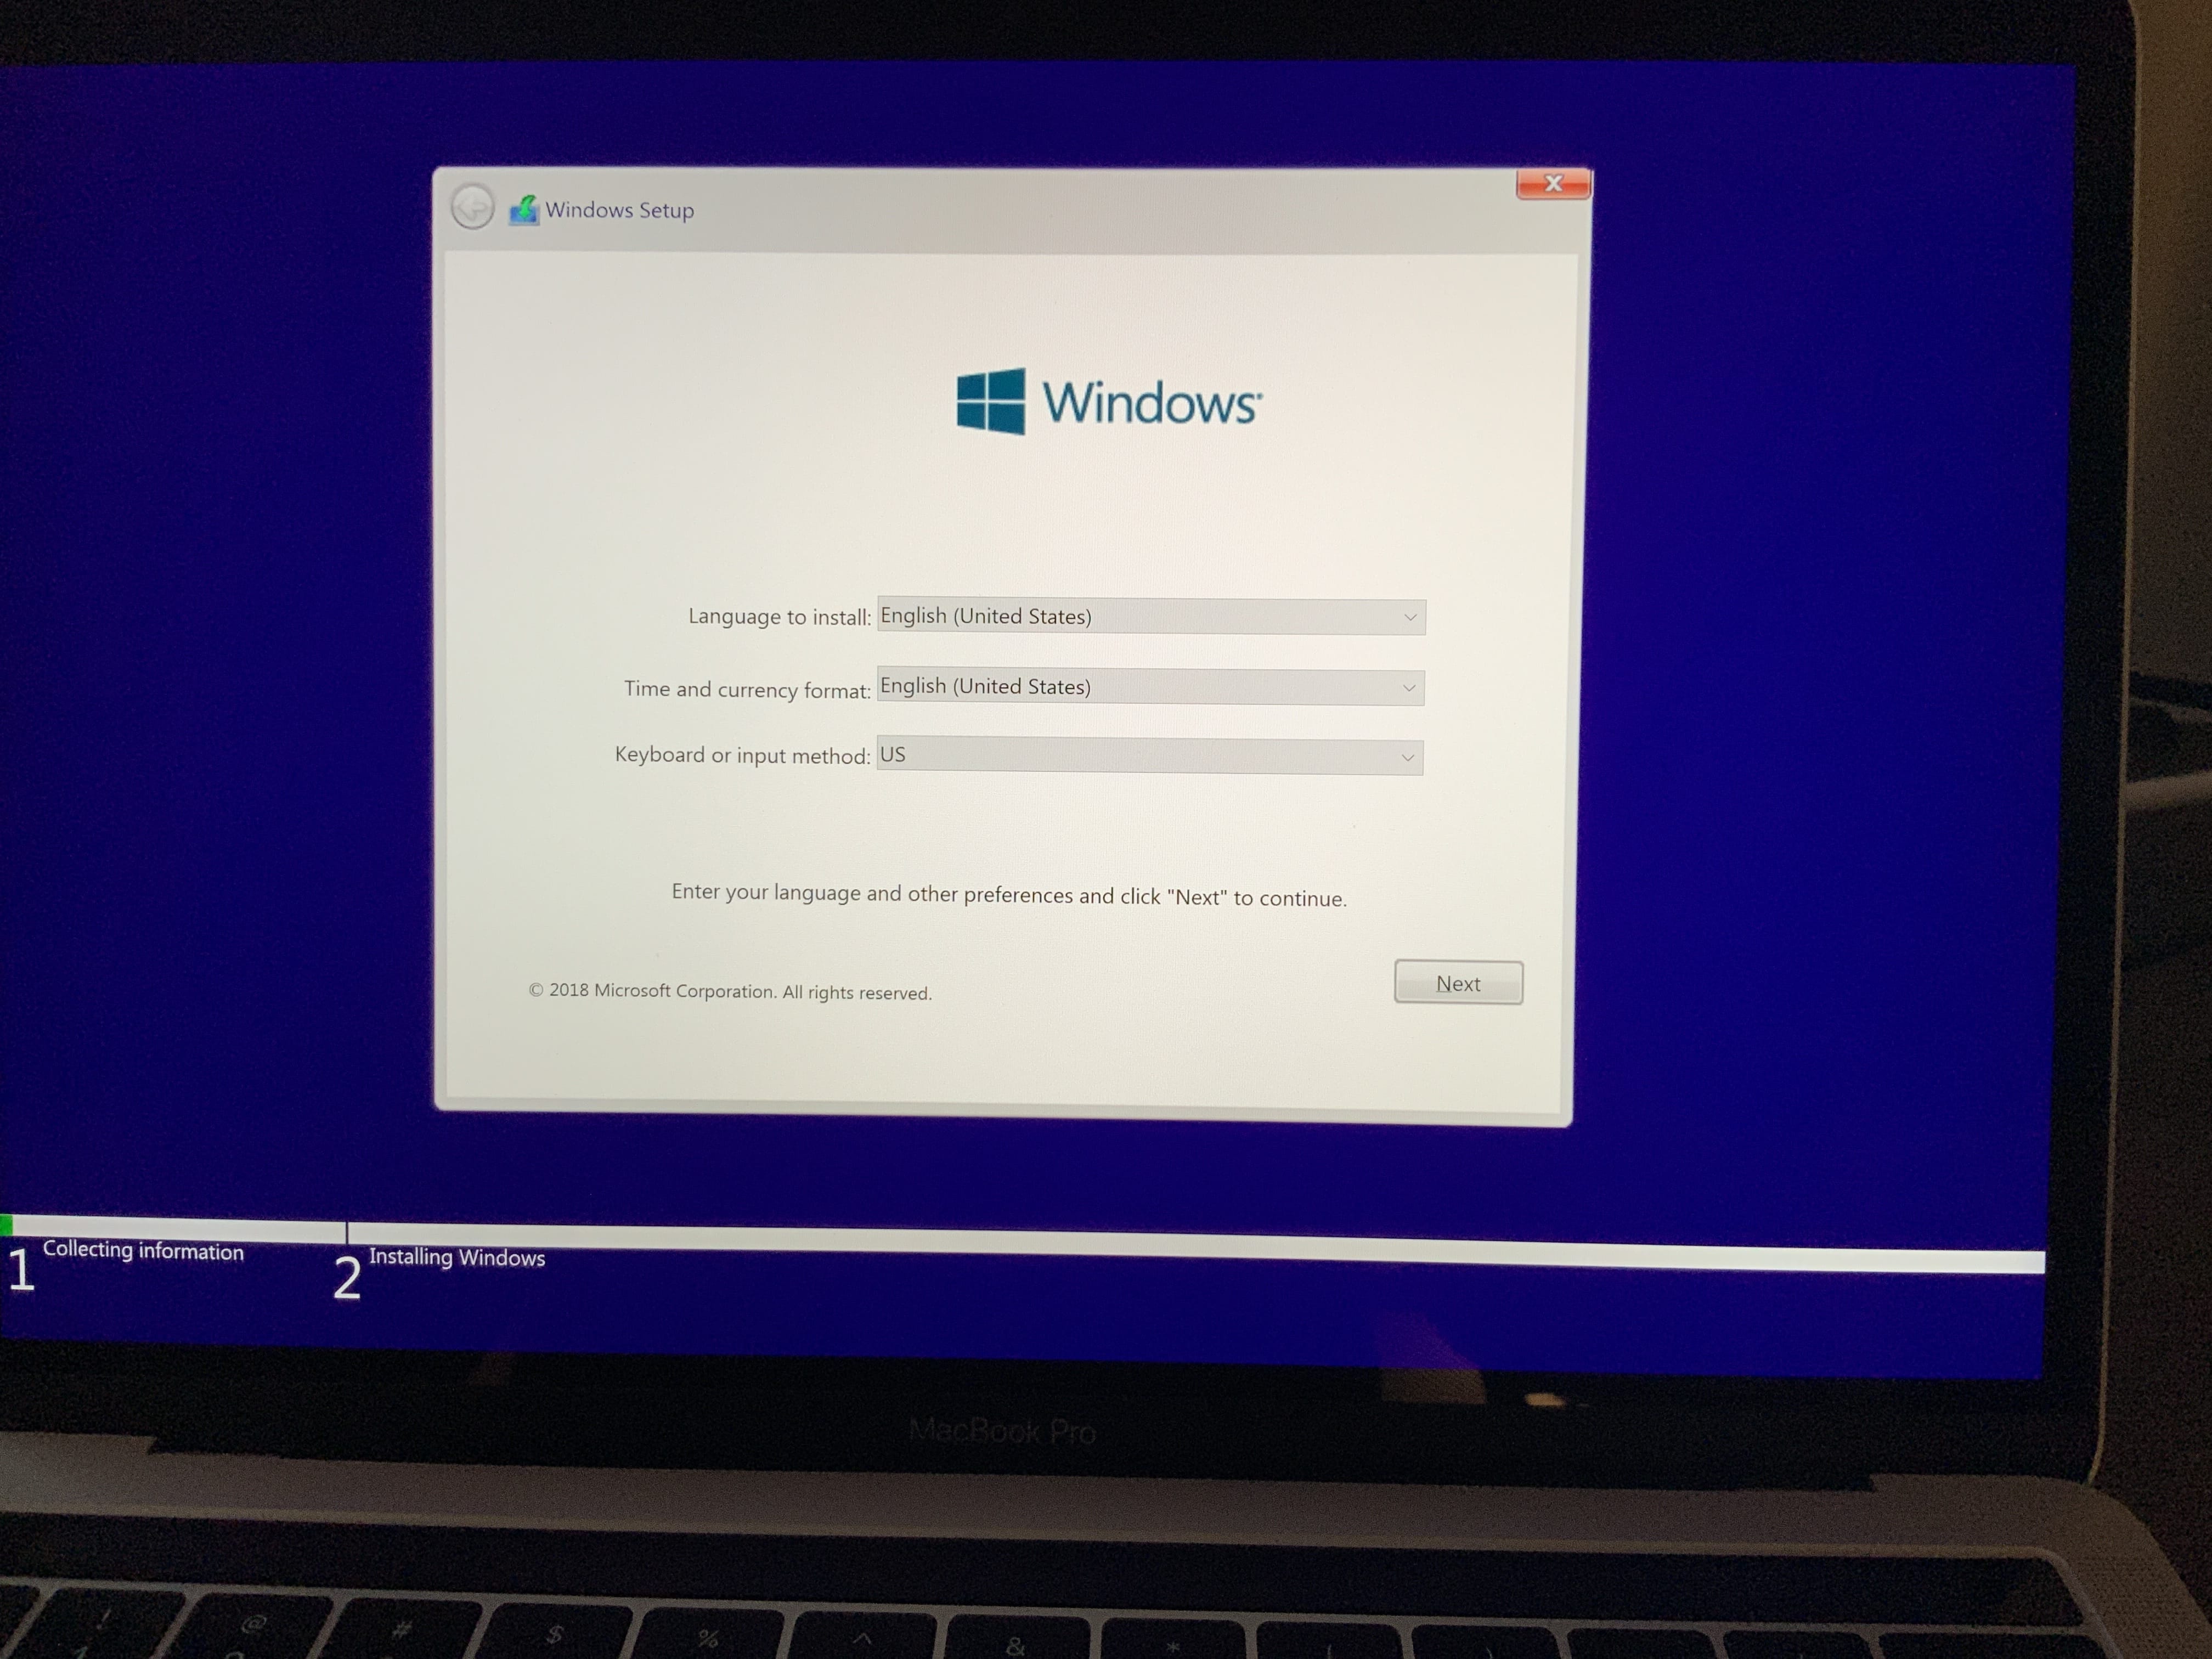
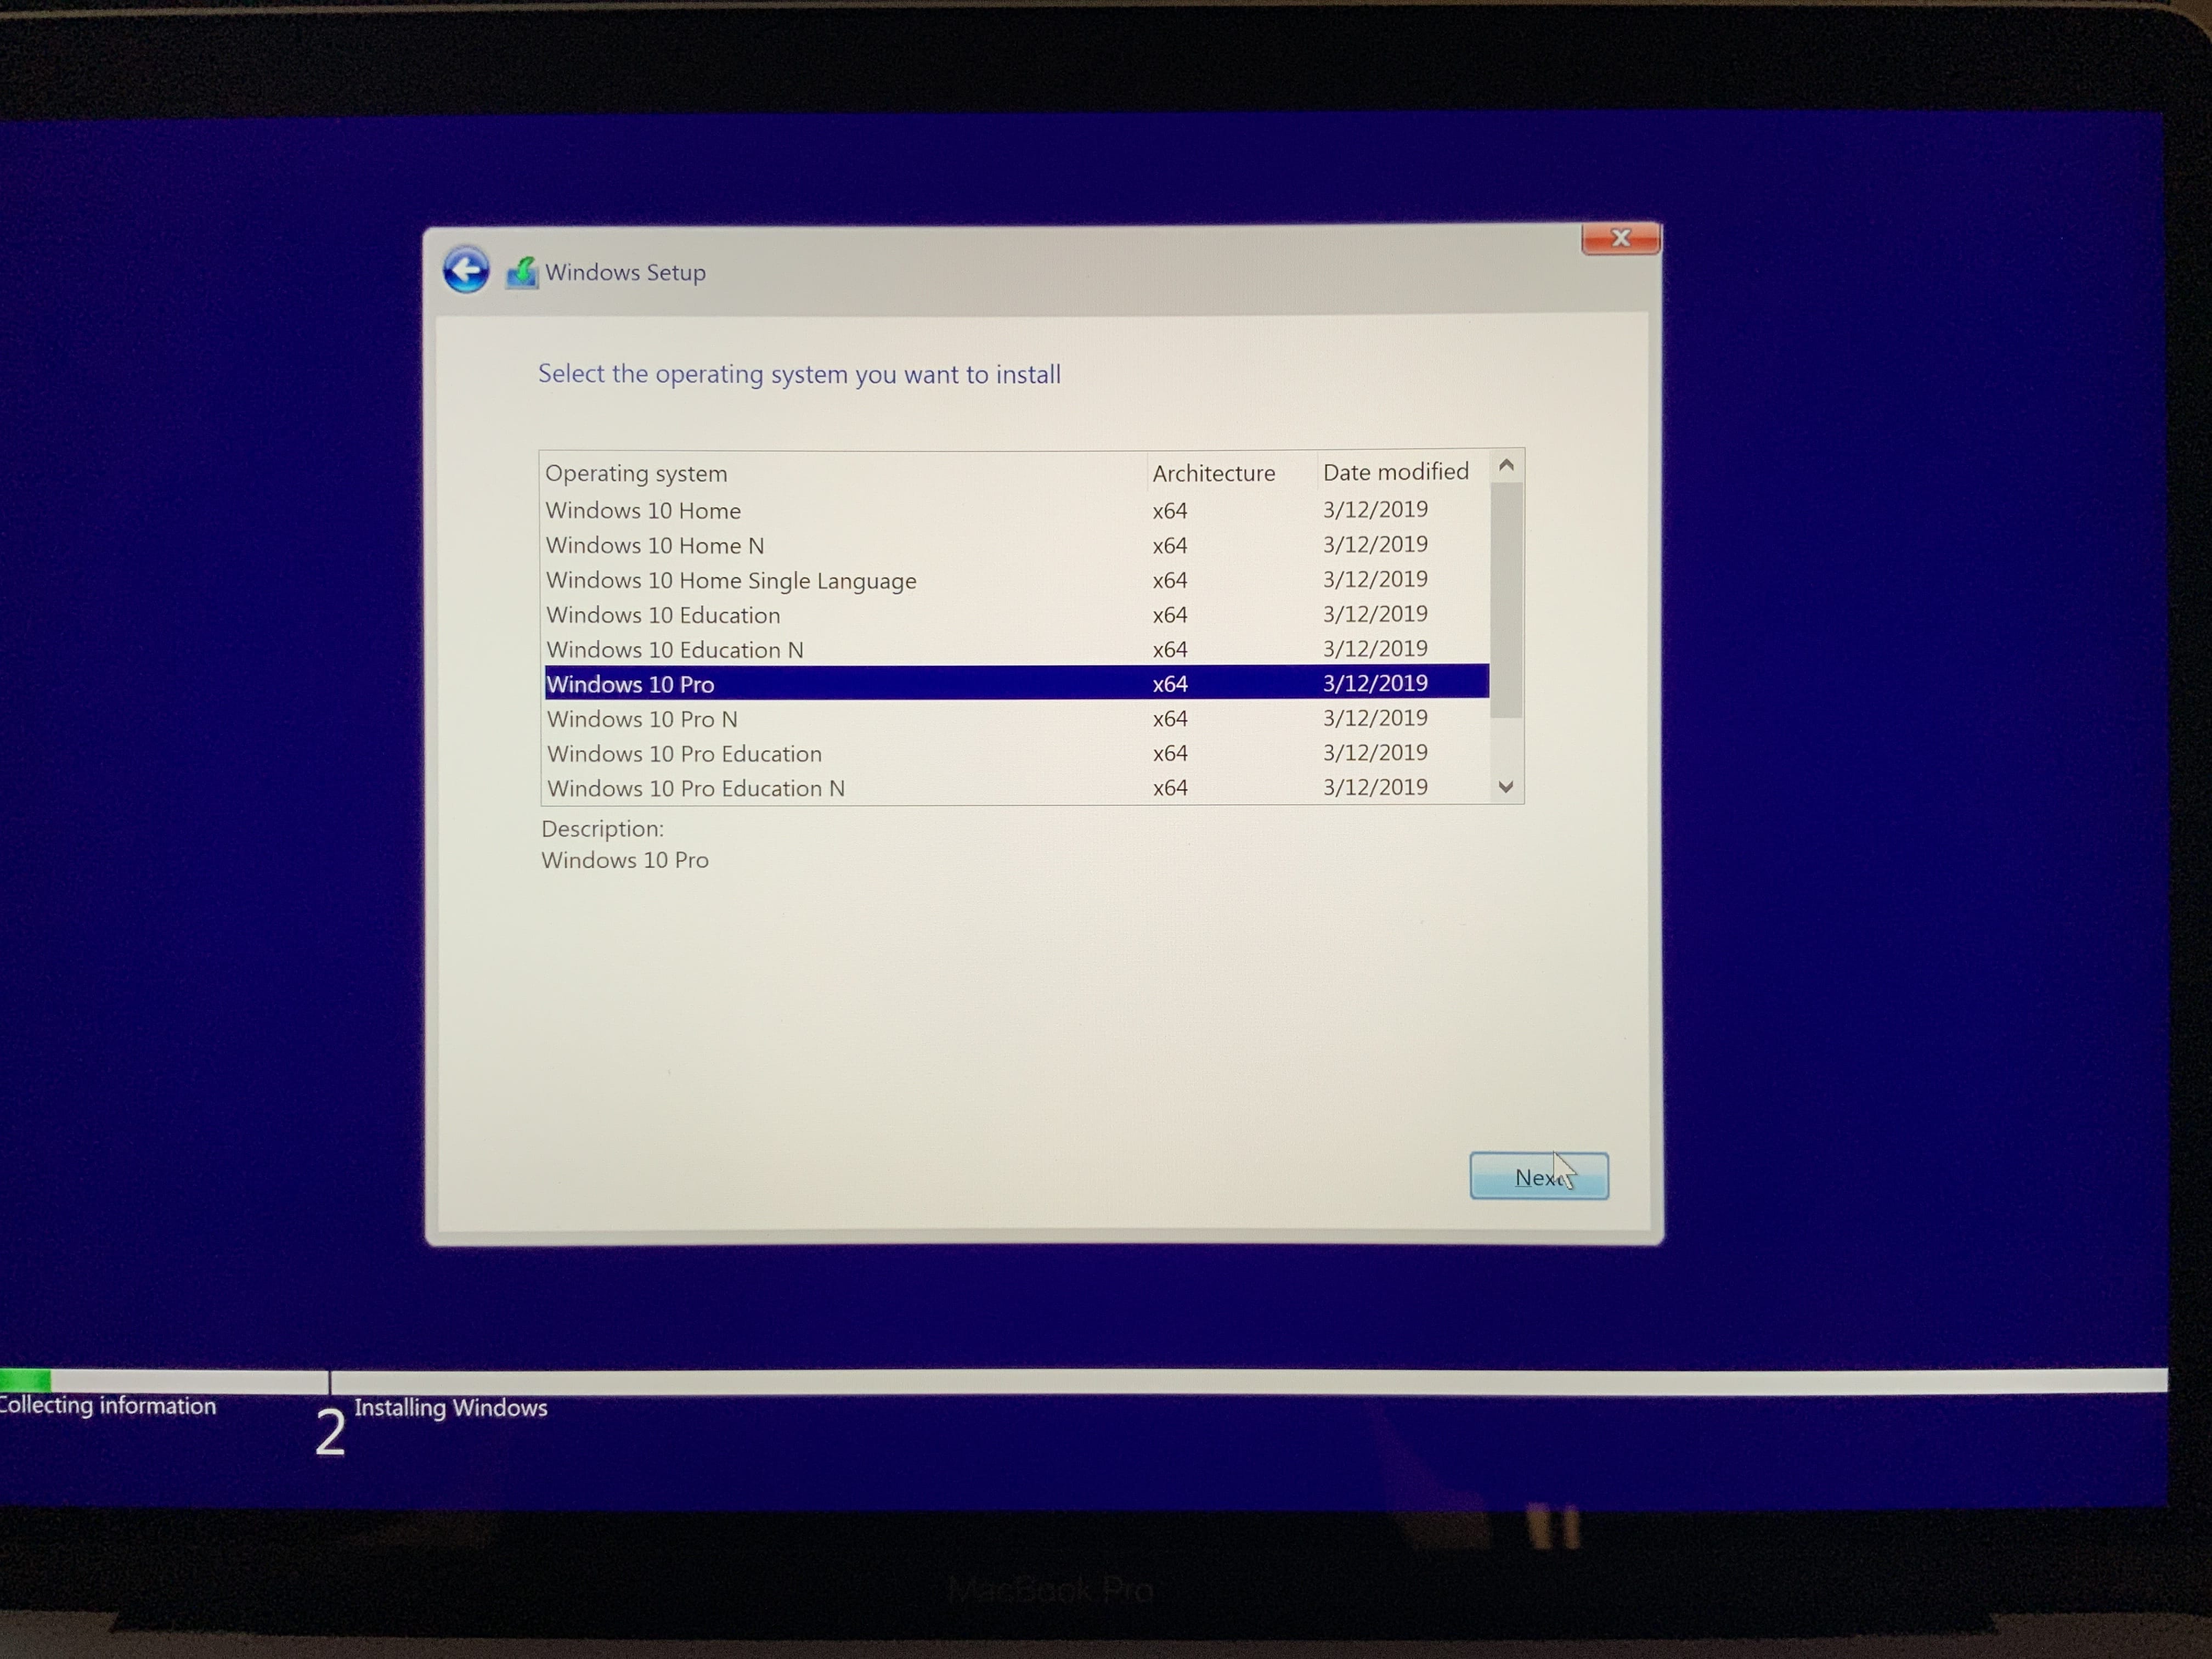
The most important step is actually not entering your product key (which can be done later), but ensuring you pick the edition of Windows for which you have (or want) a license. In my case, Windows 10 Pro:
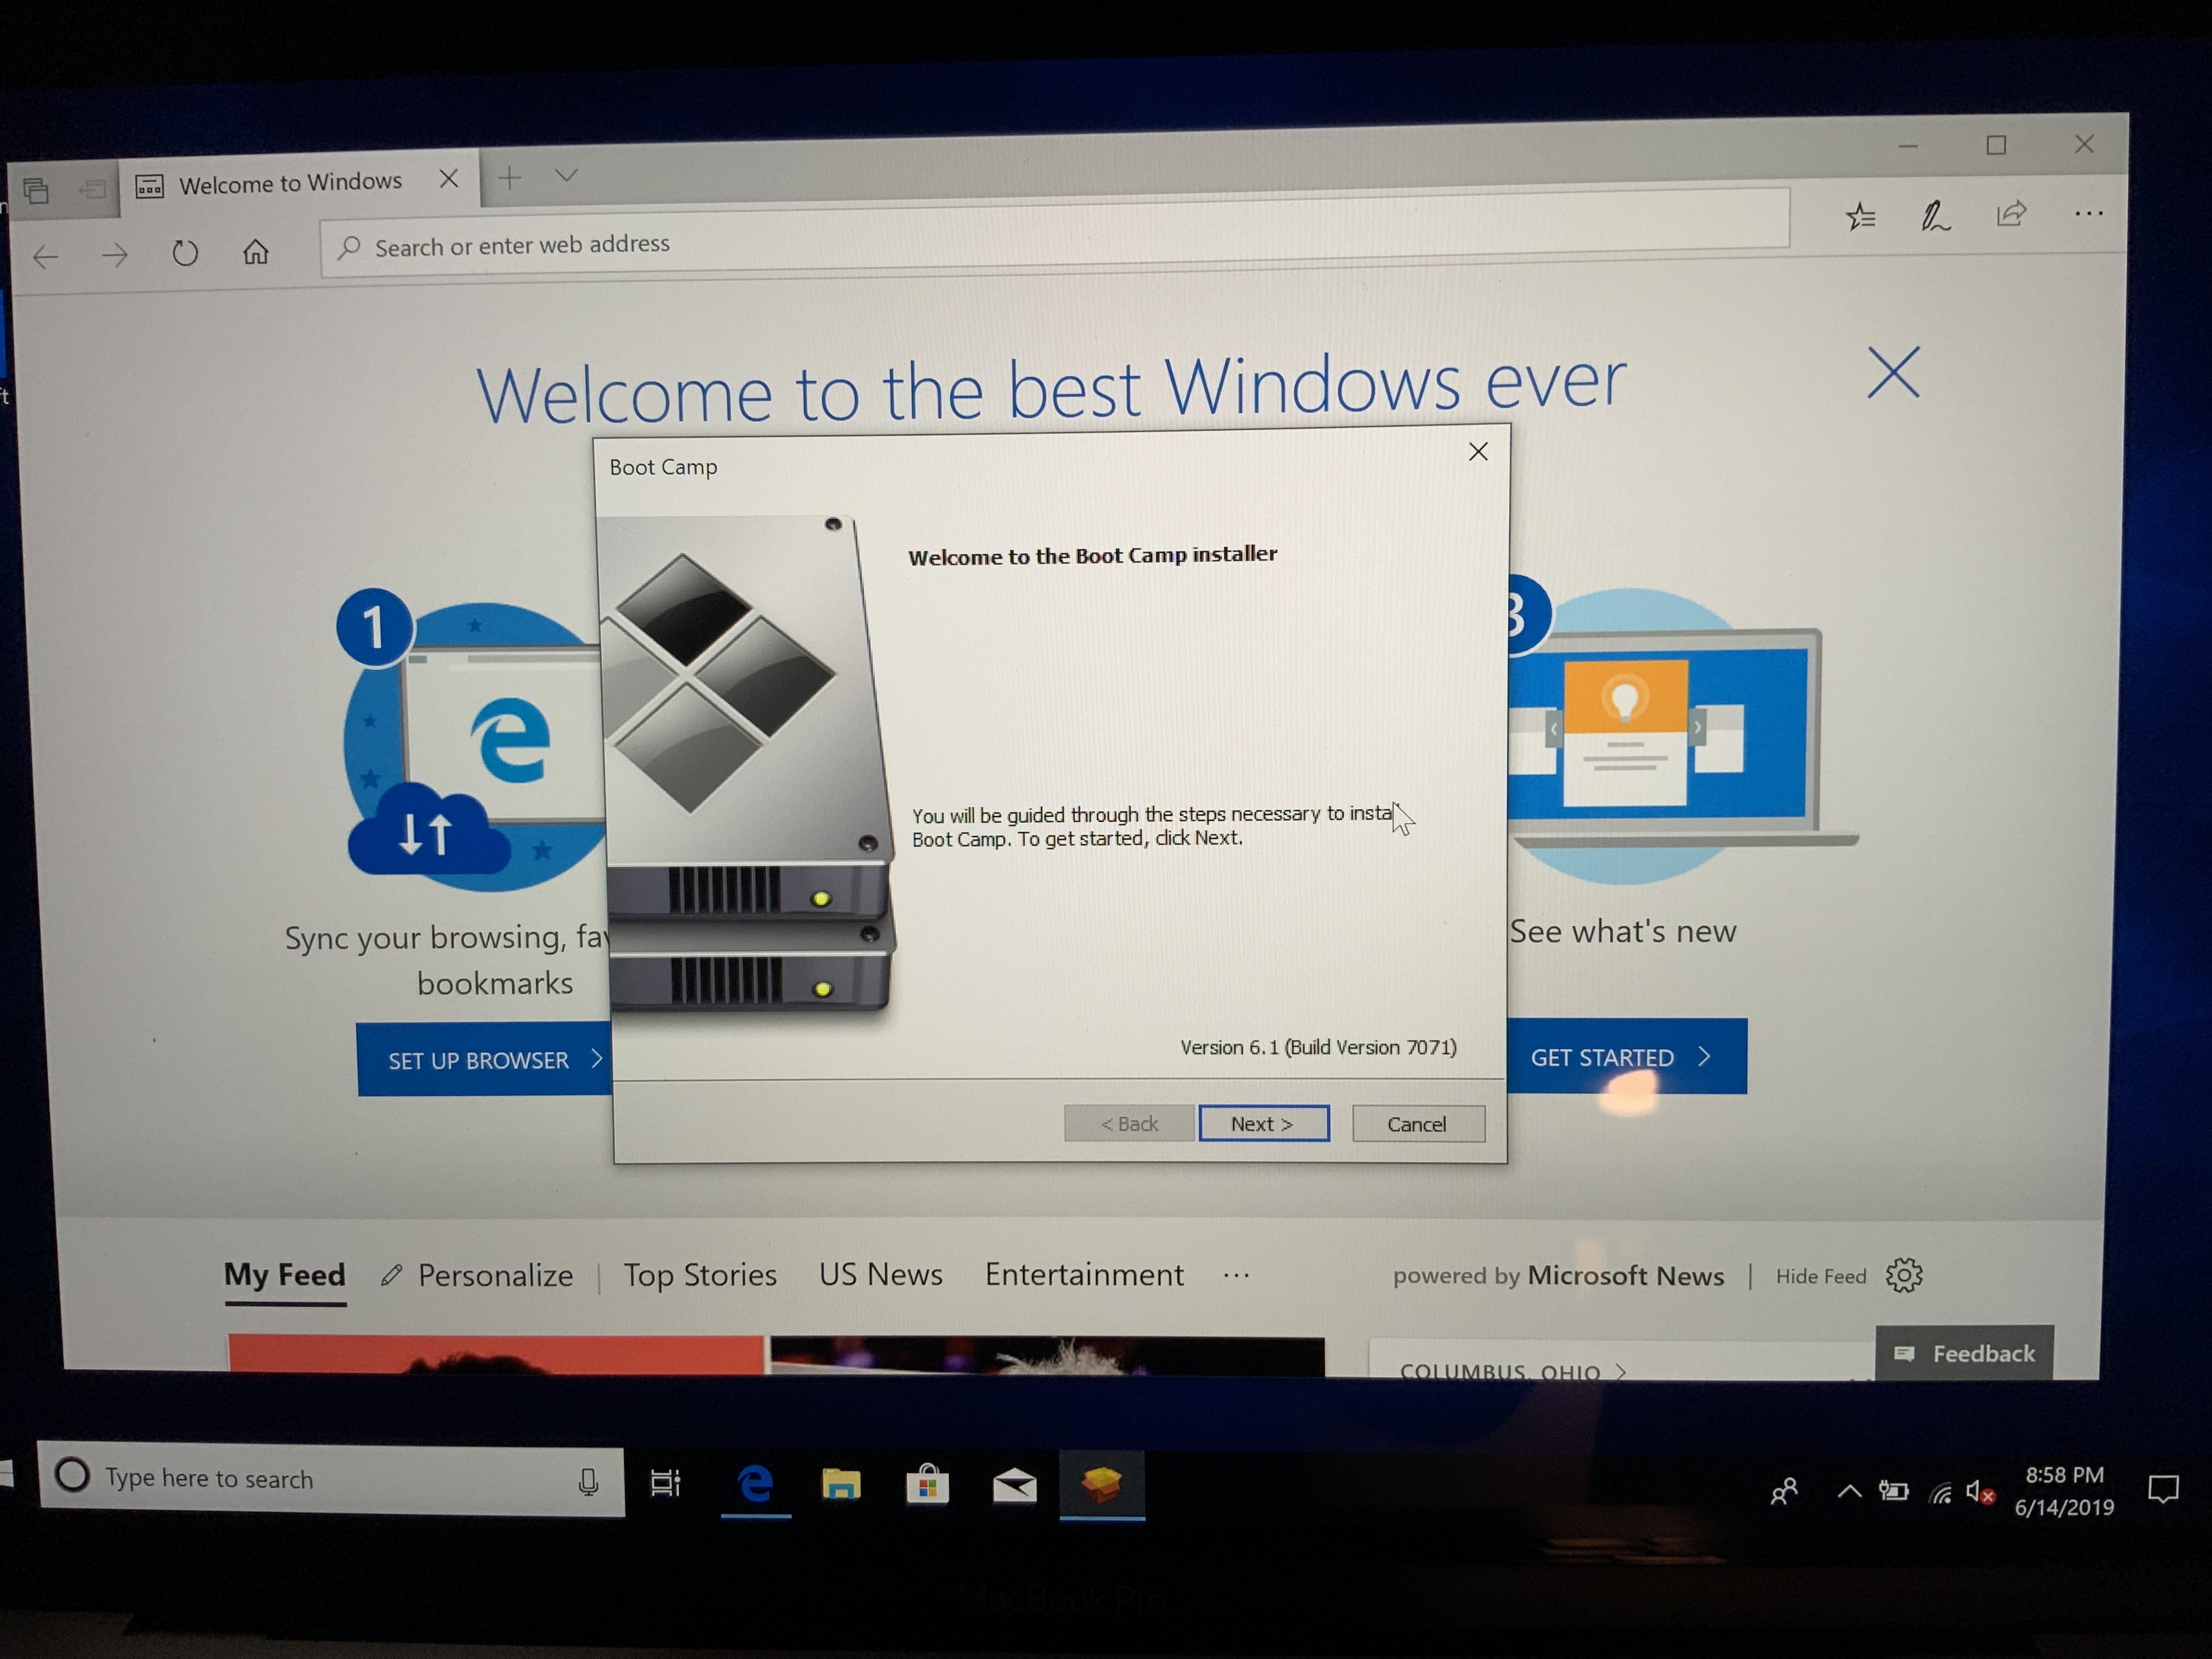
The next thing to look out for is that once Windows boots, an Apple-deployed script will run which should launch the Boot Camp installer, which contains all of your machine's drivers and which you'll definitely want to install immediately before you do anything else:
Because each subsequent Windows release is dramatically improving its own eGPU support, before doing anything else you'll want to upgrade to the latest available stable version. For reference, my installer started me at Windows 10 version 1809, which wasn't the latest major release.
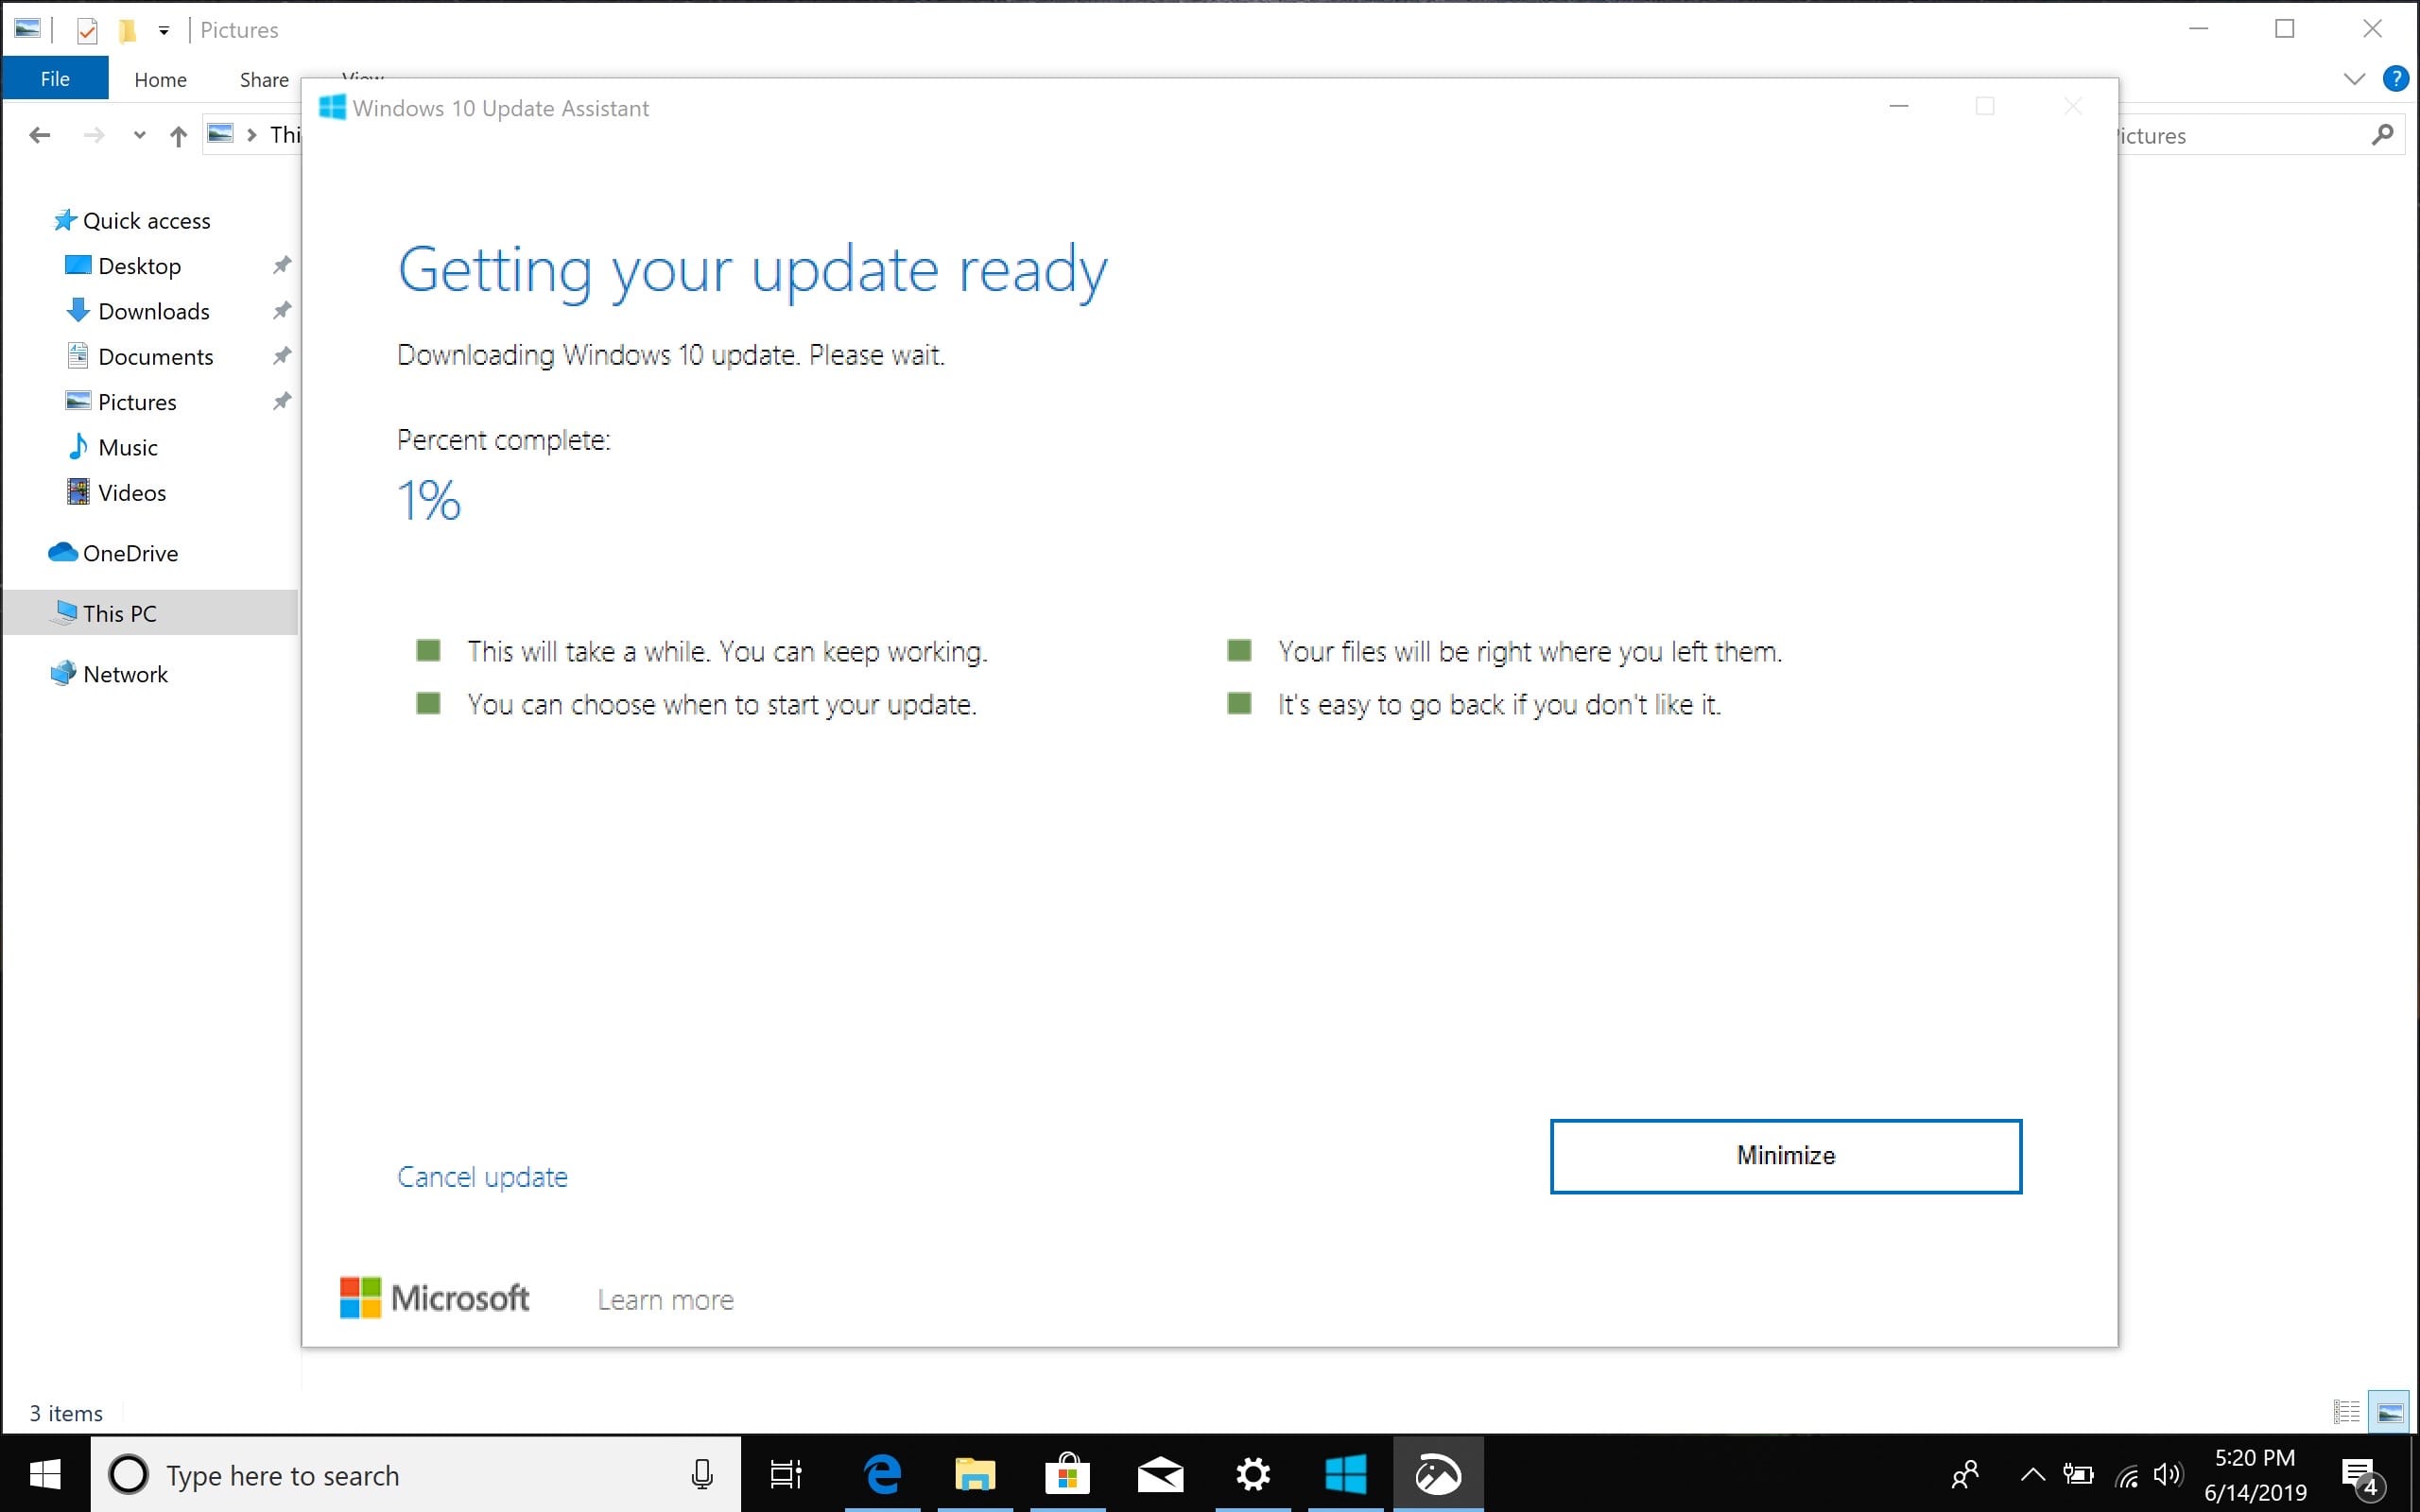
The most recent release at the time was 1903, but Windows 10 is especially precious about how it rolls out system updates across its install base, and actually does not expose a mechanism in the operating system to tell it "shut up, just give me the latest and greatest." You can force-trigger a release by visiting a particular Microsoft web page and clicking "Update now", however:
Weird.
Anyway, that'll take entirely too long to download, so go make a sandwich, I guess. I was too afraid of continuing with any configuration when so many things were likely to have been improved in the newer release. So I'd recommend just waiting for this update to finish:
Enabling Windows system protection
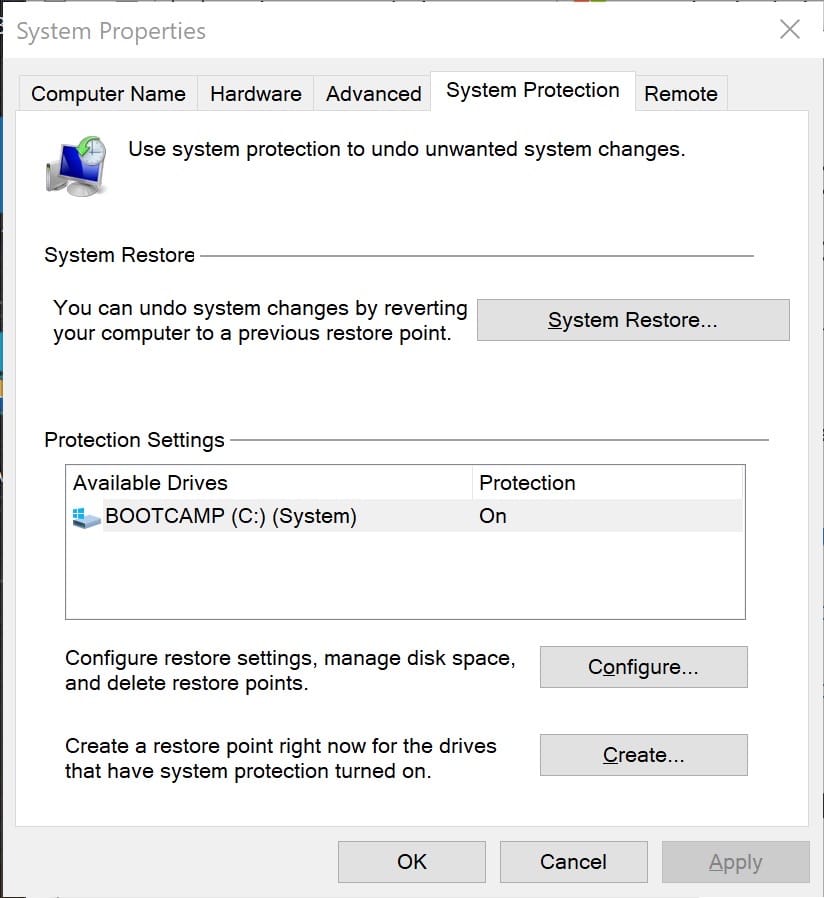
Once Windows has updated itself and restarted, we want to create a System Restore Point, so that we can easily unwind any driver & configuration changes we make if we run into trouble. You can do this by hitting the windows key and searching "restore point" to open this dialog:
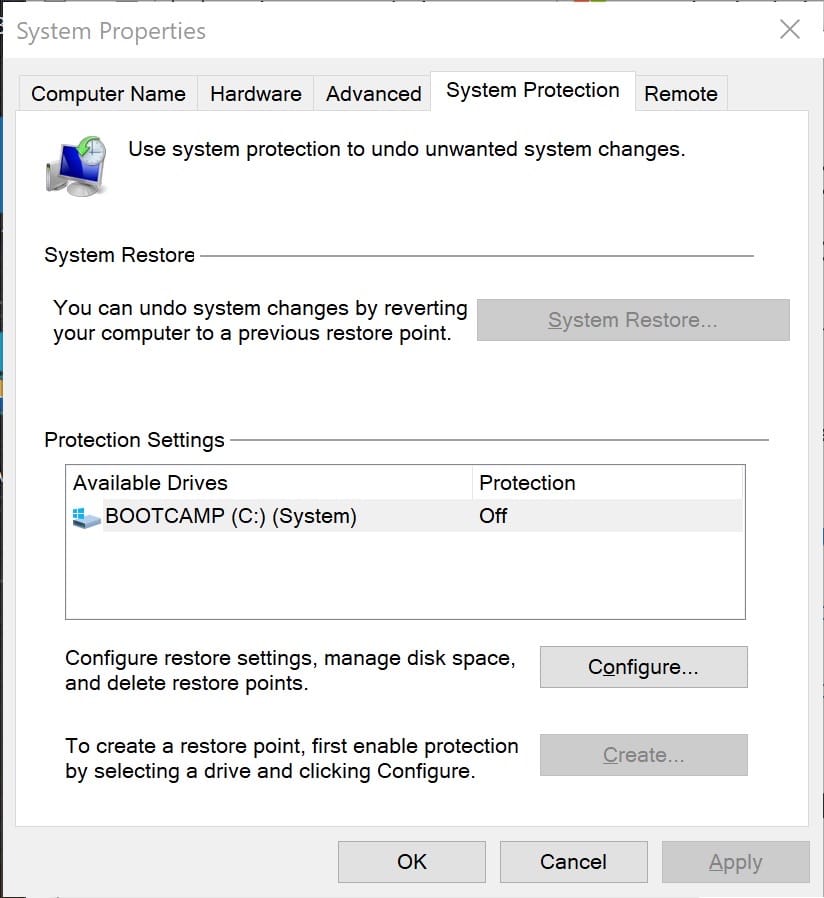
Click "Configure" restore settings, and in the subsequent dialog box choose "Turn on system protection" (how is this not on by default?!):
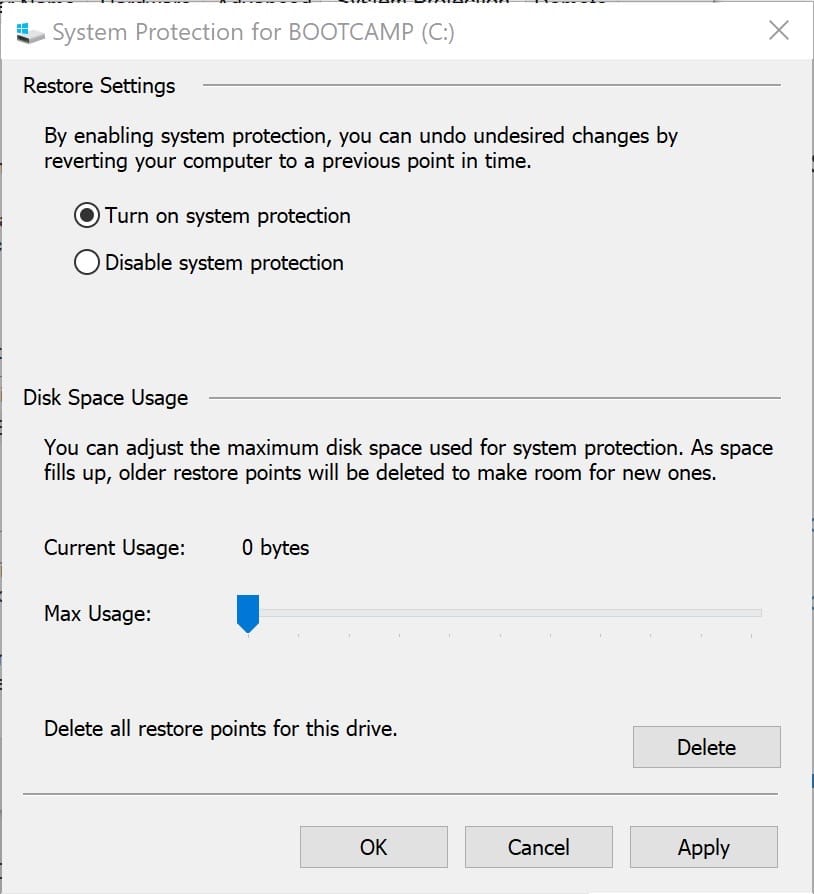
Click OK, and in the previous pane, you should now be able to click "Create" a restore point:
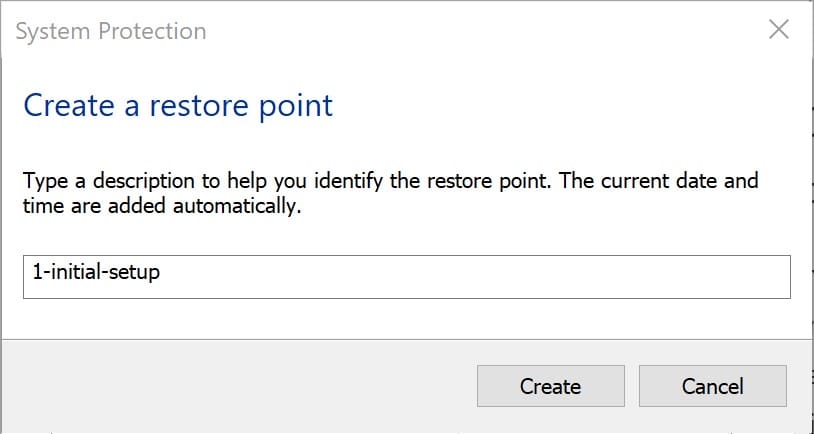
You'll be asked to name the restore point, and you can give it whatever name you want:
Running DDU to take control of Windows GPU drivers
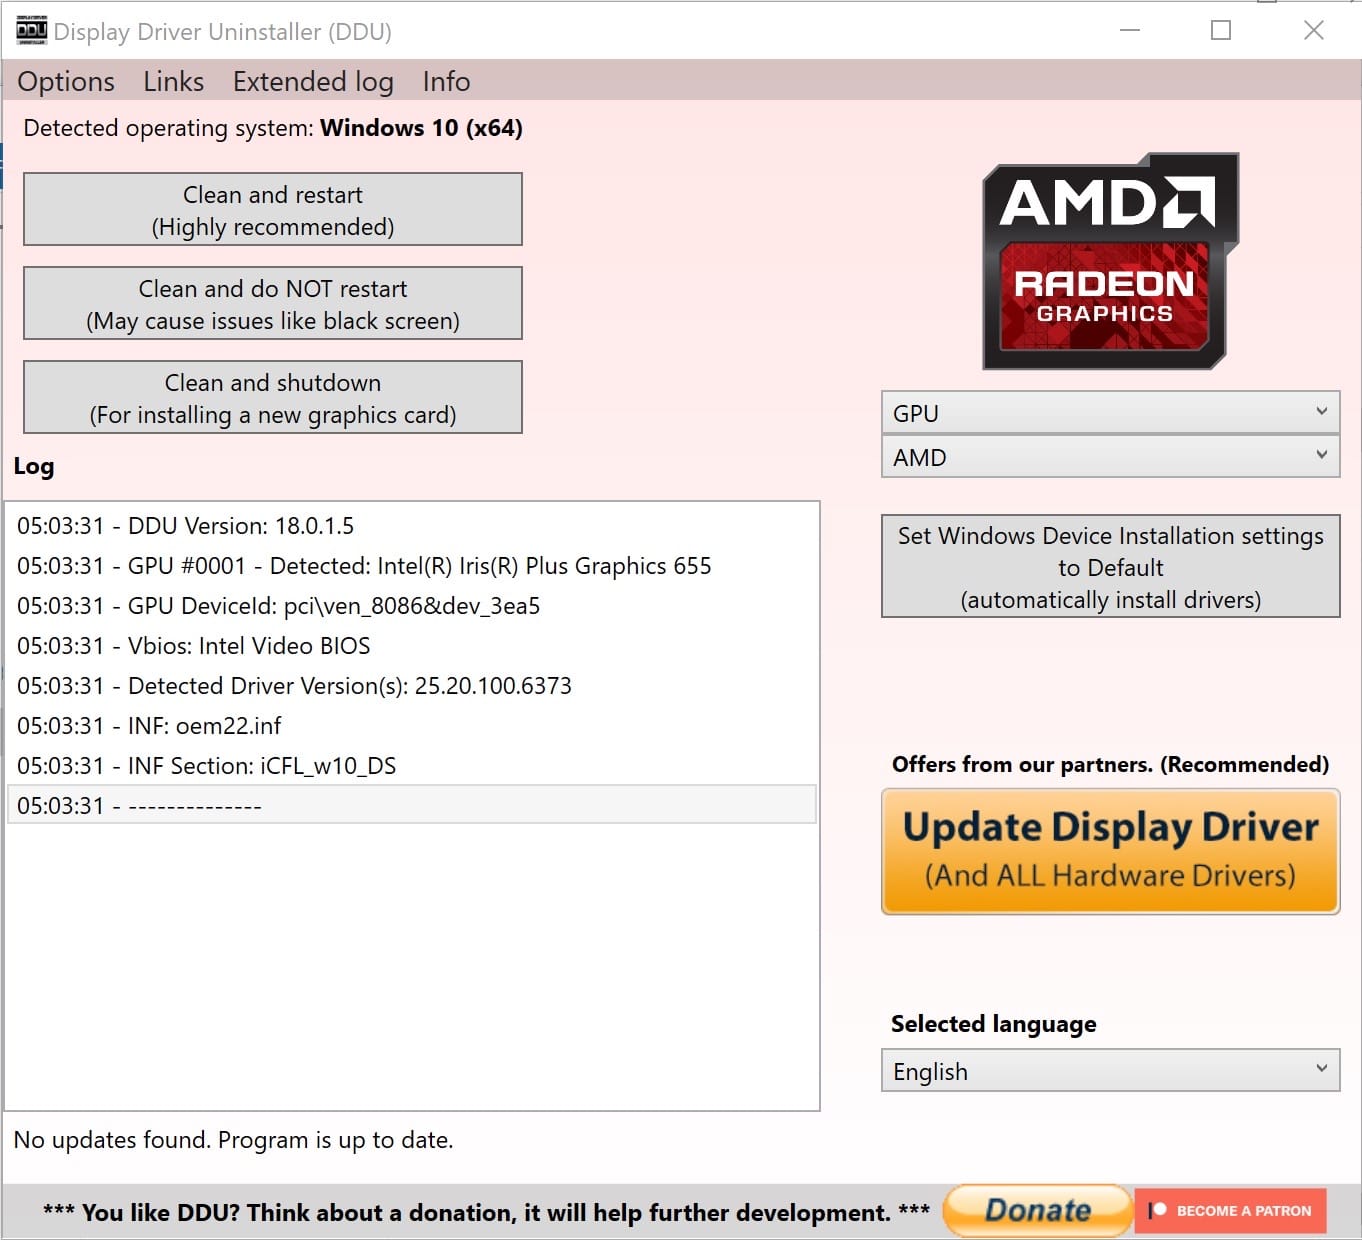
Next, because Windows 10's built-in methods for locating and installing GPU drivers will often interfere with the chipmakers' own software, prior to plugging in your eGPU or installing any AMD or Nvidia drivers, you actually want to uninstall all GPU drivers and prevent Windows Update from attempting to install new ones. This can be done with a program called DDU which can be downloaded here (I used version 18.0.1.5). The website looks like every other official home for software that runs on Windows:
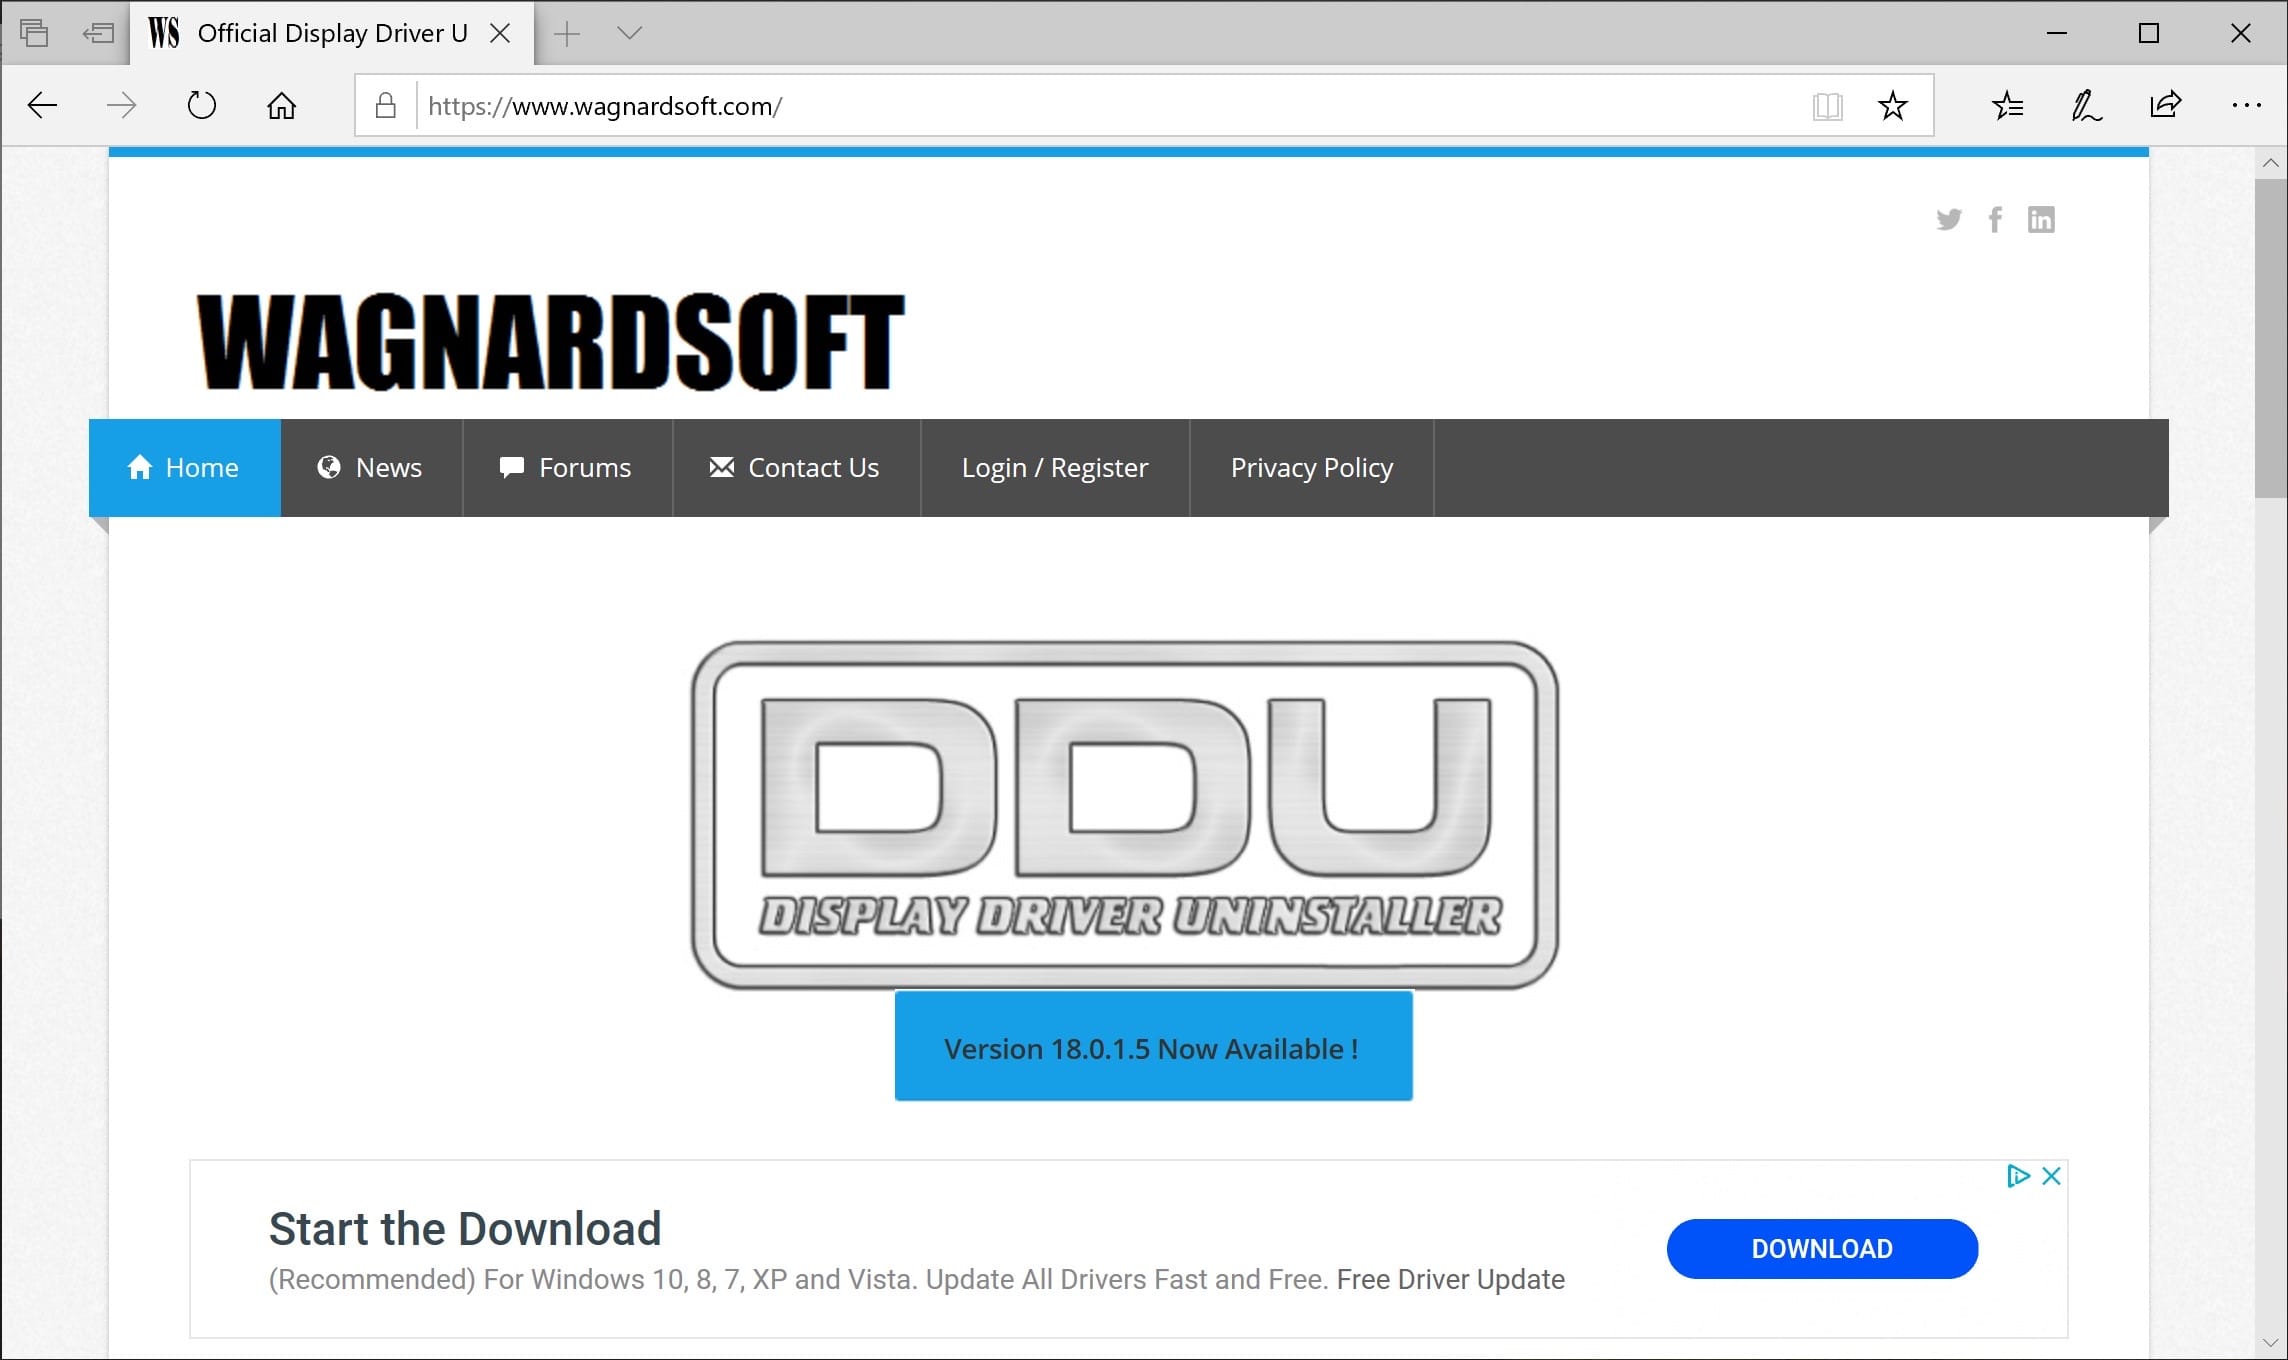
Because the only download link that isn't a display ad will disappear every few seconds as part of a timed carousel animation, just wait until you can time your click such that you successfully download it. This took me no fewer than three tries.
Once installed, run it and it'll complain that you're not in Windows Safe mode:
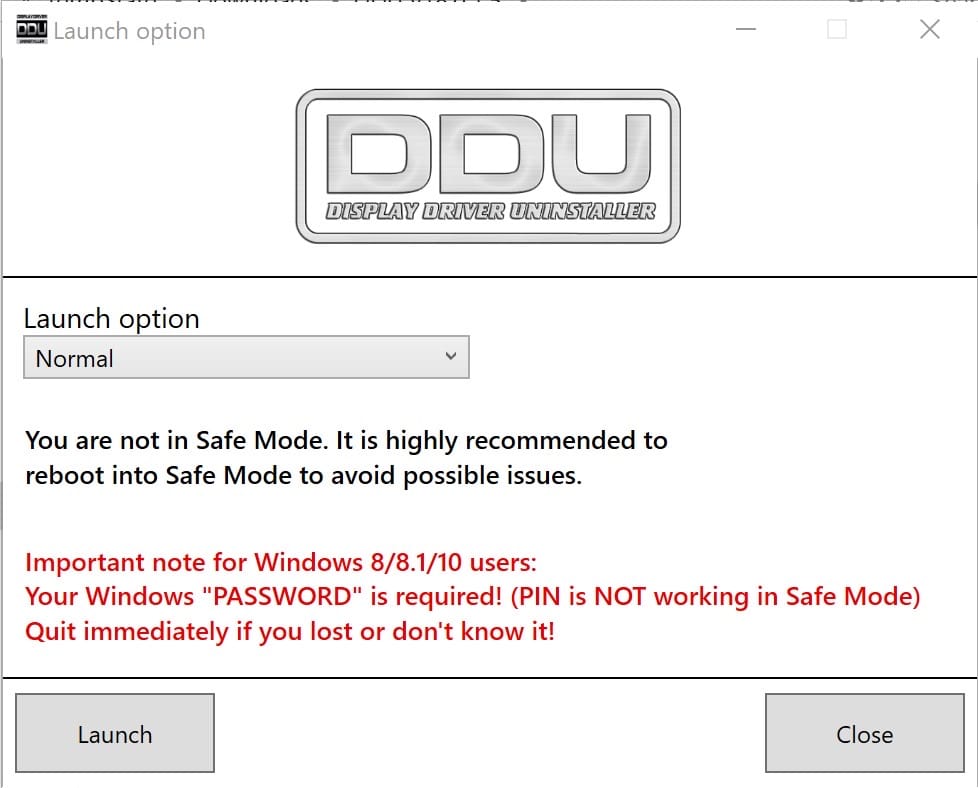
At the time of this writing and with this mix of hardware and software, it actually didn't appear to be possible to boot Windows 10 into Safe Mode under Boot Camp, so I just launched DDU anyway.
Since I was going to install a Radeon card, I selected AMD from the dropdown box near the top-right of the UI, resulting in the app shading itself like this:
From there, open the options and check the "Prevent downloads of drivers from 'Windows update'" box at the bottom of the page:
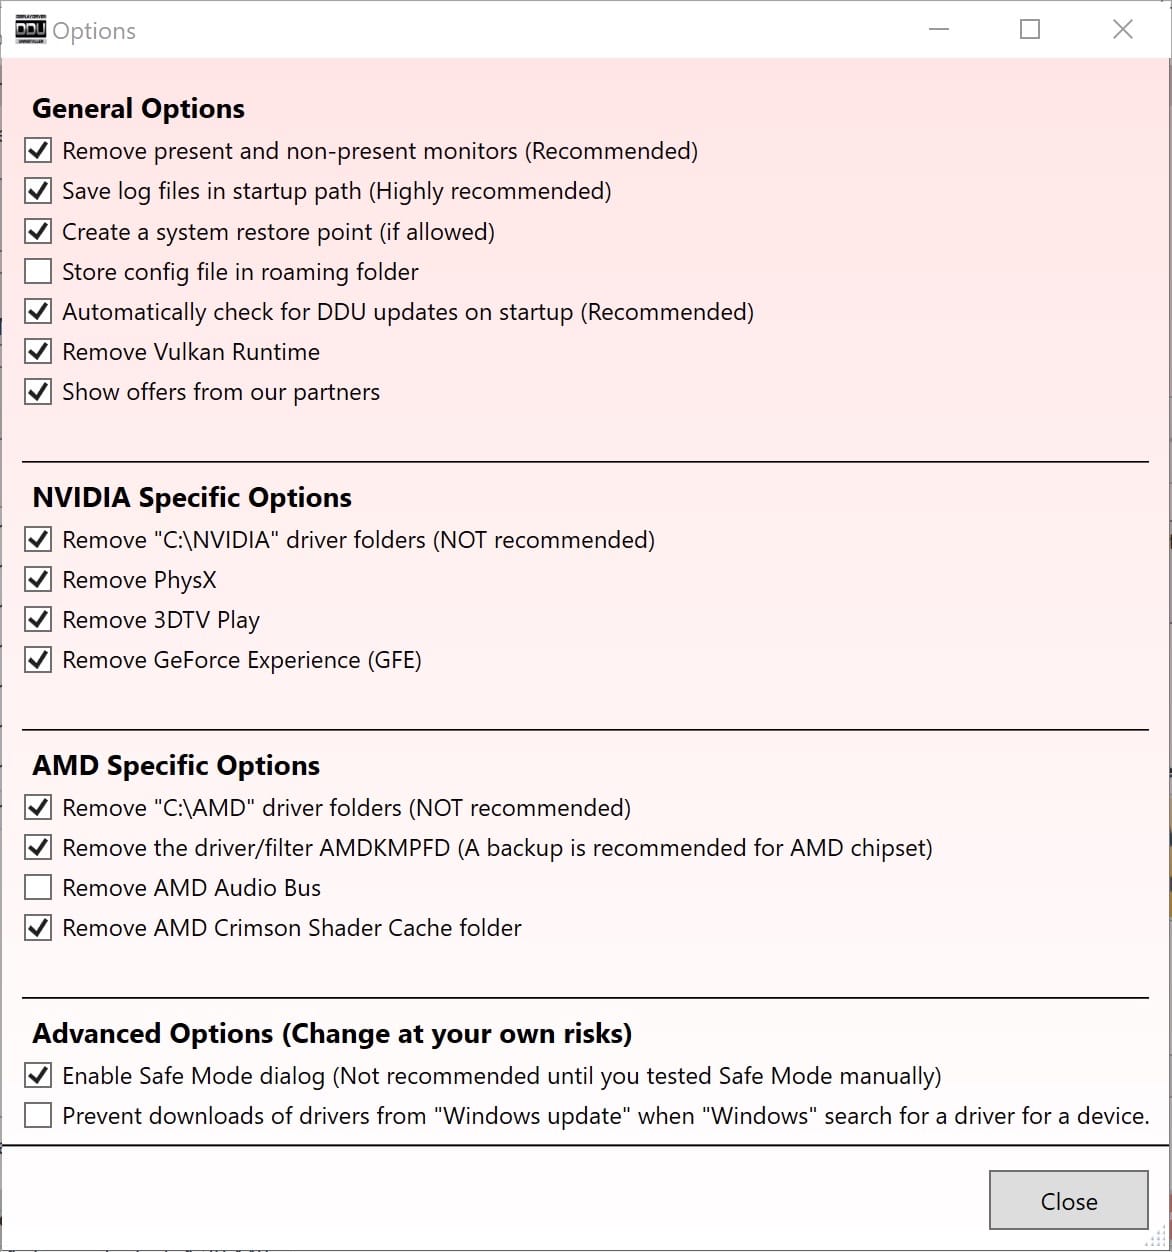
This will prevent Windows Update from attempting to install any GPU drivers. Windows Update doesn't normally screw up GPU drivers once things are initially set up, but because you're likely going to be connecting and disconnecting a GPU with much greater regularity than you ever would on a traditional PC tower (much less into any of four different Thunderbolt 3 ports), the risk is much greater of Windows screwing up your GPU drivers when attempting to configure your eGPU.
Okay, after checking "prevent downloads", close the options menu and then click "Clean and restart"in the top-left corner of DDU's interface. It may warn you again and you will ignore it, because you've been using Windows for two hours at this point and you've already dismissed twenty pointless warning dialogs:

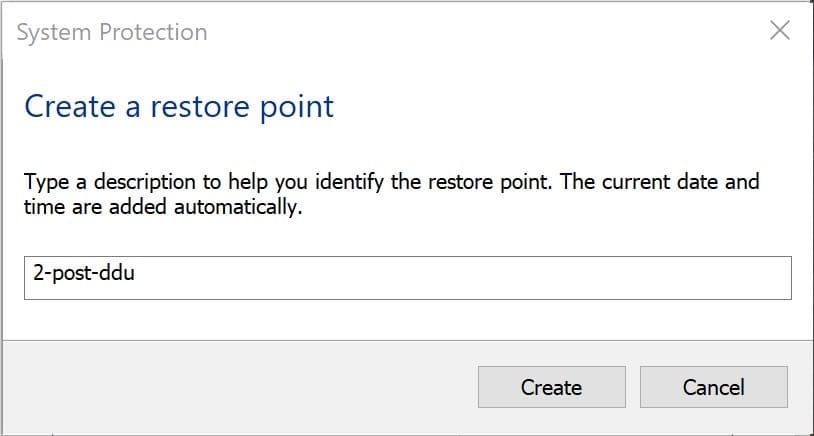
When that's done, restart, hit the Windows key and type "restore point" again to create a second restore point after you've run DDU but before you've downloaded your GPU's drivers:
Install your GPU drivers
Next up, you should finally plug in your eGPU! Give Windows a minute as the eGPU warms up to detect the Thunderbolt controller. If you open Device Manager you should see a display adapter named "Microsoft Basic Display Adapter":
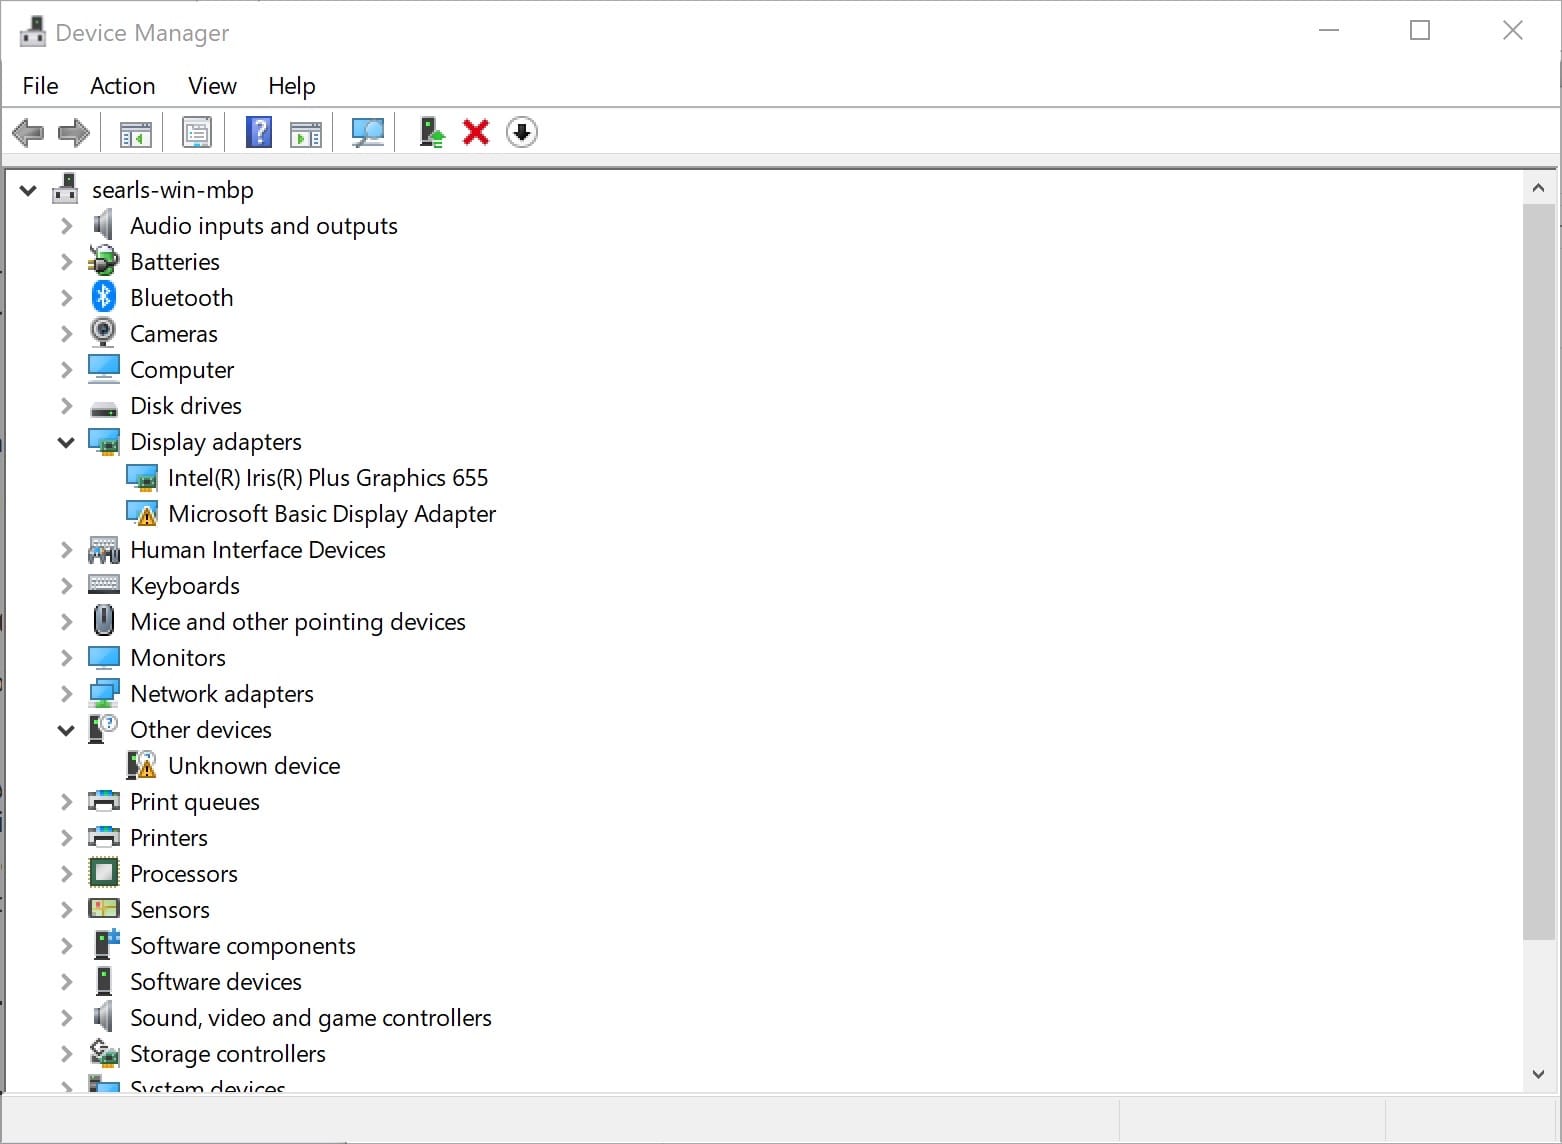
If you check the properties of that (driverless) display adapter, they'll look like this;

This is great! It means Windows is connecting to your eGPU enclosure's Thunderbolt 3 controller fine, and it can tell there's a GPU plugged into it.
Next, we'll want to install drivers.
- AMD: Go to the downloads page and scroll down to download the "Auto-Detect and Install Radeon Graphics Drivers for Windows" installer
- Nvidia: Download GeForce Experience under "Automatic Driver Updates"
The installation process for both is dead simple and fully automated. Either will prompt you to restart Windows, but don't click Restart. Instead, shut down the computer entirely. Once it's off, unplug the eGPU, boot it up again, login, and plug the eGPU back in.
Why not restart with the eGPU connected? The hand-wavy short version is that when Windows boots normally on a Mac with an eGPU connected, the device is initialized in such a way by the EFI boot loader so as to not work as expected. (In my case, that meant Windows could never successfully boot if the eGPU was connected at boot time.) All this means that, out-of-the-box, you'll probably need to plug in your eGPU on Windows only after you're booted and logged in. There is a way around this, but it's not pretty—I'll explain below when I talk about rEFInd.
Anyway, so after you've booted up again and re-plugged in your eGPU, go back to Device Manager. With any luck, the GPU will now be recognized for what it is within 20 or 30 seconds, and you should see the model name of the card you put in there:
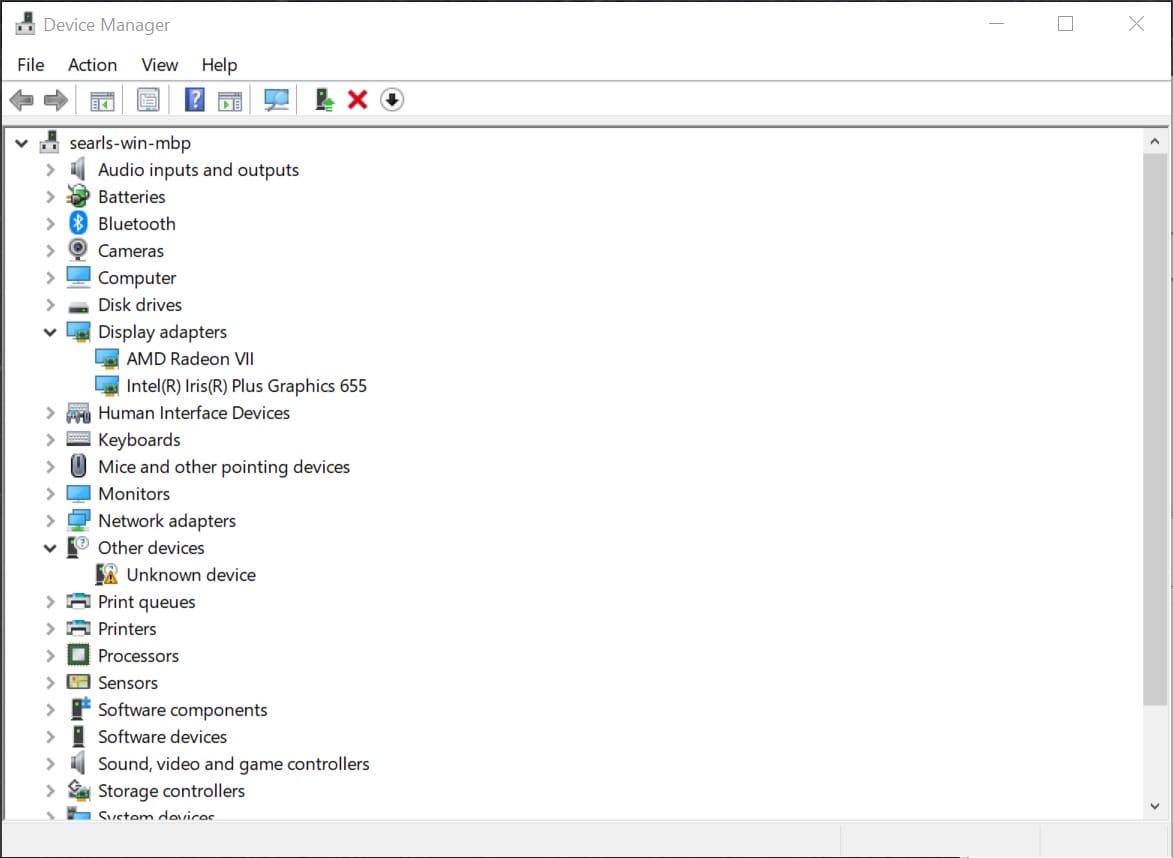
In my case, when I view the properties of the AMD Radeon VII display adapter, everything looks good:
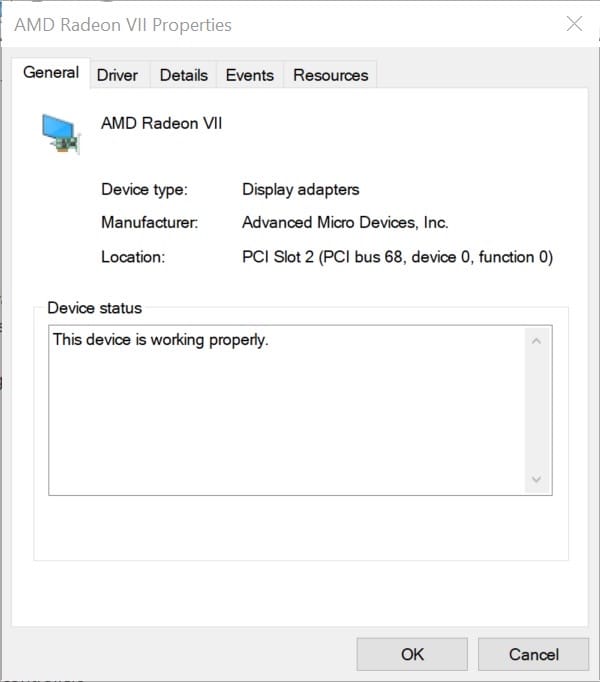
There is a really good chance, however, that you'll see a yellow exclamation point over the GPU's icon, and instead of "This device is working properly", you'll be greeted by "Error 12" and a message that the device doesn't have sufficient resources (read: either memory addressing or bandwidth) to be used. If you see this, your GPU won't engage at all, and you'll have to troubleshoot it. There are a bunch of ideas in this thread, but what will work for you depends on a combination of factors.
Before you get too deep in the weeds trying to solve this, however, be sure to try connecting the eGPU to each of the four Thunderbolt 4 ports of your MacBook Pro, each separated by a system reboot. It may be the case that one of them works reliably (on the 13" models, the left-front port typically has the most available bandwidth for Thunderbolt 3 PCIe devices).
In any case, if and when Windows reports the device is working properly, that means you should be able to drive an external display by connecting it to one of your card's output ports. You may be able to imagine that this requires significantly less bandwidth than looping back to the built-in monitor, because all the information involved is traveling in one direction (instructions move from the computer to the eGPU, and those rendered frames go from the eGPU onward to the monitor).
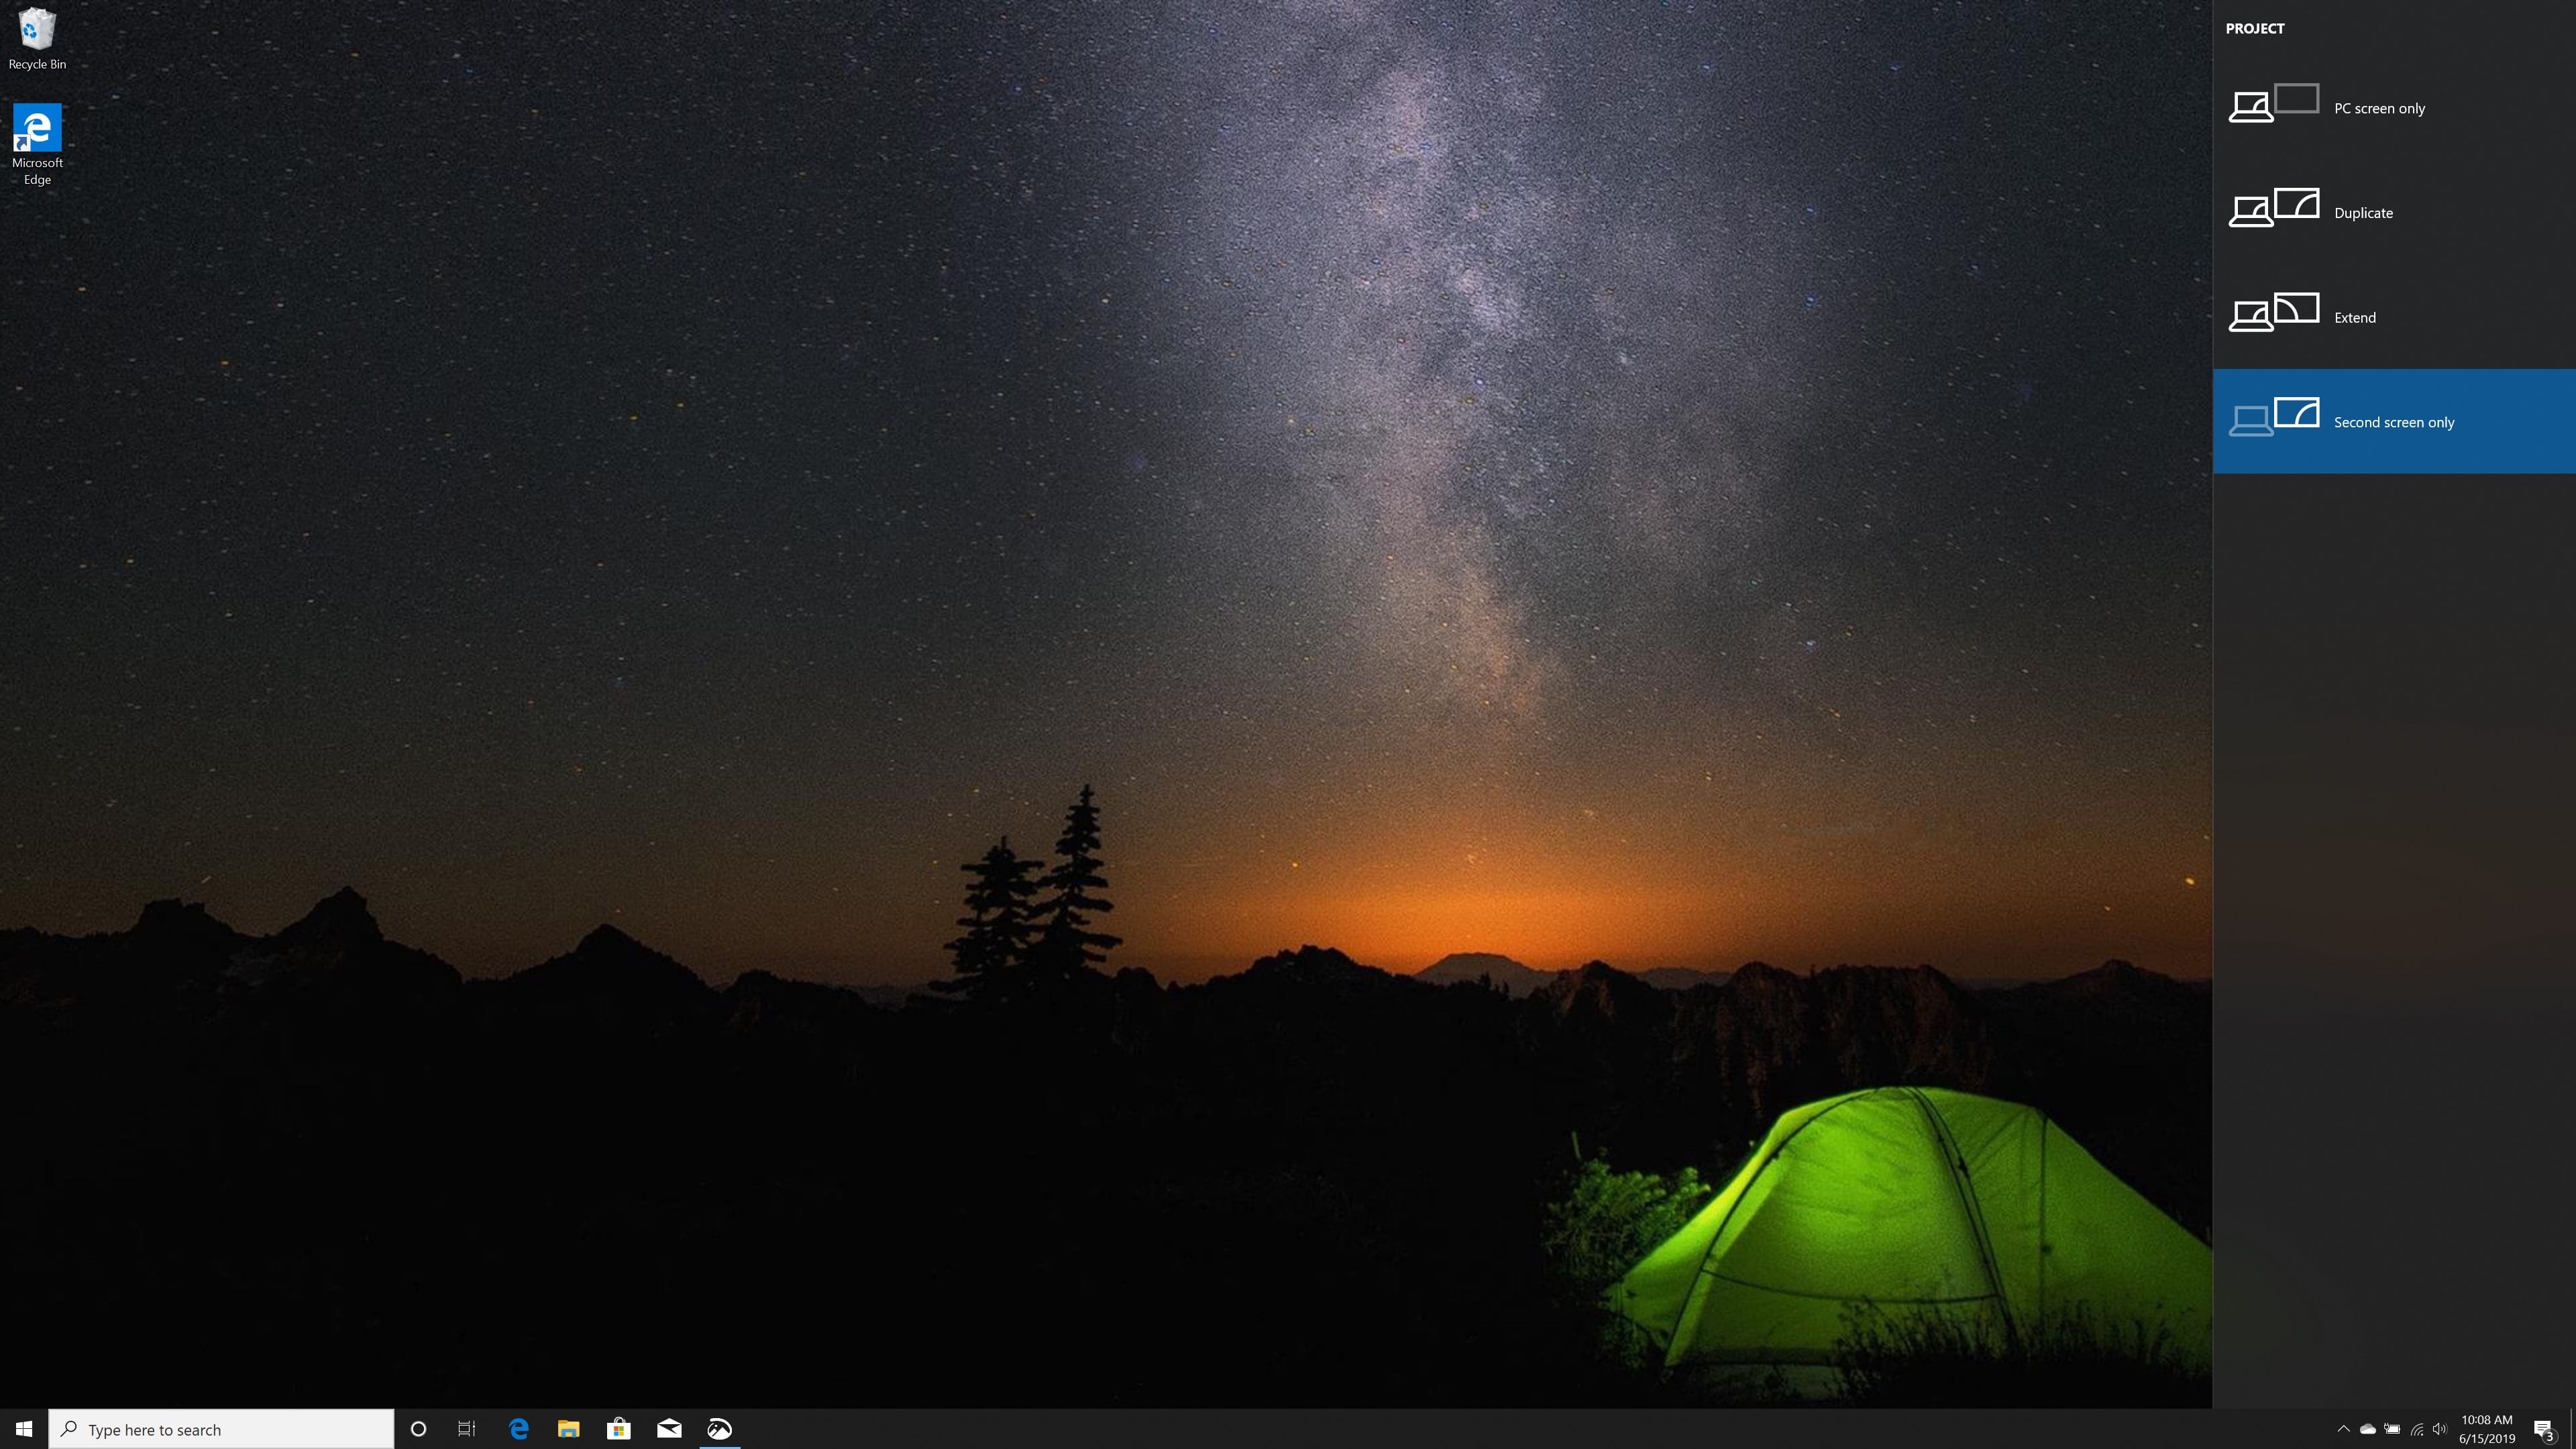
Once you've connected a second monitor, if you want to ensure no Thunderbolt 3 bandwidth is wasted on driving your MacBook's display, hit Windows-P repeatedly until you select "second screen only", effectively disabling the notebook display under Windows:
Adjust Windows sleep settings
Several eGPU enclosures as well as specific cards have a really hard time figuring out what to do with their fans when Windows goes to sleep. In my case, every time Windows slept or I closed my MacBook Pro's lid, both the GPU's and the enclosure's fans all began spinning at 100% speed, which—fun fact—was a very loud 59dB measured from about a meter away.
To avoid this, I went through and disabled Windows sleep everywhere I could.
First, hit the Windows key and type "power" to bring up the basic power preferences:
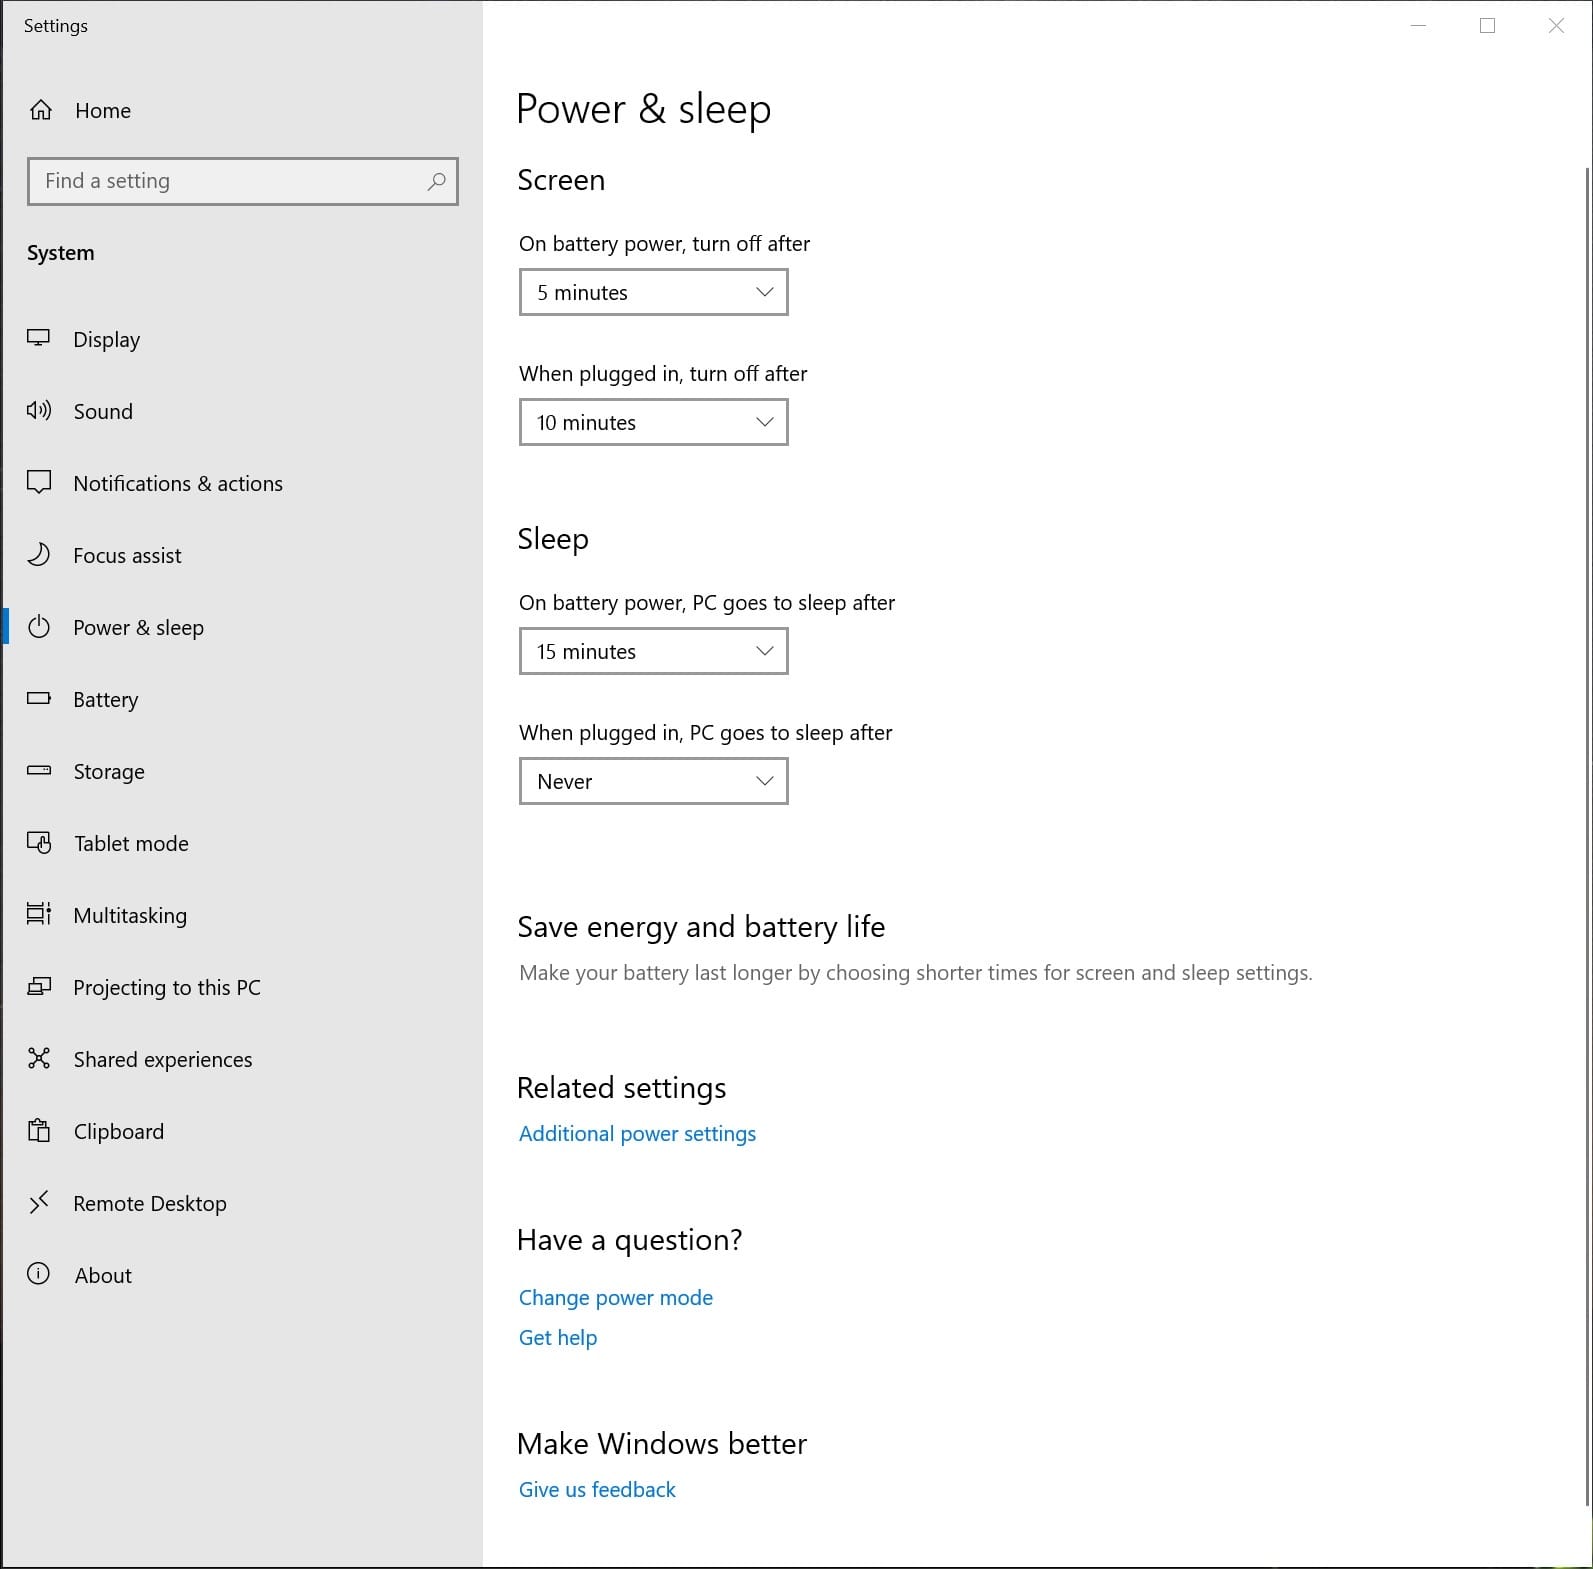
All I changed here was to set "When plugged in, PC goes to sleep after" to "Never", which doesn't form a real sentence, but will solve the primary problem of eGPUs freaking out during Windows sleep. Note that it is safe to allow sleep when on battery power, since all eGPU enclosures supply power to the system over the Thunderbolt 3 cable, you're never not plugged in when they're connected.
Next, click additional power settings and stumble around until you find this energy settings page:
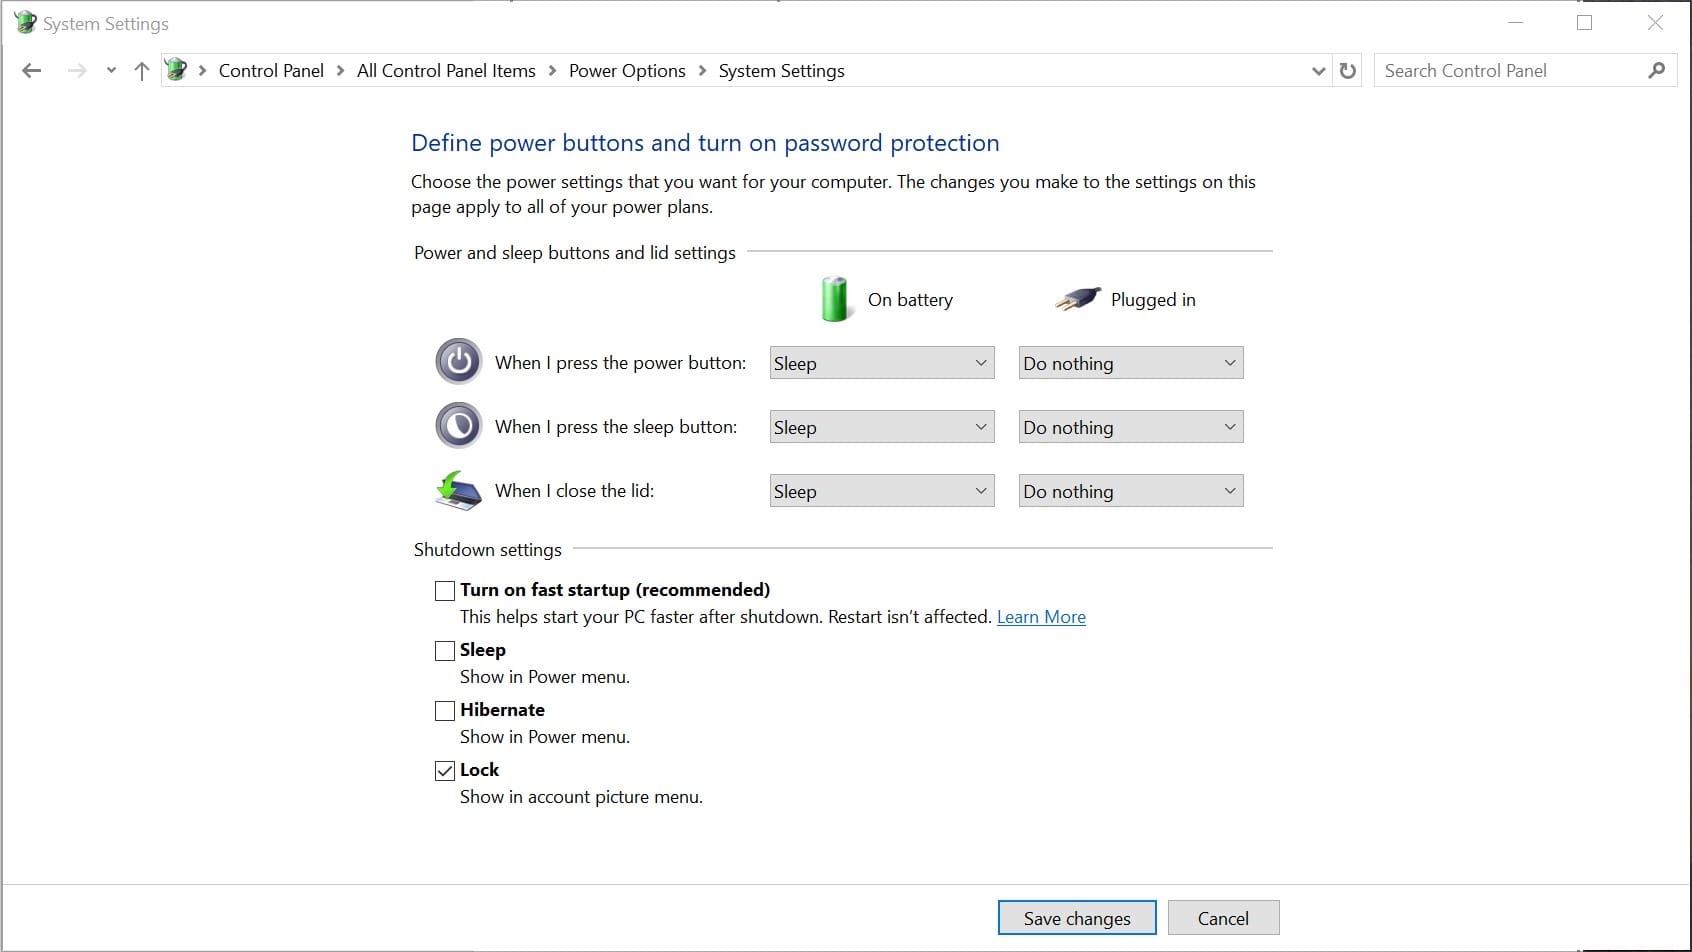
Of these, the most important is that you be able to close the lid without triggering Windows sleep when you're plugged in. But you can see I also disabled sleep when pressing the power button, as well as removing all sleep-related options from the start menu.
Run some benchmarks
From here, you can start installing and trying out some games. To verify everything is working as you expect, it might make sense to run a benchmark. A free one you might try is the Unigine "superposition" benchmark, which should be able to stress any GPU currently on the market.
If you're not familiar, benchmarks are basically complex 3D rendered game-like environments that are scripted as opposed to being interactive. Running a 2 or 3 minute demo, benchmarks usually do just enough to heat up the GPU and measure how it performs under load.
Because I was connected to a 4K monitor, I ran the benchmark at "4K optimized" and this setup yielded a score of 7037, whatever that means:
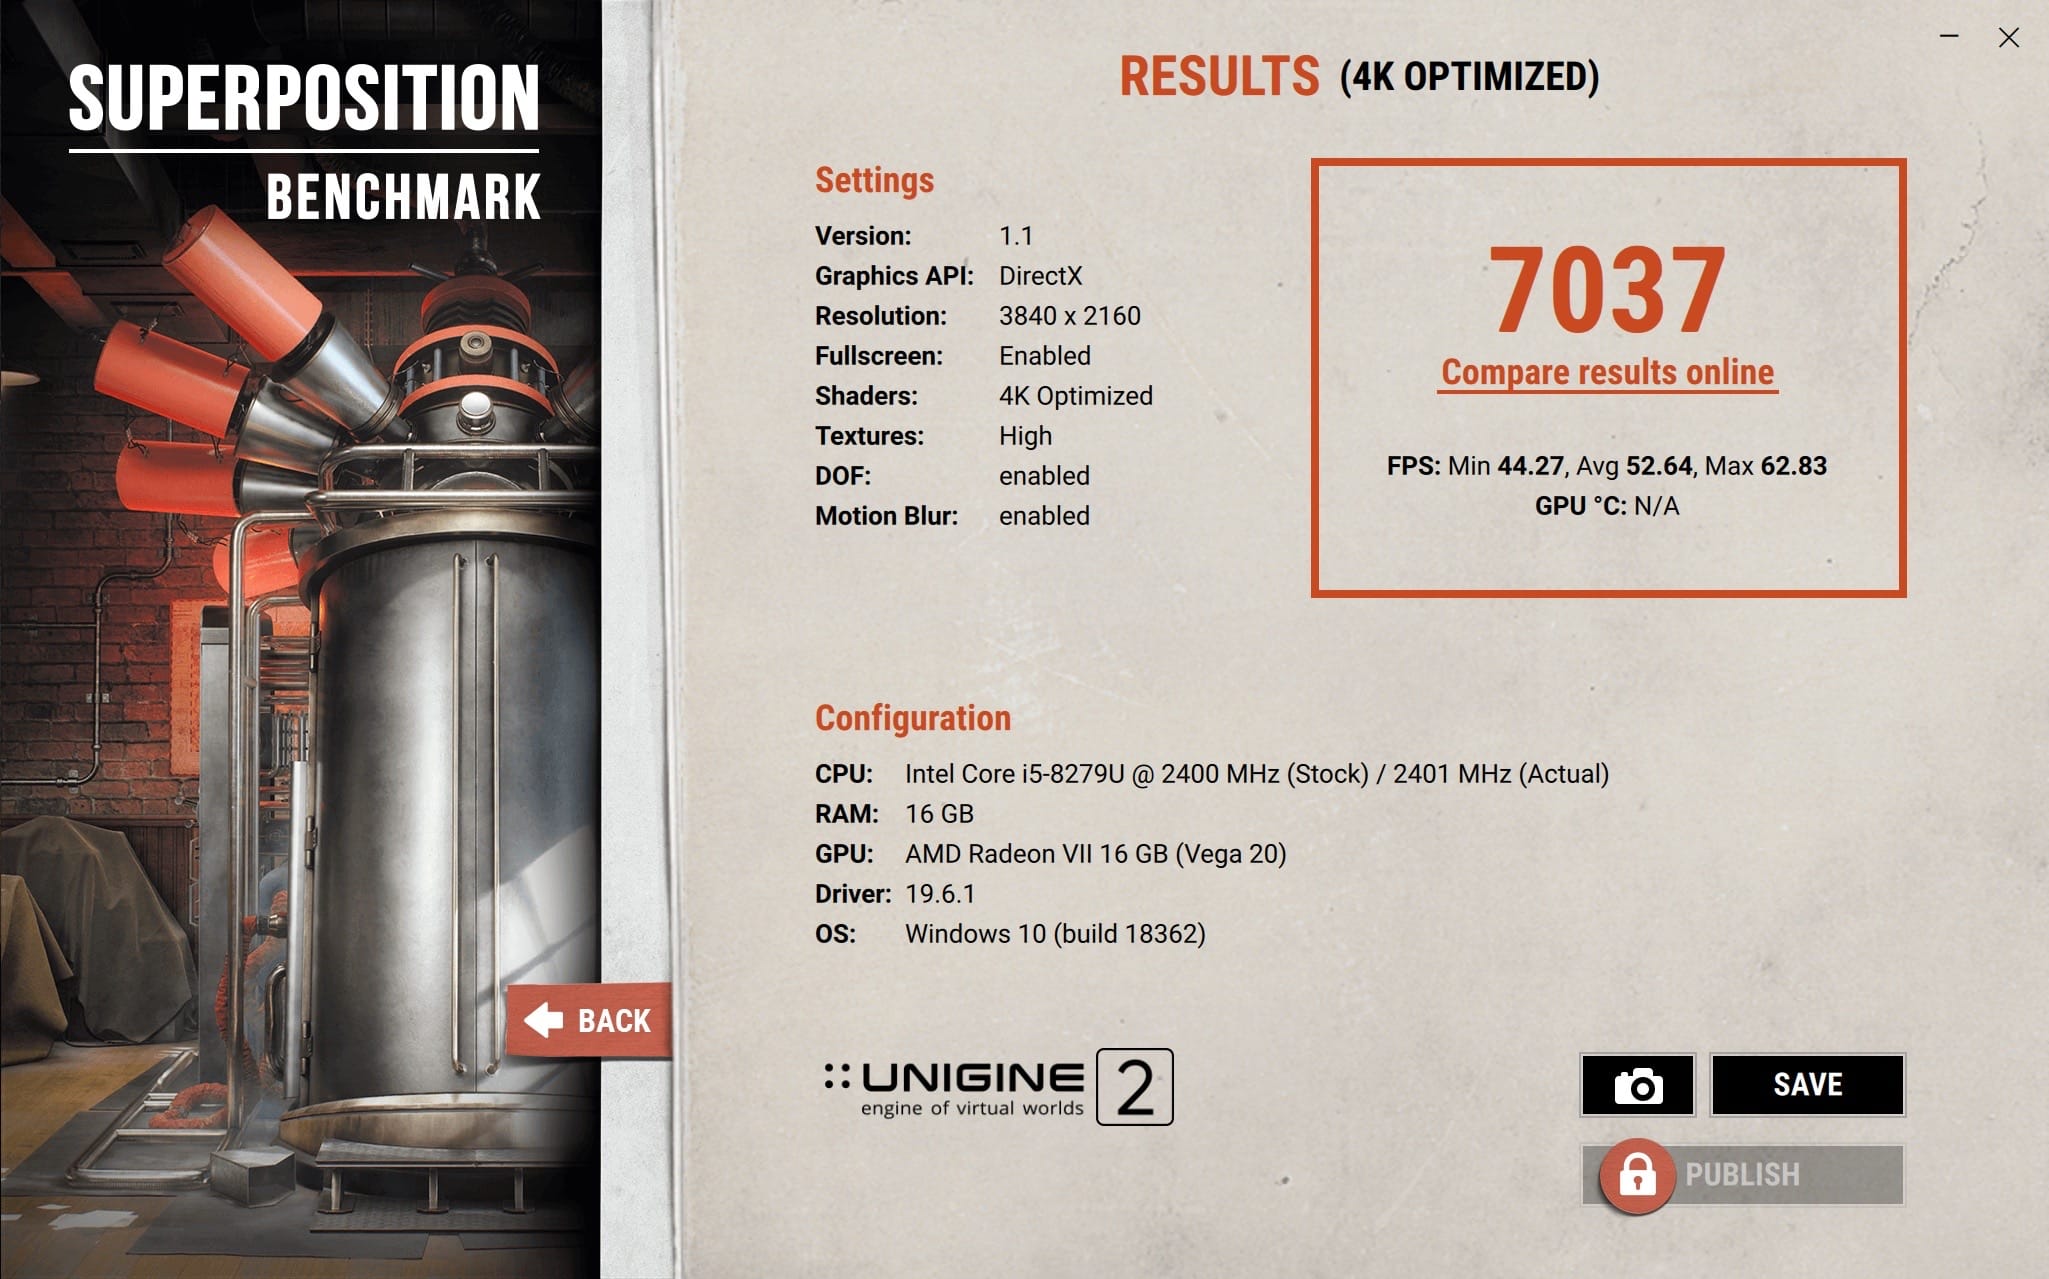
The Razer Core V2 really doesn't hide any noise at all, so in addition to running fairly hot, it was definitely pretty loud: between 53-56dB from a meter away. Because I'm used to modern GPUs being six feet away under a TV and in a massive noise-dampening case, the screeches and whines that result when the GPU is being put to work terrify me that something is wrong, but I have zero actual indication that I'm being anything but paranoid.
Install rEFInd Boot Manager
To work around the issue of your eGPU being initialized improperly at boot-time when booting into Windows when the eGPU is connected, you can use rEFInd as your boot manager specifically to pretend that you're booting macOS each time you boot Windows for the purpose of hardware initialization. If this sounds dumb, it really is.
Only proceed with this section of installing rEFInd if you want to be able to perform a cold boot into Windows without first disconnecting the eGPU. It's a silly amount of security compromise and complexity for such a small quality of life improvement, but if you're going to be switching between Windows and macOS frequently, or if you're using a headless Mac like a Mac Mini, or if you're struggling to overcome "Error 12", installing rEFInd might be worth it to you.
First, download the binary zip file linked to from the project page. Extract the directory to someplace you can find easily from the command line for the next few steps. I put mine in my home directory: /Users/justin/refind-bin-0.11.4.
Disable Secure Boot
If your Mac has a T2 chip, it is pre-configured to only boot Apple-approved operating systems, of which rEFInd most certainly is not. To disable this feature, reboot your Mac into Recovery Mode while holding Command-R.
Once in Recovery Mode, from the Utilities menu, open Startup Security Utility, and enter an administrator's password. It should look like this:
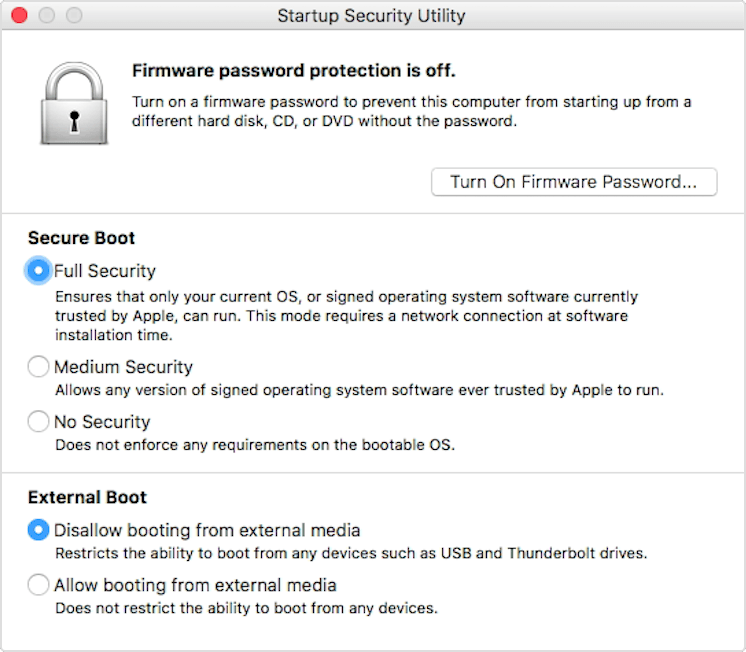
To use rEFInd, you'll need to select "No Security" under "Secure Boot". Once toggled, you can quit the app.
Next, from the Utility menu, launch the Terminal app. Here, you'll need to disable System Integrity Protection (SIP) so that you can write to the EFI system partition (ESP). To do this, in Terminal, execute:
# csrutil disable
Now, for this to take effect, you'll need to restart the Mac and hold command-R to reboot into Recovery Mode yet again.
Once back in Recovery Mode, you'll need to mount your main Mac partition so that you can get access to the rEFInd installer you downloaded previously. You can do this by launching Disk Utility from the Utilities menu, clicking "Macintosh HD" and clicking the "Mount" toolbar button:
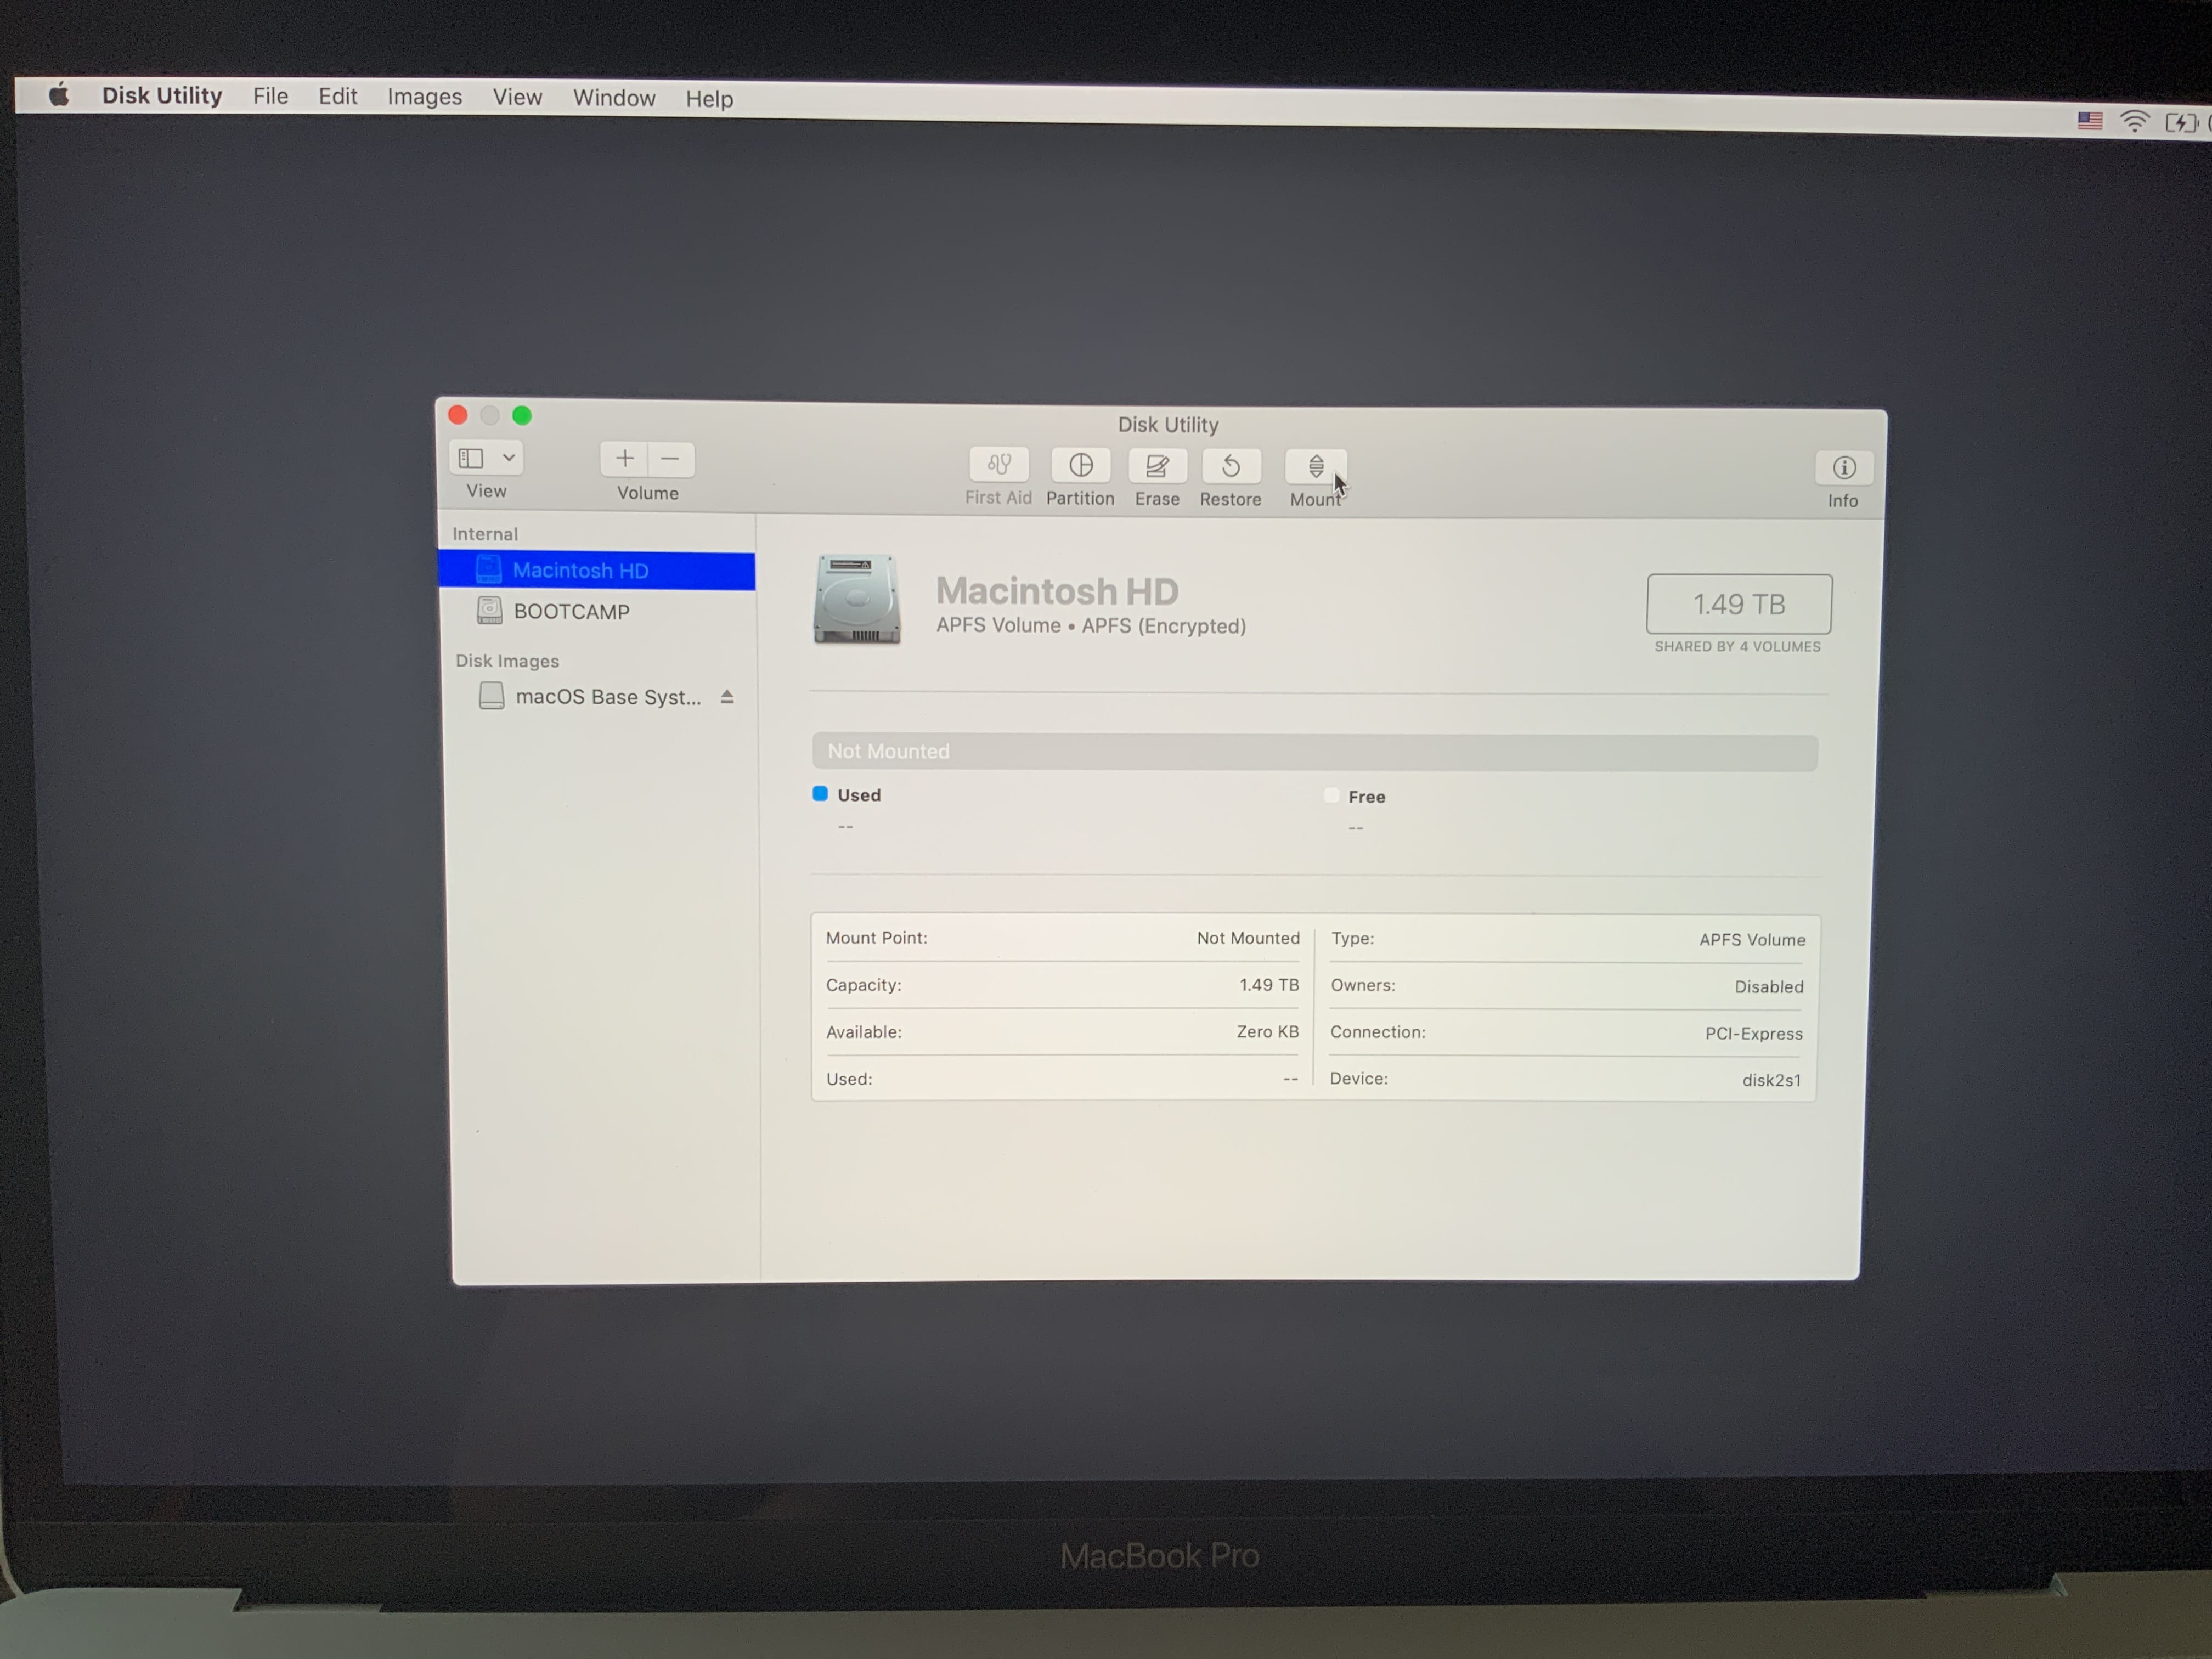
If FileVault is enabled, mounting the drive will require any user's password to unlock it. Now, quit Disk Utility and again open Terminal.
Now that the disk is mounted, navigate to your home directory, which in my case is:
# cd /Volumes/Macintosh\ HD/Users/justin
Then, run rEFInd's install script, which I'd placed right there:
# refind-bin-0.11.4/refind-install
This script will mount the EFI system partition to /Volumes/ESP, install itself, and bless itself in the Mac's NVRAM so that upon boot, rEFInd is the first thing that's executed.
Before the installer exits, it will also report that it's copied a configuration file to refind.conf.
We need to edit this file to enable macOS hardware "spoofing" so that Windows has any chance of booting successfully while an eGPU is connected.
Run this command to open vim and edit the configuration file:
# vim /Volumes/ESP/EFI/refind/refind.conf
If you don't know vim, don't worry, there's not a lot to do here. Just follow exactly these keystrokes:
-
type
'/spoof'and hit enter -
position the cursor over the
#character at the beginning of the line that reads#spoof_osx_version 10.9(you can use the arrow keys) -
hit the
xkey to delete the#, effectively uncommenting it -
type
:wqand hit enter to write the file and quit vim
Congratulations, now you know vim. Quit terminal, and shut down the machine.
Now, each time you boot, you'll be treated to this really ugly splash page that will remind you of the year of Linux on the desktop, whichever year that was for you:
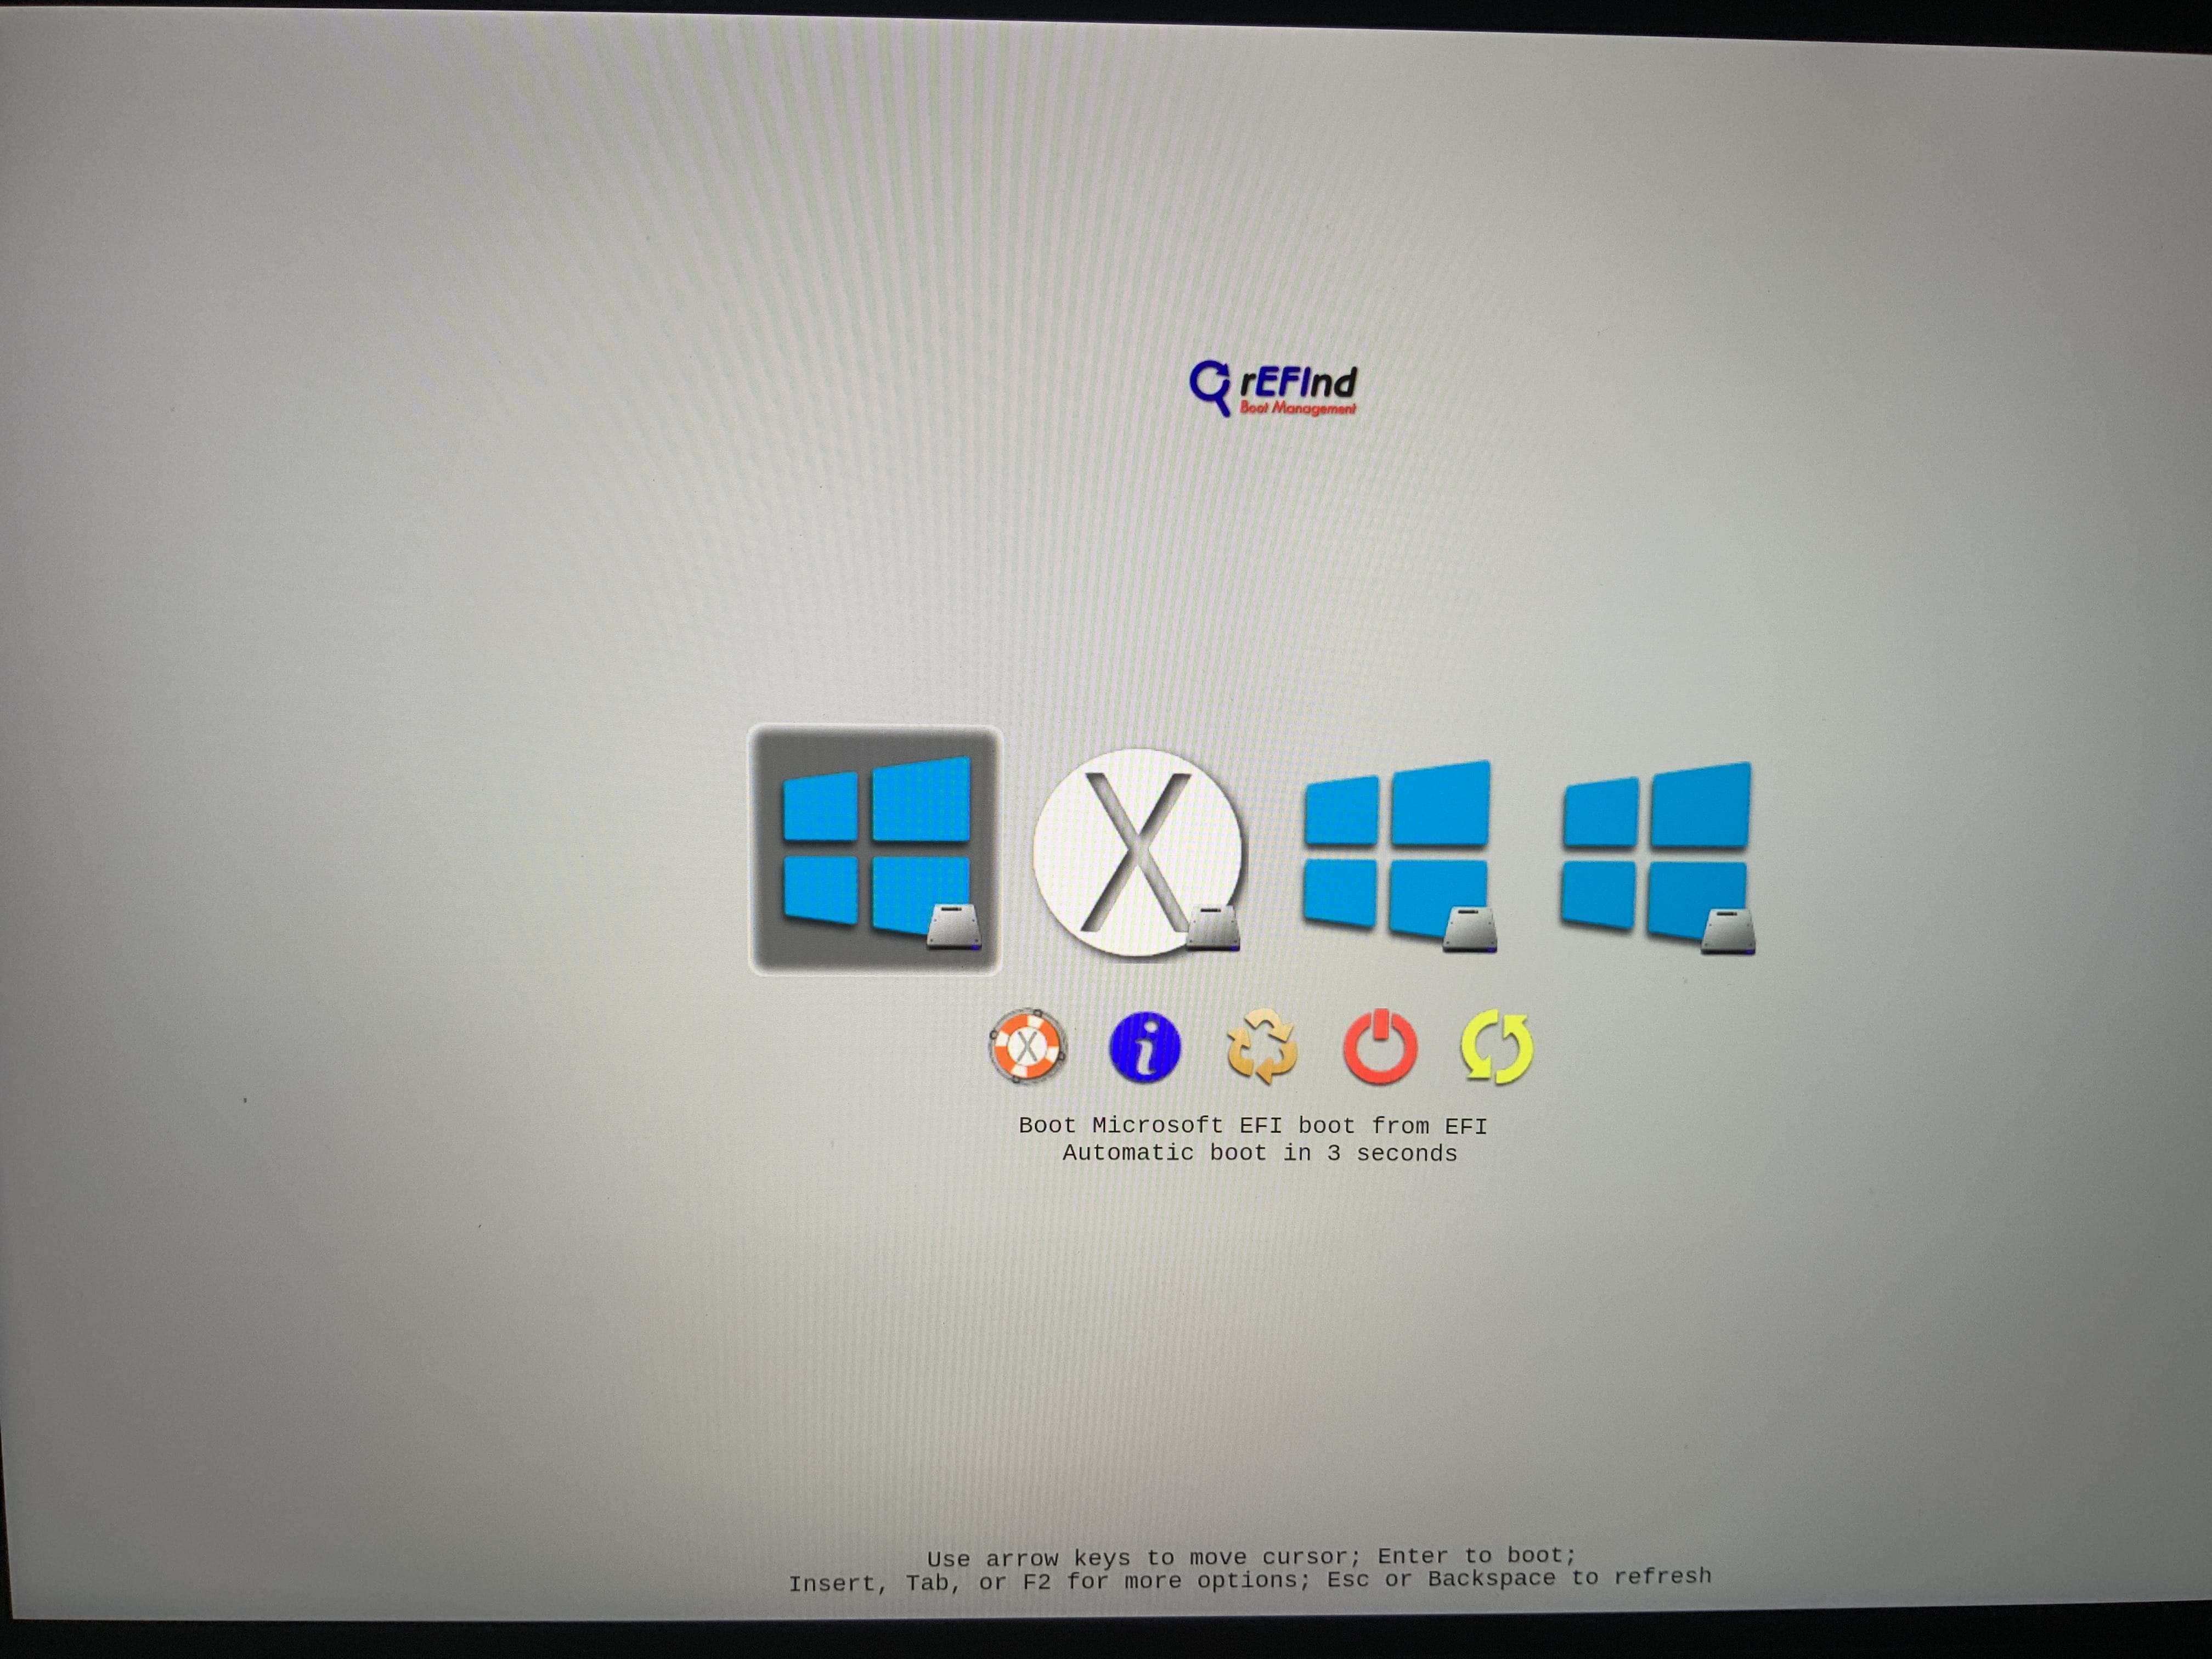
To boot Windows with macOS hardware spoofing, boot the first item on the left. Use the arrow keys and enter to launch it. For macOS, you want to select the second option. It's useful to keep in mind that rEFInd will automatically boot the previously used partition after a 20 second timeout. This is handy, because if you boot while you're in clamshell mode, you're not going to see this screen on your external display. Just wait, and eventually the machine will boot into whatever operating system you used most recently.
If you need to switch between operating systems across boots, you'll need to either hit the correct arrow key at the right time or crack the lid to see what's going on.
That's all, folks!
Congratulations, you're now too tired to want to play any games with your now-capable-of-running-them MacBook Pro.
But seriously, eGPUs represent an exciting branch of enthusiast computer hardware in an era of increasingly mundane and by-the-numbers computing upgrades. For being so niche and little known, there's clearly a ton of investment being made by multiple hardware manufacturers (with new enclosures hitting the market each quarter), by Apple and Microsoft (from whom, each operating system release over the last two years has improved eGPU support), and from Intel (whose Thunderbolt 3 API for the eGPU spec has realized the dream of plug-and-play interoperability between hundreds of enclosure-and-GPU combinations.
It'll be interesting to see where things go from here, and even if you don't have imminent plans to build your own travel-friendly PC gaming battle station, you might want to keep tabs on the eGPU.io forums or the /r/eGPU subreddit every now and again, because this sort of gaming configuration is getting easier all the time.