Simultaneously save+copy screenshots on the Mac
[UPDATE: Since publishing, I've simplified these instructions and reduced the latency in bringing up the screenshot tool by about half.]
[UPDATE 2: If you're on macOS 14.4 Sonoma and you want to avoid "Operation Not Permitted" errors, there's no sure-fire way to avoid them whether you set this up via Shortcuts or Automator, so I'd recommend using Keyboard Maestro instead.]
macOS ships with a pretty rad Screenshot app, except that one thing about it totally sucks: it can be configured to either copy screenshots to the clipboard or save them to files, but not both.
Well, I finally got off my ass and cooked up a way to have my save and copy it, too. Read on if you're interested.
How I take screenshots
First, a refresher. I've always used Command-Shift-4 to take screenshots on
the Mac. If you haven't used this method, it works like this:
- Press
Command-Shift-4anywhere in the system when your subject is composed properly - Then do either of these to actually take the screenshot:
- Drag the mouse to select the region of the screen you want to capture, then release the mouse
- Hit
Spaceto switch to window selection mode and click on the window you want to capture
The problem
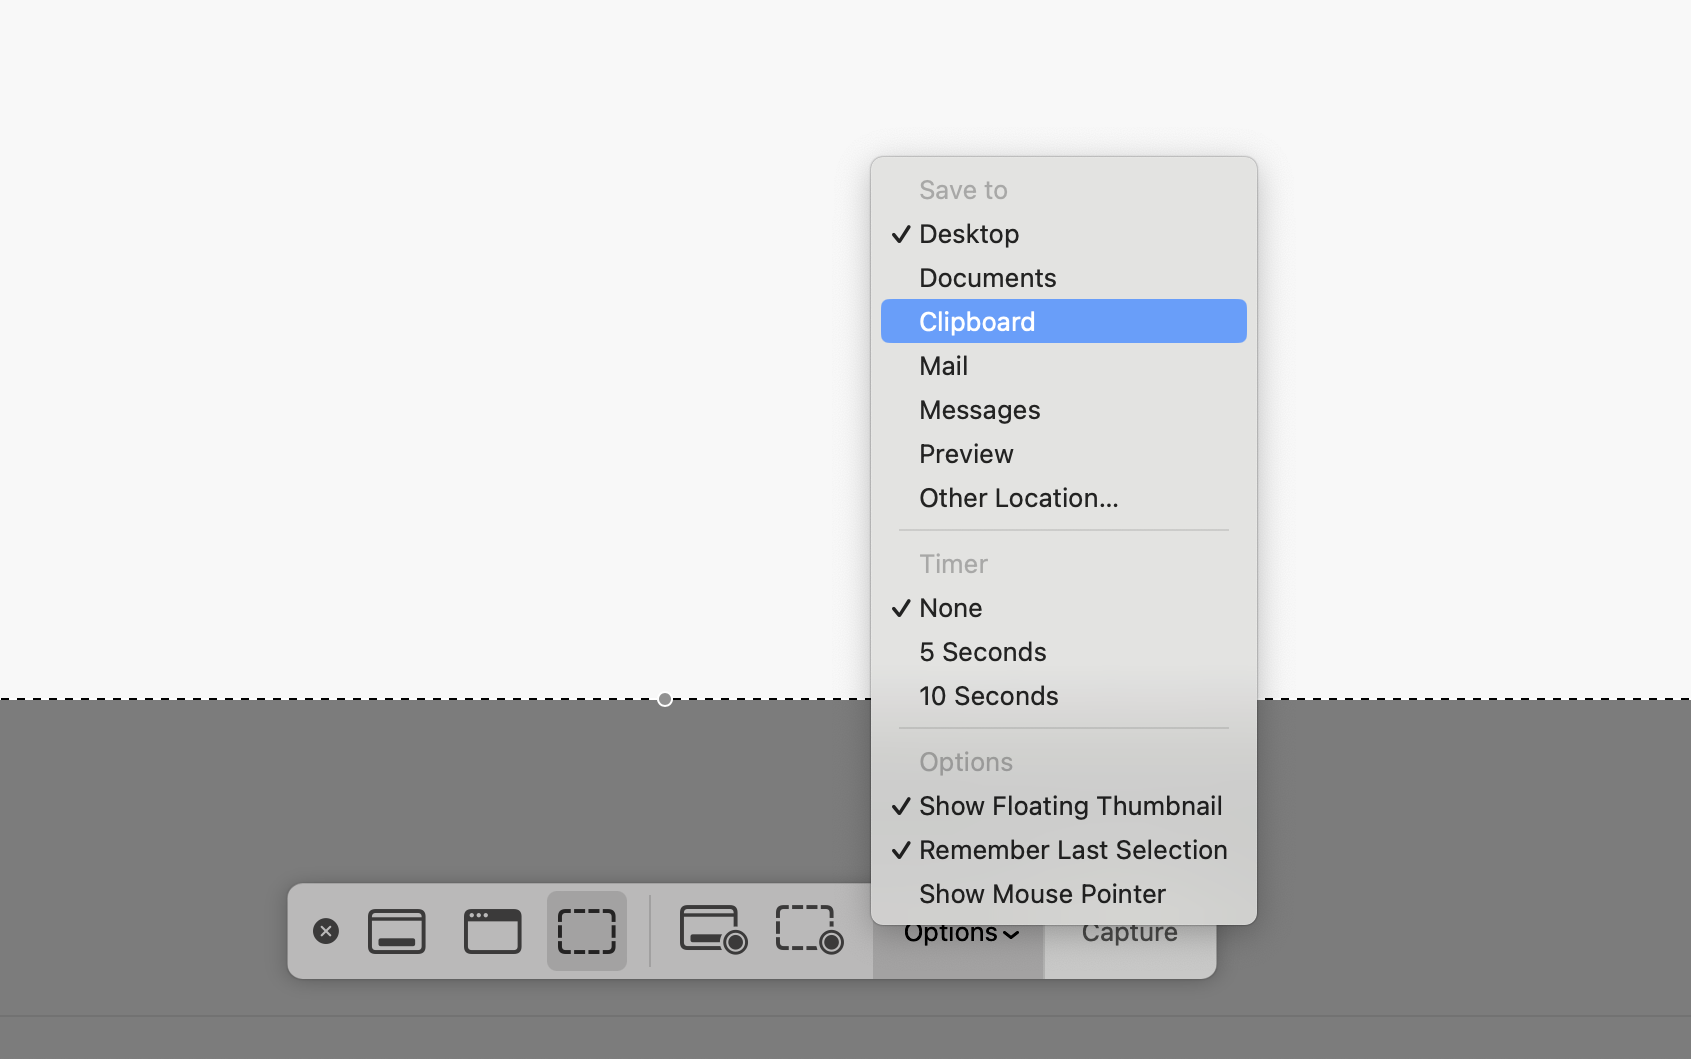
When you bring up the Screenshot app (either by opening it in
/Applications/Utilities or by pressing Command-Shift-5), you'll see that the
"Save to" option forces you to choose between either saving to a particular
file destination or copying the screenshot to the clipboard:

Whatever you choose is "sticky" and will apply to all future screenshots until
you change it again. If you're smarter than I am, you could set this to a
location like Desktop, then rewire your brain to know to press
Command-Shift-4 when you want the screenshot saved to a file and instead press
Command-Shift-Control-4 when you want it copied to the clipboard. I'm too lazy
to teach myself to remember the latter.
Besides, why not both?
How to copy and save the screenshot in one fell swoop
So here's what you can do to work around this, at a high level:
- Un-assign
Screenshot.app'sCommand-Shift-4keyboard shortcut - Write a shell script that relies on Apple's
screencaptureandosascriptcommands - Create a Shortcut that runs the shell script
- Assign
Command-Shift-4to our new Shortcut
Unset the default screenshot keyboard shortcut
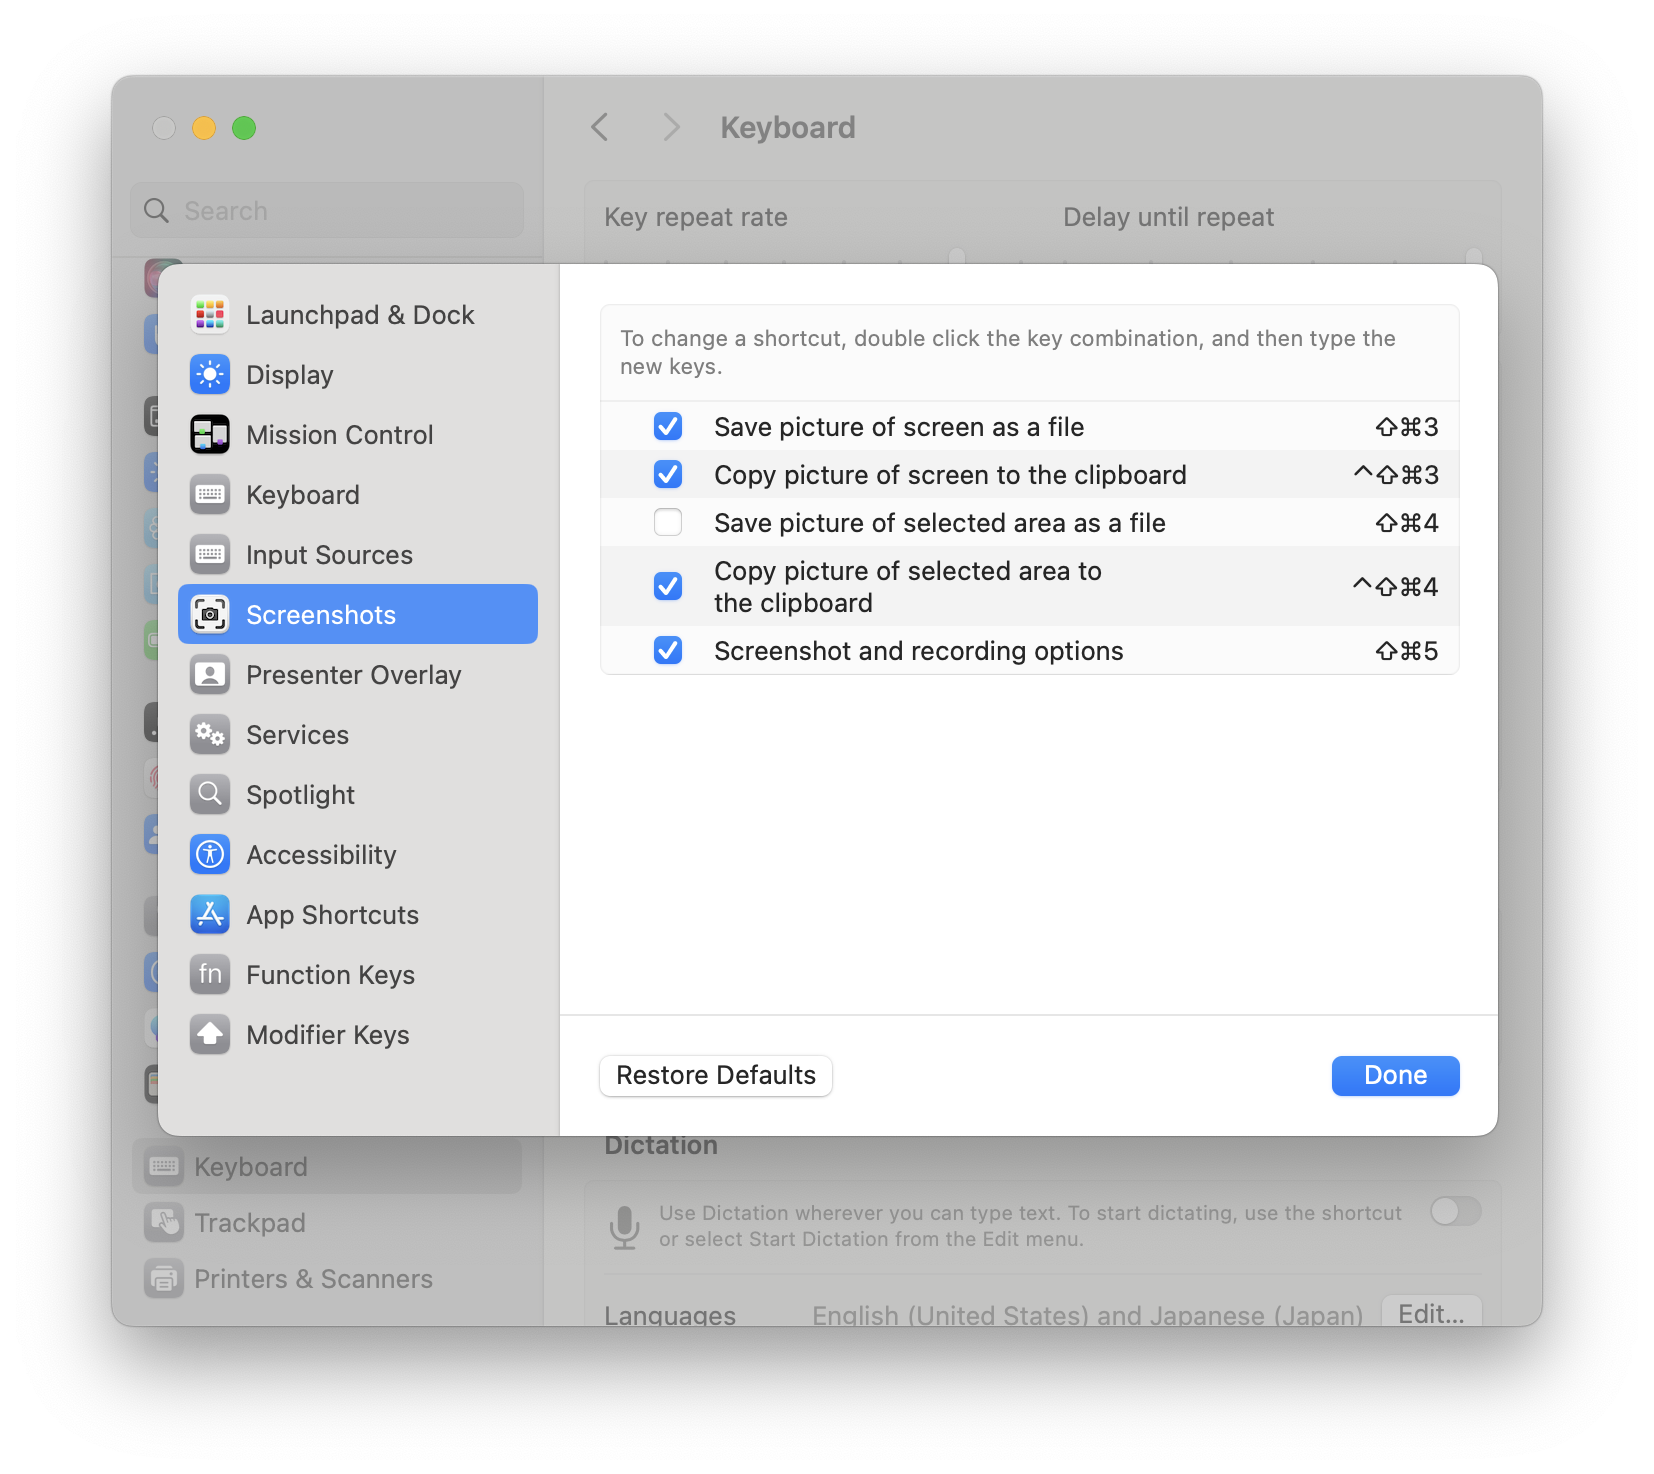
First, we need to disable the existing global shortcut for taking interactive
screenshots. To do this, open System Settings, scroll to Keyboard in the
left sidebar, then click the Keyboard Shortcuts button. This will bring up a
modal window—click its Screenshots section.
Uncheck "Save picture of selected area as a file":

With the system default keyboard shortcut disabled, we can now create our own.
Write a shell script
Next, we need to write a bash script to save and copy screenshots. Here's mine. It lives in a directory I created in my home directory (~/bin/screenshot), but it can reside anywhere you like:
#!/usr/bin/env bash

# Usage:
#
#   $ screenshot
#
# Then, either:
#   - drag and release the mouse to select an area to screenshot
#   - press spacebar and click the mouse to select the current window

# Construct a unique-ish filename like:
# ~/Desktop/screenshot-2024-03-16-16h43m48s.png
isoTime=$(date +"%Y-%m-%d-%Hh%Mm%Ss")
fileName="$HOME/Desktop/screenshot-$isoTime.png"

# The -i will put the Screenshot app into interactive mode (like cmd-shift-4)
screencapture -i "$fileName"

if [ -f "$fileName" ]; then
  # This gnarly "«class PNGf»" incantation is for some reason necessary to copy the file
  osascript -e "set the clipboard to (read (POSIX file \"${fileName}\") as «class PNGf»)"
fi
Once you've saved it, you'll want to make it executable. If you placed it where I did (~/bin/screenshot), that would look like:
$ chmod +x ~/bin/screenshot
Create a Shortcut
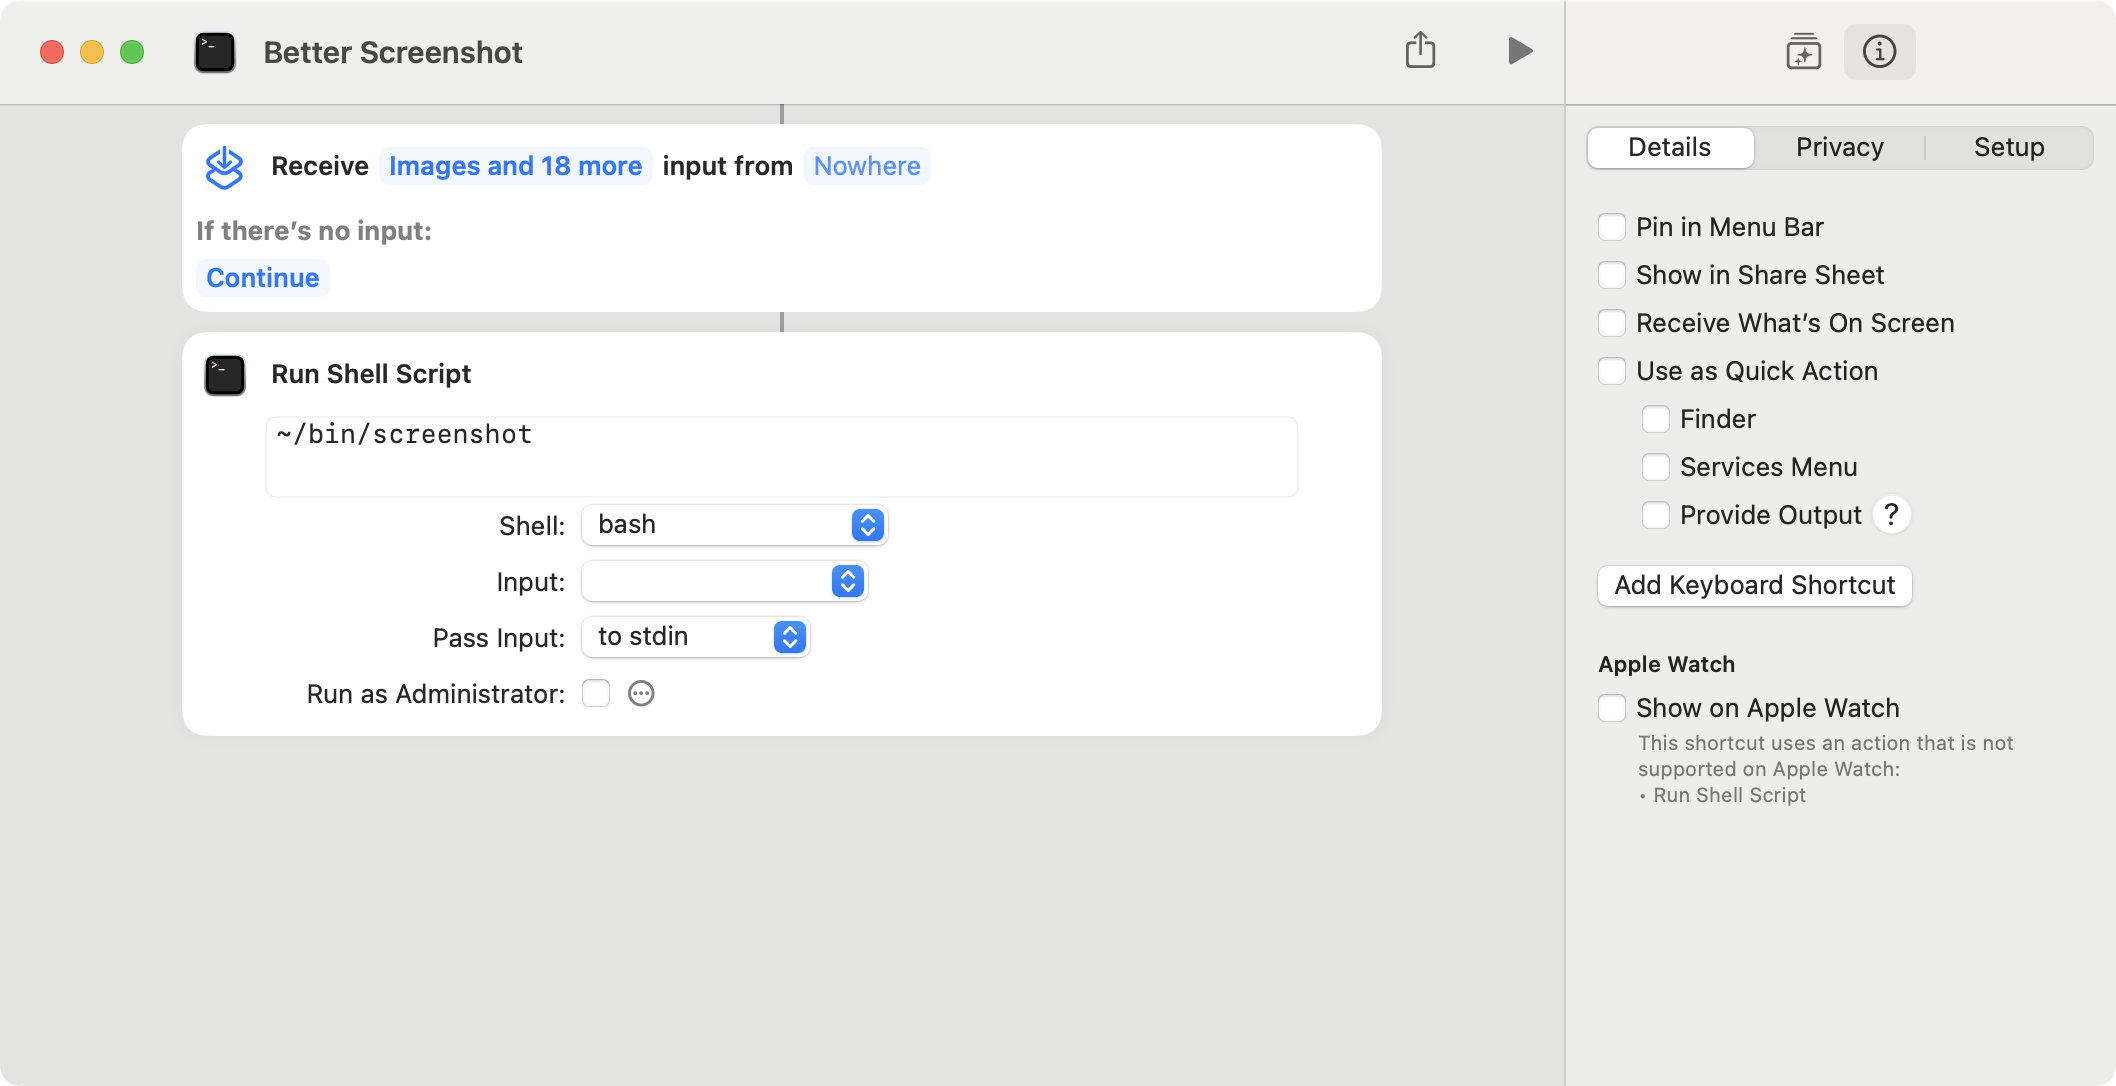
Next, open the Shortcuts app and:
- Create a new Shortcut (I named mine "Better Screenshot")
- Add the "Run Shell Script" action
- Type a valid location pointing to your script

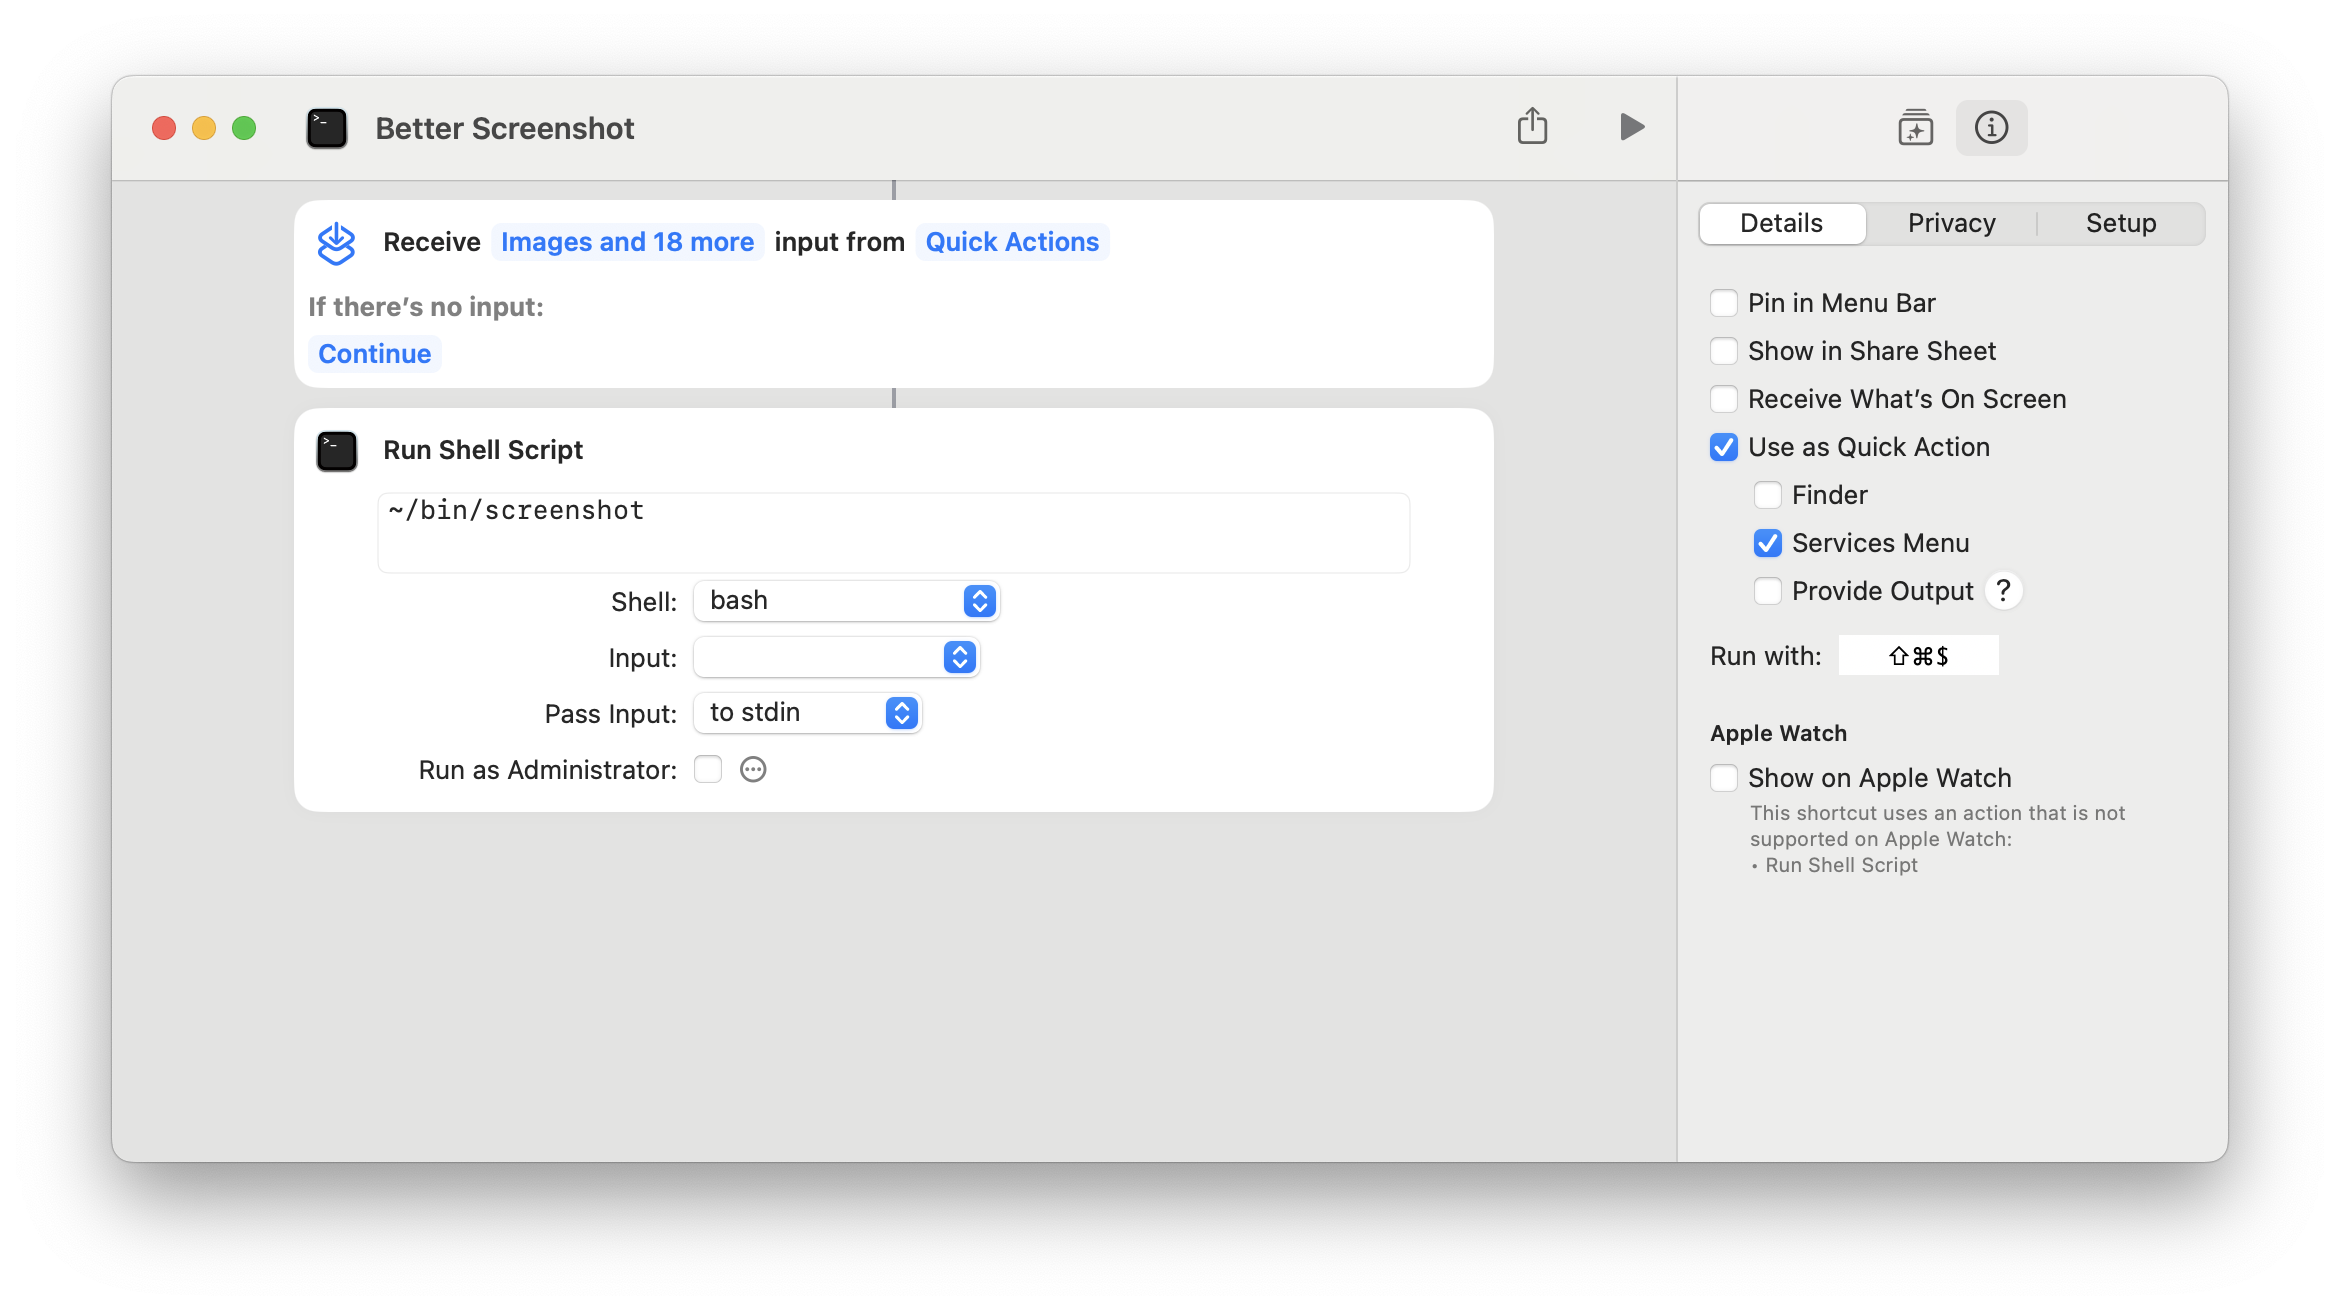
Set your new Shortcut to a keyboard shortcut
Finally, on the same screen, click the i (info) icon at the top of the right
sidebar, then click the Add Keyboard Shortcut button and press Command-Shift-4,
(which will read as Cmd-Shift-$) and press return to confirm:

See, wasn't that easy?
After you do all this, the first couple times you actually use the new
Shortcut, it may ask for permissions for either bash or Shortcuts itself to
record the screen and access your documents folder, and you'll need to do the
"Quit & Reopen" dance after turning those on.
So there we are. Clear as mud. I'm happy to report that this all works, but there's a ~150ms delay before the interactive crosshair appears, which sucks.
If you want to transfer this approach to your other Macs, it shouldn't be too hard. Because Shortcuts sync via iCloud, you just need to copy your shell script (which I do via searls/icloud-dotfiles), and then repeat the keyboard shortcut setup steps.
Lemme know if you have any compliments, questions, or suggestions to improve on this. 💜